• Home
  • Breakfast
  • Lunch
  • Dinner
  • Dessert
  • Drinks
koya recipes
keep your memories alive
Home » Archives for Sarah
Author

Sarah

Avatar of Sarah
Sarah

Easter Jello Pie sliced open with vibrant layers
Recipes

Easter Jello Pie – The Best No-Bake Layered Dessert for Spring

by Sarah June 26, 2025
written by Sarah

Easter Jello Pie brings together everything I love about spring and sweet family traditions—vibrant colors, refreshing flavors, and the kind of simple joy that fills your kitchen with laughter and togetherness. When I was a little girl, holidays meant crowding into my grandmother’s kitchen. I’d help stir the gelatin, sneak a few marshmallows, and press graham cracker crumbs into the pie plate like it was some grand baking ritual. It wasn’t just dessert—it was memory-making.

Now, as a mom creating cozy magic in my own kitchen, I’ve brought that tradition full circle with this Easter Jello Pie. This easy, no-bake pie is not only visually stunning—it’s a perfect make-ahead treat that feels fancy without the fuss. Whether you’re setting the Easter table for a big family brunch or just looking to surprise the kids with something fun, this Easter Jello Pie recipe is pure happiness in sliceable form. It’s colorful, cheerful, and guaranteed to become a new holiday favorite.

Looking for inspiration? Try our crumbl strawberry crumb cake cookie for another colorful dessert twist.

In this post, I’ll walk you through everything you need to make the perfect Easter Jello Pie—from choosing vibrant Jello flavors to decorating like a pro and avoiding the common pitfalls of layered gelatin. Let’s dive into the joy of this springtime favorite.

Table of Contents
  • What Makes Easter Jello Pie Special
  • The Origin of Layered Jello Pies for Spring
  • Choosing the Right Jello Flavors for Vibrant Layers
  • Cool Whip vs. Whipped Cream: Which Works Best?
  • How to Create Clean, Defined Jello Layers
  • Tips for Chilling Between Layers for a Flawless Finish
  • Can I Use a Pre-Made Graham Cracker Crust?
  • How to Make a Homemade Crust That Holds Up
  • Using Different Jello Flavors and Color Combos
  • Fun Mix-ins Like Fruit, Candies, and Marshmallows
  • Making It More Vibrant with Toppings and Layers
  • Pastel Decorations and Whipped Cream Piping Ideas
  • Why Your Layers May Be Mixing or Collapsing
  • How to Fix Watery or Uneven Layers
  • Best Way to Slice and Serve Without Cracking
  • How Long It Keeps in the Fridge for Holiday Prep
  • Can I use Cool Whip instead of whipped cream?
  • Can I use a pre-made graham cracker crust?
  • How can I make this pie more vibrant for Easter?
  • Can I use different Jello flavors?
  • Why does my pie need to be chilled between layers?

What Is Easter Jello Pie

What Makes Easter Jello Pie Special

Easter Jello Pie isn’t just another dessert—it’s a showstopper. With its pastel layers and refreshing taste, it captures the spirit of the season in every bite. Unlike complicated confections, it’s light, easy to make, and guaranteed to bring smiles. Kids love the colors, adults appreciate the nostalgic flavor, and everyone goes back for seconds.

What really sets this Easter Jello Pie apart is how customizable it is. You can mix and match any combination of fruity Jello flavors to create your own playful color palette—perfect for capturing your unique Easter vibe. And because it’s a chilled pie, this Easter Jello Pie is especially refreshing after a hearty holiday meal.

The Origin of Layered Jello Pies for Spring

The tradition of using Jello in desserts dates back to early 20th-century America, when gelatin treats were considered elegant additions to potlucks and celebrations. By the 1950s, colorful layered creations had become staples at spring and Easter gatherings—often shaped in molds or poured into pie shells for easy slicing. Today’s Easter Jello Pie is a playful nod to that retro charm, combining vintage vibes with modern ease.

Today’s Easter Jello Pie is a modern spin on those vintage recipes. It’s faster, more forgiving, and even more festive. With whipped topping, a graham cracker crust, and the option to customize every layer, it reflects the same homestyle values that inspired so many family traditions—just like the ones I grew up with.

Don’t miss our brussel sprouts and ham quiche—a savory dish that complements this pie perfectly on your Easter menu.

Key Ingredients for a Perfect Easter Jello Pie
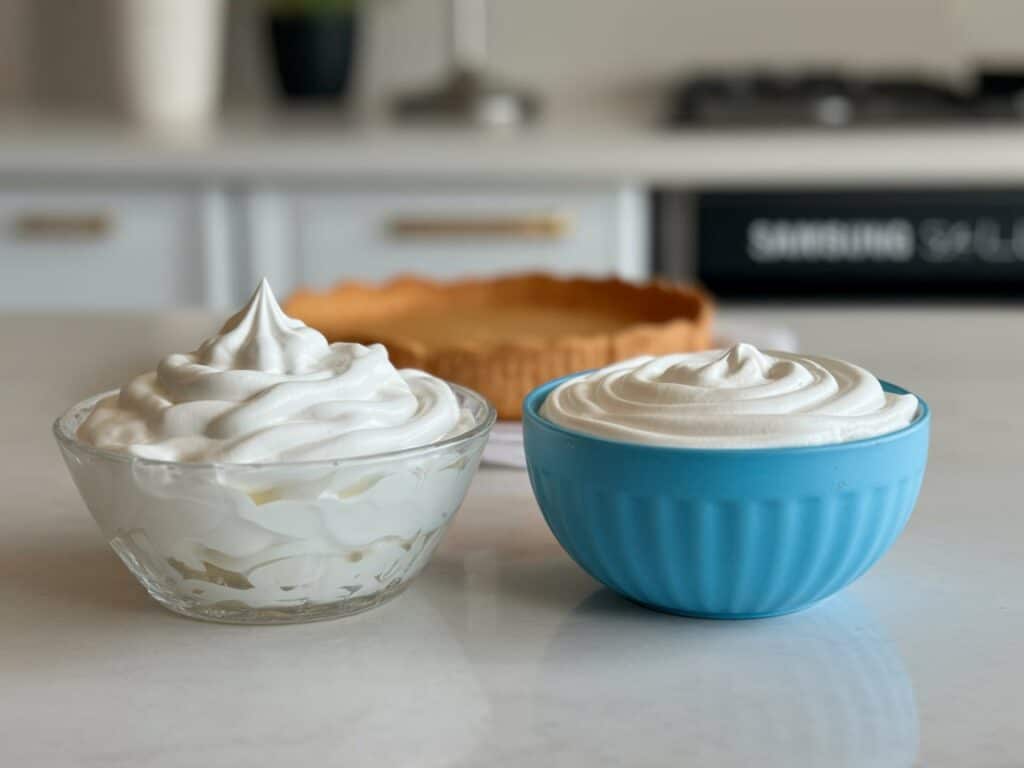
Cool Whip vs homemade whipped cream for Jello Pie
Cool Whip vs whipped cream—what works best?

Choosing the Right Jello Flavors for Vibrant Layers

When it comes to creating the perfect Easter Jello Pie, color is everything. The magic of this dessert lies in its layered appearance—and that all starts with your Jello choices. Think spring: soft pastels, fruity brightness, and shades that pop on a dessert table. The most popular combinations include:

FlavorColor OutcomeNotes
StrawberryLight redSweet and kid-friendly
LemonPale yellowBright, sunny flavor
LimeSoft greenZesty and refreshing
Berry BluePastel blueVivid and vibrant
Grape (lightened)Lavender tintFor a subtle purple layer
PeachLight orangeMild and smooth taste

To achieve softer pastel tones, consider adding a bit of whipped topping to the Jello mix for a creamy swirl effect. This trick softens both the color and texture, giving your pie a mousse-like layer.

Choose 3 to 4 complementary flavors. Alternate colors for contrast—like lemon, berry blue, and strawberry—to keep each layer visually distinct.

Cool Whip vs. Whipped Cream: Which Works Best?

A common question when making layered Jello desserts is: Should I use Cool Whip or fresh whipped cream? Let’s break it down.

FeatureCool WhipHomemade Whipped Cream
TextureStable and smoothFluffy but can deflate over time
SweetnessPre-sweetenedAdjustable with sugar
ConvenienceNo prep neededRequires whipping + monitoring
StructureHolds well for layersMay collapse if not stabilized
FlavorSubtle vanilla sweetnessRich, creamy dairy taste

Verdict: If you’re going for convenience and reliability—especially when working with kids or prepping ahead—Cool Whip is a solid choice. It blends seamlessly with Jello and holds firm between layers. That said, if you prefer homemade ingredients or a richer taste, fresh whipped cream (stabilized with a bit of gelatin or powdered sugar) can add an elegant touch.

Discover great ideas like our banana peach smoothie recipe for flavor pairing inspiration that also balances sweetness with fruity brightness.

Keep in mind: whichever method you choose, the whipped topping acts as the creamy binder between layers and adds that dreamy, cloud-like texture. In an Easter Jello Pie, it’s not just a topping—it’s an essential part of the structure.

Step-by-Step Recipe Instructions

How to Create Clean, Defined Jello Layers

To build a stunning Easter Jello Pie, patience and layering technique are key. Follow these steps to achieve beautifully distinct, pastel layers every time:

Step 1: Prepare the Crust
Start by pressing crushed graham crackers mixed with melted butter into a pie dish. Chill in the fridge while you prepare your first Jello layer.

Step 2: Mix Your First Jello Flavor
Dissolve one box (3 oz) of flavored gelatin into ½ cup of boiling water. Stir until fully dissolved. Then, let it cool slightly and whisk in ½ cup of cold water. To give it a creamy pastel look, fold in ⅓ cup of whipped topping (Cool Whip or homemade) before pouring it into your chilled crust.

Step 3: Chill Between Layers
Refrigerate the first layer for 30 to 40 minutes—just until firm enough to hold the next layer without mixing. Do not freeze to speed up the process; it may ruin the texture.

Step 4: Repeat With Additional Flavors
Follow the same process for each Jello layer, allowing each one to chill before adding the next. Gently pour each new layer over the back of a spoon to avoid disturbing the one underneath.

Step 5: Top It Off
Once all layers are set, top your pie with a final spread of whipped topping. Use a piping bag if you want to get fancy, or just smooth it with a spoon for a rustic look.

Tips for Chilling Between Layers for a Flawless Finish

Layered Jello desserts live or die by the chill time. Here’s how to master it:

  • Stick to 30–40 minutes per layer—not more, not less. You want the surface to be set but not icy.
  • Use a timer. Multitasking? Set reminders so you don’t over-firm the layers.
  • Avoid overpouring. Always check that your bowl or cup is close to the surface before pouring the next layer—this prevents splashing and keeps lines clean.
  • No shortcuts with the freezer. Rapid freezing can cause uneven textures and cracks in the layers.

Even if you’re short on time, resist the urge to rush. That little extra wait between each step is what makes your pie a true centerpiece.

Check out our protein coffee recipe—a perfect pick-me-up while you’re waiting for those layers to chill!

Print
clock clock iconcutlery cutlery iconflag flag iconfolder folder iconinstagram instagram iconpinterest pinterest iconfacebook facebook iconprint print iconsquares squares iconheart heart iconheart solid heart solid icon
Easter Jello Pie sliced open with vibrant layers

Easter Jello Pie Recipe

5 Stars 4 Stars 3 Stars 2 Stars 1 Star

No reviews

Print Recipe
Pin Recipe

Easter Jello Pie is the ultimate no-bake, colorful dessert perfect for your spring table. Easy, fun, and festive!

  • Total Time: 8 hours
  • Yield: 8–10 1x

Ingredients

Scale

1 pre-made or homemade graham cracker crust

3–4 boxes (3 oz) Jello in various flavors

2 cups boiling water

2 cups cold water

1½ cups whipped topping (Cool Whip or homemade)

Toppings: candy eggs, sprinkles, whipped cream, marshmallows

Instructions

Prepare crust and chill.


Dissolve Jello flavor #1 in ½ cup boiling water. Add ½ cup cold water and ⅓ cup whipped topping.


Pour into crust and refrigerate for 30–40 minutes.


Repeat for each flavor, layering carefully.


Top with whipped cream and decorations once fully set.


Chill for at least 6 hours before serving.

Notes

Do not freeze.


Mix gently to preserve creamy texture.


Use hot knife for clean slices.

  • Author: Sarah
  • Prep Time: 20 minutes
  • Chill Time: 6–8 hours

Nutrition

  • Serving Size: 8–10
  • Calories: 210 kcal
  • Sodium: 190 mg
  • Fat: 9 g
  • Carbohydrates: 32 g

Did you make this recipe?

Share a photo and tag us — we can’t wait to see what you’ve made!

Crust Choices That Compliment the Jello Texture

Can I Use a Pre-Made Graham Cracker Crust?

Yes, you absolutely can! A pre-made graham cracker crust is a game-changer for busy bakers or anyone short on prep time. These crusts are sold in disposable aluminum pie tins and are already pressed, baked, and ready to fill. Here’s why they work so well for Easter Jello Pie:

  • Convenience: No need to crush, mix, or bake.
  • Uniform shape: Perfect circular structure every time.
  • Firm base: Surprisingly sturdy once chilled with the pie.

But here’s the catch: store-bought crusts can be a little shallow—especially if you’re building an Easter Jello Pie with more than three colorful layers. If you’re aiming for height and that extra “wow” factor, a homemade crust in a deep-dish pie plate is your best bet.

How to Make a Homemade Crust That Holds Up

For a more rustic, personal touch (and if you want that extra depth for four or more layers), making your own crust is simple and only takes about 10 minutes.

Homemade Graham Cracker Crust Recipe:

  • 1½ cups graham cracker crumbs (about 10 full sheets)
  • ⅓ cup granulated sugar
  • 6 tablespoons melted butter

Instructions:

  1. In a mixing bowl, combine crumbs and sugar. Stir in melted butter until the texture resembles wet sand.
  2. Press the mixture into the bottom and sides of a 9-inch deep-dish pie pan.
  3. Use the bottom of a measuring cup to pack the crust tightly and evenly.
  4. Bake at 350°F (175°C) for 8–10 minutes. Let it cool completely before adding Jello layers.

Why this crust works:

  • The bake creates a firm, crisp base that won’t crumble when sliced.
  • A deeper dish allows for more generous, clean layers.

Want to level up your crust? Mix in a pinch of cinnamon or a tablespoon of shredded coconut for a subtle twist that pairs beautifully with citrus or berry-flavored Jello.

Don’t miss our high-protein dense bean salad for a wholesome, savory contrast to this sweet and creamy pie.

Variations for Creative Easter Jello Pie Twists

Decorated Easter Jello Pie with candy toppings
Add a festive touch with marshmallows and candy eggs!

Using Different Jello Flavors and Color Combos

One of the joys of making Easter Jello Pie is the endless flavor combinations. While traditional recipes stick to lemon, strawberry, and lime, don’t be afraid to mix things up! Consider seasonal flavors or even tropical twists to make your pie stand out.

Fun Flavor Ideas:

  • Tropical Vibe: Pineapple, mango, and coconut-flavored gelatin
  • Berry Explosion: Raspberry, blueberry, and black cherry
  • Citrus Fusion: Orange, lemon, and lime
  • Pastel Perfection: Grape (with whipped topping), peach, and berry blue

To get that Easter pastel effect, always blend each gelatin layer with a bit of Cool Whip or homemade whipped cream. This not only lightens the color but also adds a smooth, creamy texture that makes the pie feel mousse-like and extra indulgent.

Want even more ideas? Discover great flavor combos in our ABC fruit juice—great inspiration for your next pie palette.

Fun Mix-ins Like Fruit, Candies, and Marshmallows

Looking to give your pie some personality? Try these easy mix-ins between layers or on top of your final whipped topping layer:

Mix-in IdeaUse In or On Pie?Tip
Mini marshmallowsOn topGreat for a festive, puffy look
Diced strawberriesBetween layersAdd before layer sets
Jelly beansOn topColorful Easter touch
Shredded coconutOn top or baseToast lightly for extra flavor
SprinklesTop layer onlyAdd just before serving
Crushed candy eggsOn topAdds crunch and Easter sparkle

💡 Pro tip: If adding fruit between layers, make sure the Jello base is slightly thickened (not fully set) so it suspends nicely without sinking.

Not only do mix-ins elevate your Easter Jello Pie visually—they add fun textures and surprise flavors in every bite. It’s also a great way to get kids involved. Let them choose the “decorative” toppings and arrange them to turn the pie into a festive, edible centerpiece!

Don’t miss our natural mounjaro recipe for more colorful kitchen creativity that packs a sweet surprise.

Decorating Your Easter Jello Pie for Easter Appeal

Making It More Vibrant with Toppings and Layers

If there’s ever a time to embrace color, sparkle, and joy in the kitchen, it’s Easter. Decorating your Easter Jello Pie is all about adding playful touches that make the dessert pop without overwhelming it.

Here are some simple ways to add vibrancy and Easter flair:

  • Colorful Layers: Use alternating shades like lemon, berry blue, and strawberry. Soft pinks, yellows, and blues look especially festive.
  • Marbled Effects: Lightly swirl whipped topping into a Jello layer before it sets for a dreamy, marbled look.
  • Whipped Topping Accents: Use a piping bag with a star tip to edge your pie with whipped cream rosettes. It adds polish with almost no effort.

Want to take it further? Mix a few drops of pastel food coloring into your whipped topping and pipe multicolored accents.

Pastel Decorations and Whipped Cream Piping Ideas

Toppings are the easiest way to elevate a Jello pie. Here’s how to dress it up Easter-style:

Decoration TypeApplication Tips
Mini MarshmallowsScatter on top for a cloud-like texture
Chocolate EggsNest in whipped cream peaks
Coconut ShredsDye with food coloring for “Easter grass”
Candy SprinklesAdd just before serving to avoid melting
Edible Glitter or Gold LeafUse sparingly for elegance

You can also decorate your Easter Jello Pie with themed touches like Easter bunny picks or candy flowers placed in the center to serve as a playful focal point. Kids will love it, and your guests might just think it came straight from a bakery.

Looking for a savory brunch pairing? Check out our steak chimichurri dense bean salad—a bold and fresh counterpoint to your sweet creation.

Common Mistakes to Avoid with Layered Easter Jello Pie

Why Your Layers May Be Mixing or Collapsing

A perfect Easter Jello Pie is defined by its clean, distinct layers. But if those lines blur or collapse into each other, here are the likely culprits—and how to fix them:

1. Not Chilling Long Enough Between Layers

Each Jello layer needs at least 30–40 minutes in the fridge to set up. If you pour the next layer too soon, it’ll sink or mix with the one below.

Fix: Touch the surface gently. If it jiggles but doesn’t stick to your finger, it’s ready.

2. Pouring Too Quickly or From Too High

Pouring warm Jello directly onto a set layer can create pressure that breaks the surface tension, causing layers to bleed.

Fix: Always pour over the back of a spoon held close to the surface to diffuse the impact.

3. Too Much Liquid in the Mixture

If your Jello isn’t setting properly, double-check your water ratios. Using more than the recommended amount can weaken the structure.

Fix: Stick to the standard ½ cup boiling + ½ cup cold water per 3 oz box for firmer layers.

How to Fix Watery or Uneven Layers

Even seasoned bakers run into issues with watery layers or uneven heights. Here’s how to prevent those common pie problems:

ProblemLikely CauseSolution
Watery top layerOvermixing whipped topping into JelloFold gently and use less topping for cleaner texture
Soft pie when slicingUnderset bottom layersAllow full overnight chill for best firmness
Uneven thickness per layerEyeballing instead of measuringUse a measuring cup to divide Jello evenly
Crust falling apartNot packed tightly or fully chilledFirmly press and chill/bake crust before layering

Want to pair this pie with a light drink? Don’t miss our zobo drink recipe—a floral and refreshing choice that complements fruity desserts.

Serving & Storage Tips For Easter Jello Pie
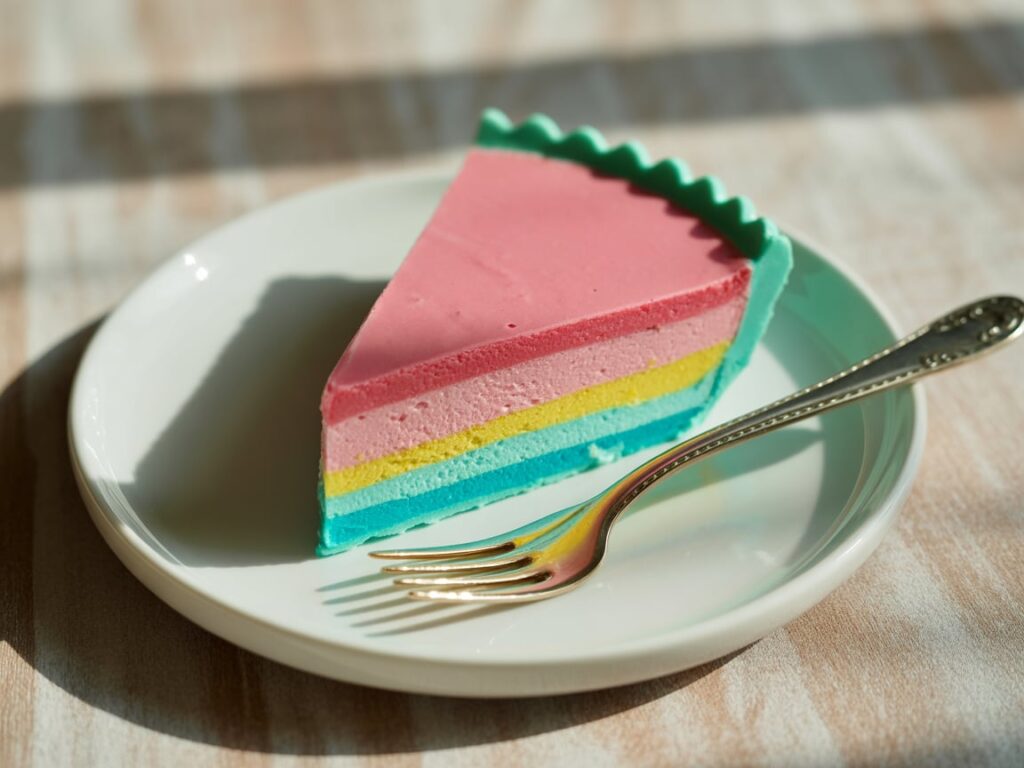
Sliced Easter Jello Pie on a plate with visible layers
Clean slices make serving easy and beautiful.

Best Way to Slice and Serve Without Cracking

After all the work layering and chilling your Easter Jello Pie, the last thing you want is a sloppy or cracked slice. Follow these steps to serve clean, Instagram-worthy pieces:

1. Chill Overnight

While a few hours of chilling is enough to set each layer, giving the entire pie at least 6–8 hours (ideally overnight) in the fridge helps the crust firm up and layers bond completely.

2. Use a Hot Knife

Before cutting, run a sharp knife under hot water, wipe it dry, and slice carefully. The heat glides through the chilled layers cleanly without tugging or cracking.

3. Dip Your Server in Hot Water Too

This trick helps lift each slice from the pan without damaging the surrounding pie. Be gentle—this dessert is beautiful, but delicate.

4. Serve Cold, Not Frozen

Jello texture suffers when frozen. Serve your pie chilled straight from the fridge, ideally within 10 minutes of slicing for the best presentation.

How Long It Keeps in the Fridge for Holiday Prep

One of the best things about Easter Jello Pie is that it’s make-ahead friendly. Perfect for reducing day-of holiday stress!

Storage MethodHow Long It LastsNotes
Covered in fridge3–4 daysStore in pie dish covered with plastic wrap
Individual slices4–5 days (airtight)Store in sealed containers for easy serving
FreezerNot recommendedFreezing alters texture and makes layers weep

To keep it looking fresh:

  • Avoid adding decorations like sprinkles or marshmallows until just before serving.
  • For pies topped with fresh fruit, lightly dab the fruit dry to avoid water bleeding into the topping layer.

This make-ahead Easter Jello Pie is perfect if you’re juggling multiple dishes or planning an elaborate Easter brunch. You can prepare it the night before and still wow your guests like you just pulled it fresh from the fridge.

Want a festive, make-ahead breakfast too? Check out our semolina pudding recipes—they’re creamy, comforting, and great for prepping ahead.

Frequently Asked Questions (FAQs): Easter Jello Pie

Can I use Cool Whip instead of whipped cream?

Absolutely! Cool Whip is not only a convenient option but also works great for stabilizing layers in your Easter Jello Pie. It blends smoothly into the Jello, creating that soft, mousse-like texture and light pastel coloring. It’s also more stable than homemade whipped cream, which can deflate over time unless stabilized.
If you prefer a more homemade taste, fresh whipped cream works too—just make sure to stabilize it with a little gelatin or powdered sugar for the best results.

Can I use a pre-made graham cracker crust?

Yes! Pre-made graham cracker crusts are a quick, mess-free option and work well for this no-bake pie. They’re perfect if you’re short on time or want to skip baking. Just keep in mind that store-bought crusts are usually shallow, so if you want taller layers or more Jello volume, a homemade crust in a deep-dish pie plate might be a better choice.

How can I make this pie more vibrant for Easter?

To make your Easter Jello Pie really pop for the holiday:
Choose bright and pastel Jello flavors like lemon, berry blue, and strawberry.
Add whipped topping to each Jello mixture for a softer, pastel tone.
Decorate with mini marshmallows, pastel sprinkles, candy eggs, or even food-colored coconut flakes.
Pipe tinted whipped cream around the edges for an eye-catching finish.
Layered colors and playful toppings give this dessert its true Easter charm!

Can I use different Jello flavors?

Yes! This pie is incredibly versatile. You can mix and match any combination of gelatin flavors depending on your taste and the look you want. Some fun combinations:
Lemon + Raspberry + Lime
Peach + Berry Blue + Strawberry
Pineapple + Grape + Orange
Just be sure to let each layer set before adding the next to keep the colors separate and defined.

Why does my pie need to be chilled between layers?

Chilling between layers is what gives Easter Jello Pie its signature look. If you pour new Jello on top of a liquid or unset layer, the colors will bleed, and you’ll lose that clean separation. Chill each layer for at least 30–40 minutes before adding the next to ensure crisp, distinct lines.

Conclusion: Easter Jello Pie Recipe

Easter Jello Pie is more than just a dessert—it’s a celebration of spring, color, and childhood memories brought back to life in every bite. Whether you grew up with Jello desserts at family gatherings or are discovering this sweet tradition for the first time, this pie offers a simple, joyful way to make your Easter table extra special.

With layers of vibrant flavor, a creamy whipped texture, and endless decorating options, this Easter Jello Pie checks all the boxes: fun, festive, no-bake, and make-ahead friendly. From Cool Whip convenience to kid-friendly candy toppings, it’s a recipe flexible enough to fit your style and schedule.

So go ahead—get creative, let the kids help, and build a dessert that tastes as delightful as it looks. The only hard part? Waiting for the layers to chill.

Don’t miss our easy homemade sugar scrub—a lovely DIY treat that makes the perfect Easter gift or self-care ritual.

June 26, 2025 0 comments
0 FacebookTwitterPinterestThreadsBlueskyEmail
Crispy calamari dipping sauce – garlic aioli, marinara, and chipotle mayo
Dinner

Calamari Dipping Sauce – The Best 7 Sauces You Must Try Now

by Sarah June 23, 2025
written by Sarah

Calamari Dipping Sauce Inspired by Family, Flavor & Comfort

Calamari dipping sauce has a special place in my kitchen—and not just because it tastes incredible. It brings back memories of laughter-filled dinners, where the crispness of fried calamari was only rivaled by the bold, creamy sauces served alongside it. At CozyBitesRecipes.com, every recipe I share is deeply rooted in comfort, creativity, and the cozy moments I grew up with in my grandmother’s kitchen. That’s where I first learned how food can connect people, spark joy, and turn a simple dish into a shared experience.

Now, as a busy mom of two, I continue that tradition—especially when it comes to making the perfect calamari dipping sauce. Whether it’s my go-to chipotle mayo or a classic garlic aioli, each calamari dipping sauce I create is designed to be simple, flavorful, and family-friendly. These sauces aren’t just great for seafood nights—they’re the kind of crowd-pleasing dips that elevate any plate of fried bites. In this guide, I’ll walk you through everything you need to know to make a standout calamari dipping sauce that brings people together at the table.

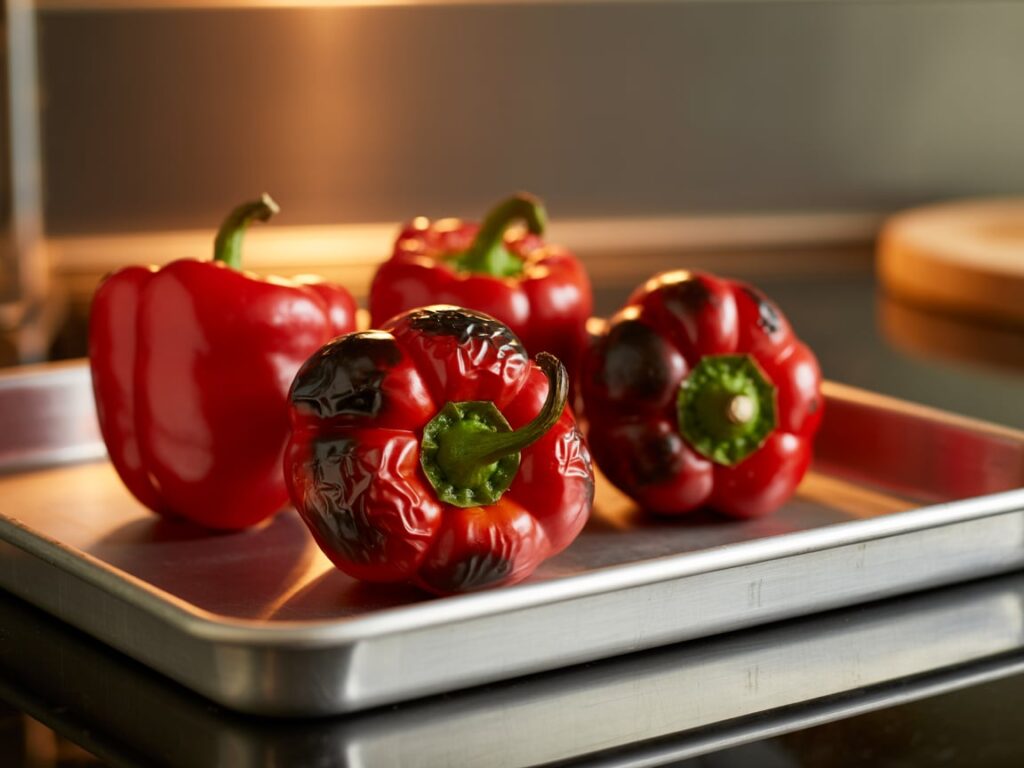
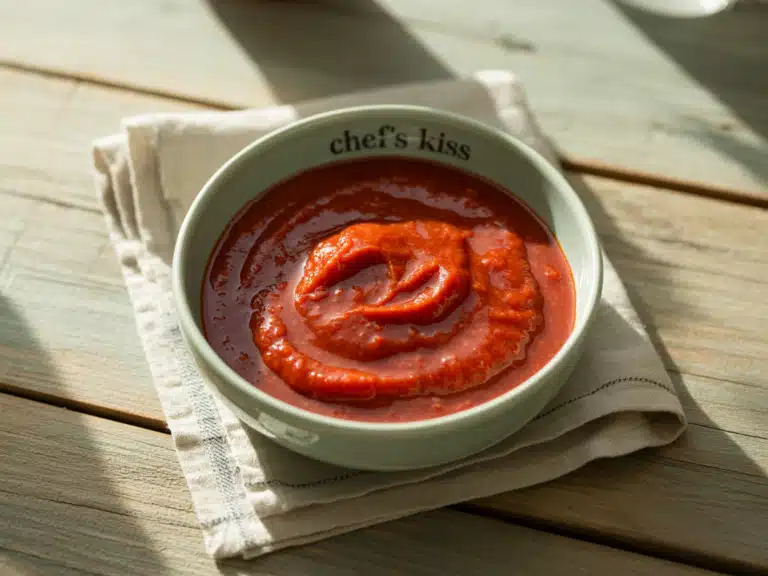
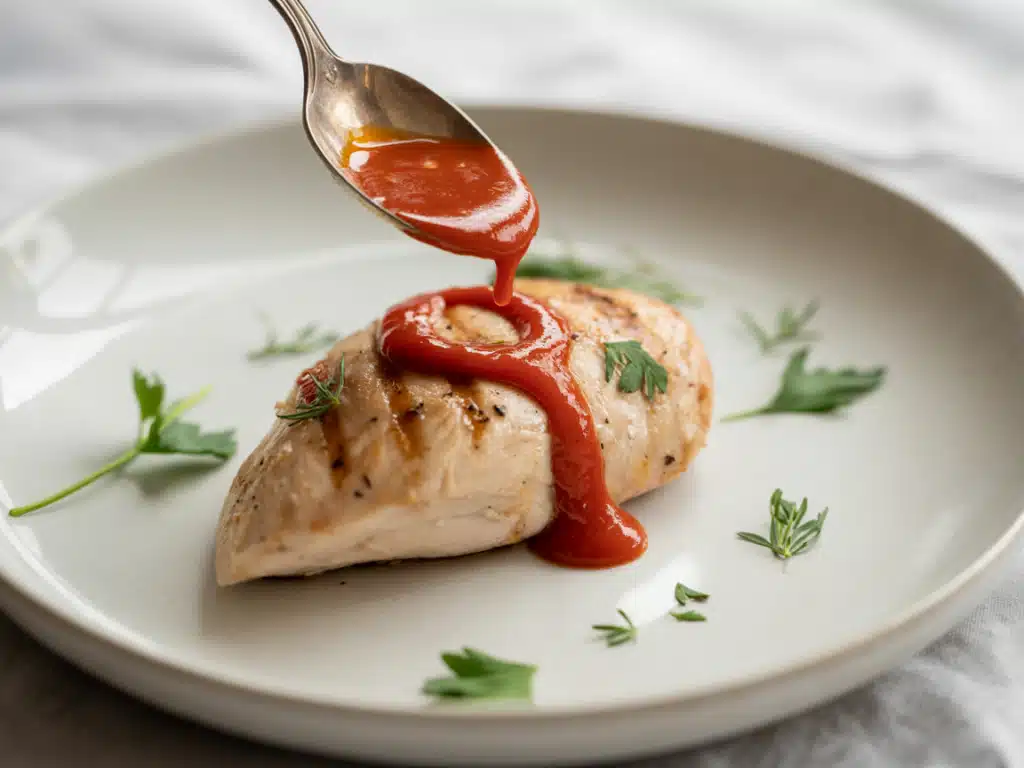
Looking for inspiration? Try this Red Pepper Coulis recipe—it pairs beautifully with fried appetizers and adds a burst of flavor to any spread.

Table of Contents
  • What is Calamari and Why It Needs a Great Dipping Sauce
  • Flavor and Texture Characteristics That Influence Sauce Pairing
  • Classic Garlic Aioli for Calamari
  • Chipotle Mayo Dipping Sauce (with Recipe Table)
  • Mediterranean Flavors: Lemon-Herb and Tzatziki Sauce
  • Asian-Inspired Sauces: Sweet Chili and Wasabi Mayo
  • Simple Garlic Mayo Recipe (Step-by-Step Guide)
  • Tips for Making it Creamy and Flavorful
  • Popular Sauce Choices in Restaurants
  • Pairing Sauces Based on Cooking Style (Fried vs Grilled)
  • Traditional Side Dishes and Sauces
  • Regional Variations in Calamari Serving Styles
  • The Olive Garden Calamari Experience
  • How to Mimic Their Dipping Sauce at Home
  • How to Set Up a Calamari Dipping Sauce Station
  • Which Sauces Pair Best with Appetizers and Wine
  • Unique Ingredients to Elevate Your Sauce
  • Mixing and Matching Flavors: Citrus, Herbs, and Spice
  • What sauce is good with calamari?
  • What is calamari traditionally served with?
  • What sauce does Olive Garden serve with calamari?
  • How to make garlic mayo for calamari?

Understanding Calamari and Its Flavor Profile: Calamari Dipping Sauce

What is Calamari and Why It Needs a Great Dipping Sauce

Calamari, often mistaken as a fancy seafood reserved for upscale restaurants, is actually just the culinary name for squid. When prepared right—especially fried to golden, crispy perfection—it becomes a dish that’s hard to resist. But here’s the real secret: calamari truly shines when served with the perfect calamari dipping sauce.

Thanks to its neutral, slightly sweet flavor, calamari is the ideal canvas for bold, flavorful calamari dipping sauce options—whether garlicky, creamy, spicy, or citrusy. A well-crafted calamari dipping sauce adds contrast, enhances every bite, and delivers that signature restaurant-quality finish we all crave at home.

Flavor and Texture Characteristics That Influence Sauce Pairing

Calamari’s texture—firm yet tender when cooked just right—makes it perfect for a variety of calamari dipping sauce styles. Thick, creamy calamari dipping sauces like garlic mayo or chipotle aioli pair beautifully with the crispy coating of fried calamari, adding richness and depth. If you’re grilling your calamari, lighter calamari dipping sauce options such as lemon-herb vinaigrettes or yogurt-based dips are a better match, enhancing the smoky flavor without overpowering it.

Here’s a quick table to show the ideal sauce texture for various calamari styles:

Calamari StyleBest Sauce TextureSuggested Flavor Profiles
Fried (Crispy)Creamy or BoldGarlic mayo, Chipotle aioli, Tartar
Grilled or SautéedLight & ZestyLemon vinaigrette, Tzatziki, Herb oil
Chilled or PickledMild and TangyCitrus yogurt, Basil pesto, Aioli mix

A well-matched sauce doesn’t just complement the calamari—it completes it.

Best Calamari Dipping Sauce Recipes You Must Try

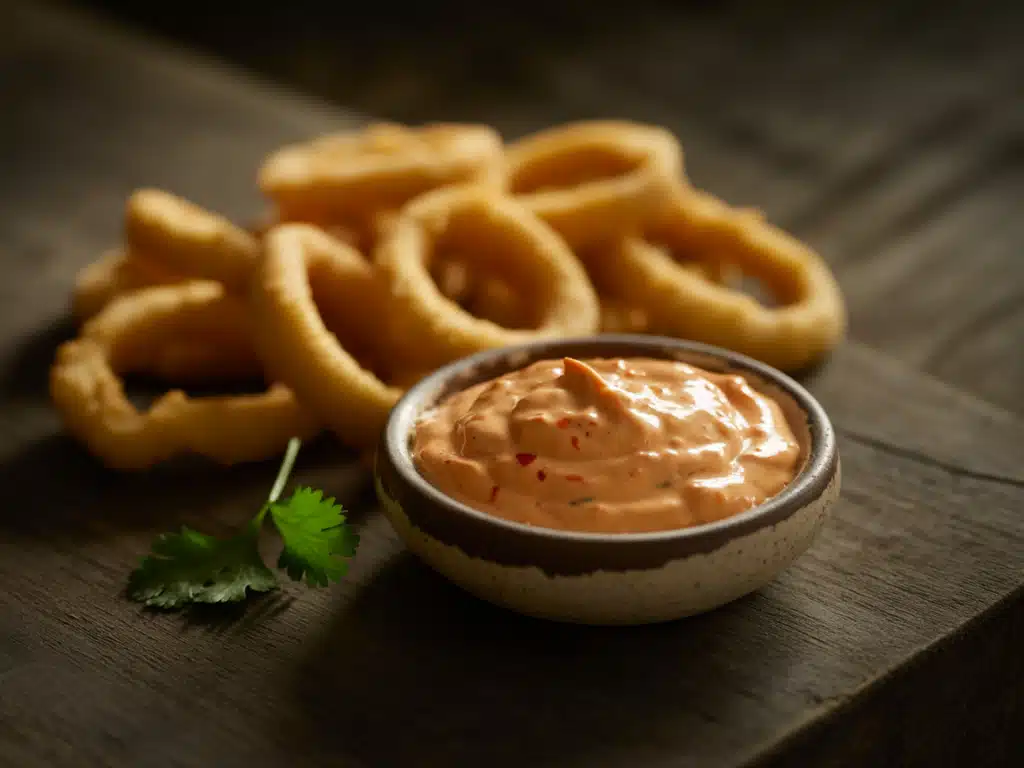
Chipotle mayo dipping sauce with fried calamari
Smoky chipotle mayo for seafood bites

Classic Garlic Aioli for Calamari

If you’re looking for a timeless favorite, garlic aioli is a no-fail calamari dipping sauce that never disappoints. This creamy, garlicky condiment hails from the Mediterranean and has become a go-to calamari dipping sauce around the world.

Why does it work so well? Its rich, velvety texture clings beautifully to each crispy bite, while the roasted garlic adds a deeply savory layer that transforms even the simplest fried squid. You can whip up a quick calamari dipping sauce version with mayo, garlic, lemon juice, and olive oil—or go all-in with a traditional egg-based emulsion for a more authentic touch.

Quick Garlic Aioli Recipe (2-Minute Version):

  • 1 cup mayonnaise
  • 2 cloves garlic (crushed or roasted)
  • 1 tablespoon lemon juice
  • Salt and pepper to taste
  • Optional: dash of Dijon mustard for tang

Blend all ingredients until smooth. Chill for 15 minutes to let the flavors meld. Serve alongside hot calamari for a dipping experience that’s bold, bright, and unforgettable.

Check out this Hickory Smoked BBQ Sauce Recipe for another sauce that’s smoky and indulgent—surprisingly tasty with grilled calamari too.

Chipotle Mayo Dipping Sauce (with Recipe Table)

If you want to bring a smoky, spicy twist to your next seafood platter, chipotle mayo is the way to go. It’s fast, flavorful, and uses pantry staples—making it a standout option when time is short but taste is non-negotiable.

Here’s the exact recipe used in my Cozy Bites kitchen:

IngredientMeasurement
Mayonnaise1 cup
Chipotle Powder or Adobo Pepper1 tsp (powder) or 2 tbsp (pepper)
Garlic (chopped)1 clove
Lemon Juice1 tsp
SaltPinch

Instructions

  1. Add mayo, chipotle, garlic, lemon juice, and salt to a bowl.
  2. If using chipotle peppers in adobo, blend in a food processor or with a stick blender until smooth.
  3. Refrigerate for 15 minutes before serving.

The beauty of this sauce lies in its versatility—you can make it smokier, spicier, or tangier based on your mood. It clings to crispy fried calamari just enough, enhancing its flavor with a satisfying kick.

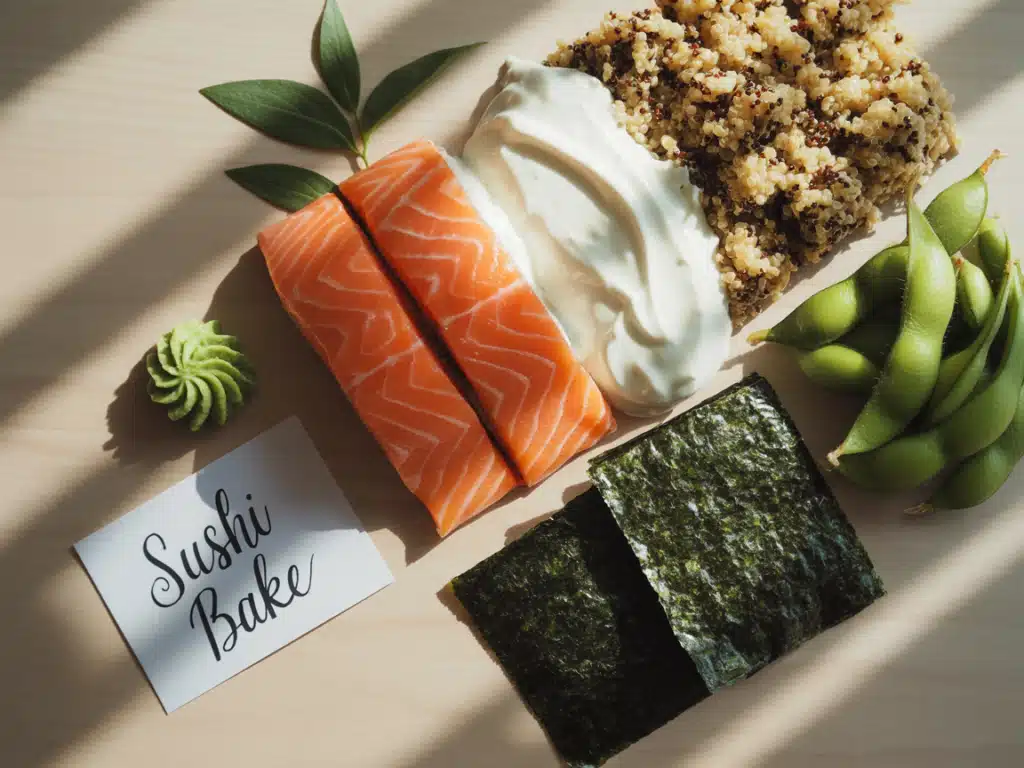
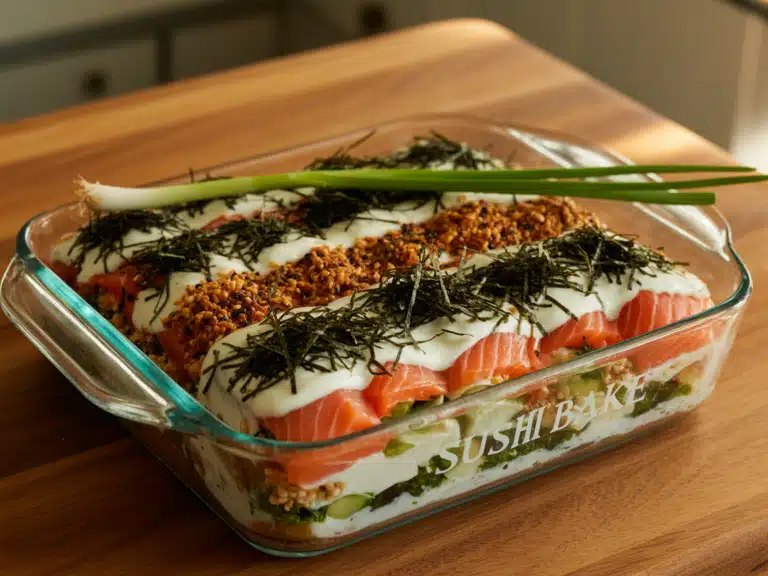
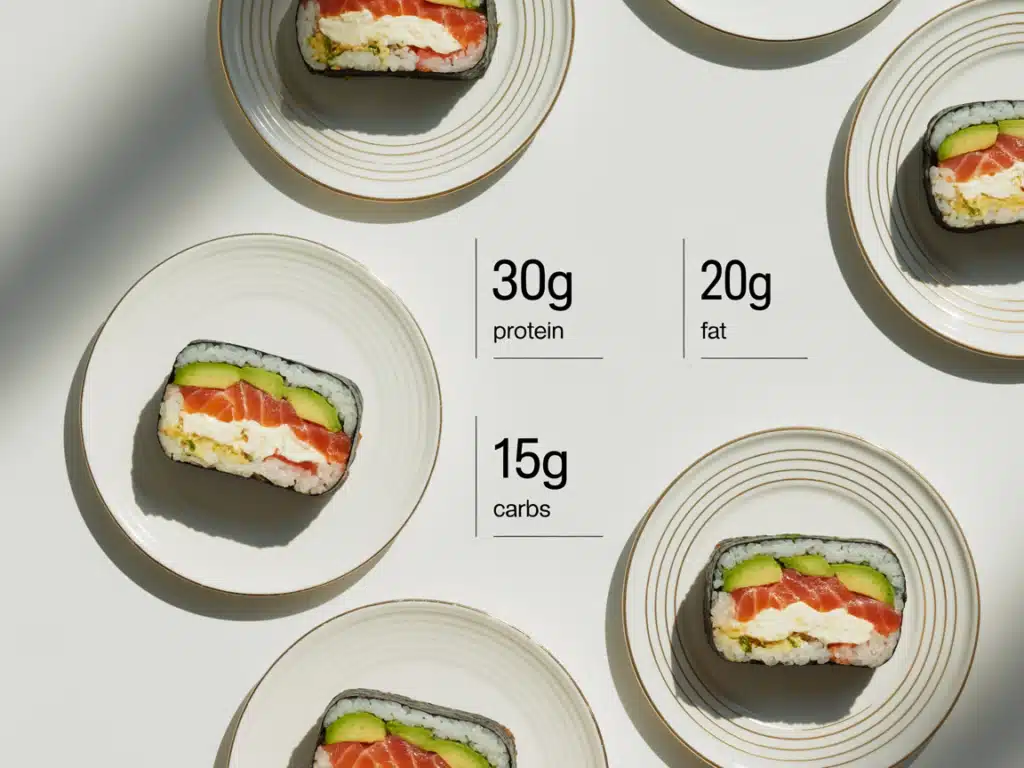
Discover great ideas like this High Protein Sushi Bake—it also benefits from creamy, flavorful sauces like this chipotle dip.

Pro Tip: Always serve your sauces slightly chilled against hot calamari for the best texture contrast and flavor burst.

Global Calamari Dipping Sauce Inspirations

Mediterranean Flavors: Lemon-Herb and Tzatziki Sauce

The Mediterranean is where calamari truly feels at home—and it’s also where some of the best calamari dipping sauce inspirations come from. Light, zesty sauces are staples across the coastal cuisines of Greece, Italy, and Spain, making them perfect companions for grilled or lightly battered calamari.

One standout calamari dipping sauce is a classic Lemon-Herb Sauce. Made with olive oil, garlic, parsley, and fresh lemon juice, it’s simple yet full of vibrant flavor. Whether drizzled over warm calamari or served on the side, this calamari dipping sauce brings a tangy brightness that balances the richness of the seafood beautifully.

Here’s a basic version you can whip up in minutes:

  • 2 tablespoons olive oil
  • 1 tablespoon lemon juice
  • 1 clove garlic, minced
  • 1 tablespoon fresh parsley or oregano
  • Salt and pepper to taste

Tzatziki Sauce is another Mediterranean classic, especially common in Greek cuisine. This creamy cucumber-yogurt dip balances crispy fried calamari with cool, refreshing notes of dill and garlic.

Why it works: The creamy texture contrasts beautifully with the crunch, while the yogurt base offers a nice acidity to keep your palate refreshed.

Check out this Protein Coffee Recipe—another great way to explore unique Mediterranean-inspired health twists in your kitchen.

Asian-Inspired Sauces: Sweet Chili and Wasabi Mayo

Asian cuisine offers a bold variety of flavors that elevate calamari in unexpected ways. If you love the fusion of sweet, sour, spicy, and umami, these sauces will become your new favorites.

Sweet Chili Sauce is a go-to option, especially in Thai and Chinese cuisine. It’s tangy, mildly spicy, and adds a glossy coating to every bite. You can buy it bottled or make your own with red chilies, garlic, vinegar, and sugar.

Perfect Pairing: Try this with calamari tempura or air-fried squid rings. The contrast of heat and sweetness enhances the delicate squid flavor.

Wasabi Mayo delivers that signature Japanese kick. It’s made with wasabi paste blended into mayonnaise—ideal for those who like their calamari with a punch. A little goes a long way!

Wasabi Mayo Recipe (Quick Blend):

  • ½ cup mayonnaise
  • 1 teaspoon wasabi paste
  • 1 teaspoon rice vinegar
  • Optional: pinch of sugar to balance the heat

These globally inspired sauces prove that calamari isn’t bound by tradition—it’s a blank canvas for bold creativity.

Don’t miss our Natural Mounjaro Recipe if you love international flavor fusions that balance indulgence and nutrition.

How to Make Garlic Mayo for Calamari at Home: Calamari Dipping Sauce

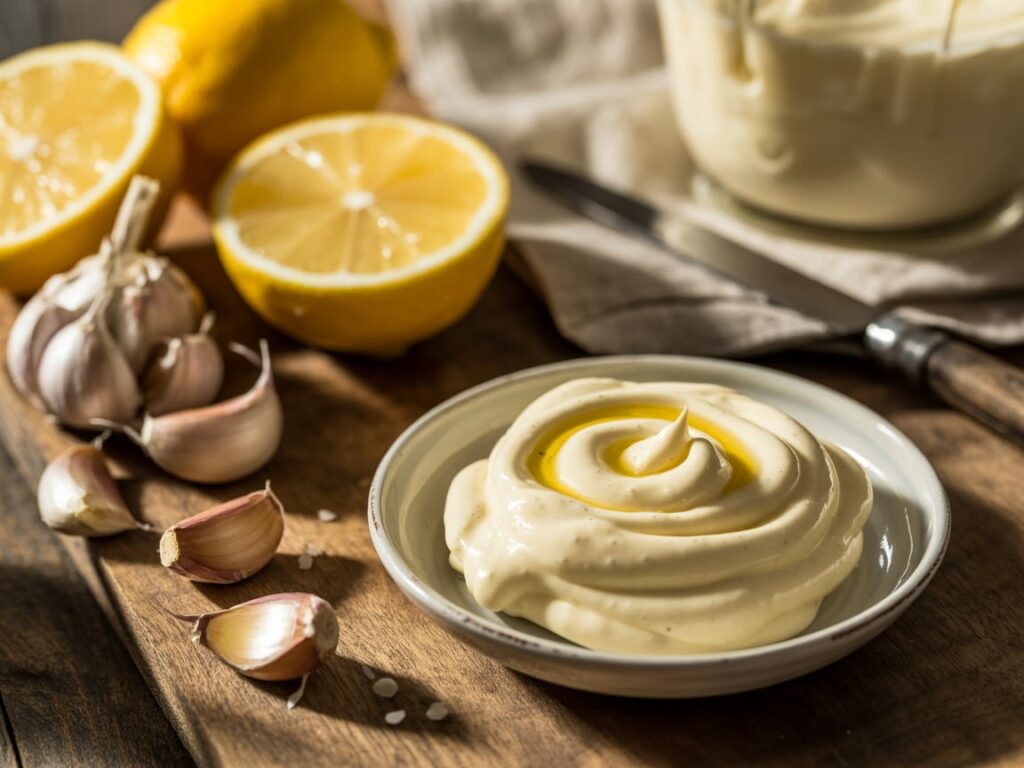
Garlic mayo dipping sauce ingredients for calamari
Simple ingredients for garlic mayo

Simple Garlic Mayo Recipe (Step-by-Step Guide)

If you ask any seafood lover which calamari dipping sauce is the best, garlic mayo often tops the list. Creamy, rich, and infused with the warm bite of garlic, this classic calamari dipping sauce never disappoints and pairs perfectly with crispy fried squid.

Let’s break down how to make it in your own kitchen, no culinary degree required.

Basic Garlic Mayo Ingredients:

  • 1 cup mayonnaise
  • 1 clove garlic, coarsely chopped
  • 1 teaspoon lemon juice
  • Pinch of salt
  • Optional: ½ teaspoon Dijon mustard for extra depth

Instructions:

  1. In a mixing bowl, combine mayo, chopped garlic, lemon juice, and salt.
  2. If you prefer a smoother sauce, use a stick blender or small food processor to blend until creamy.
  3. Taste and adjust the salt or lemon juice as needed.
  4. Refrigerate for at least 15 minutes to allow the flavors to meld.

It’s ready to serve! This version balances tang, creaminess, and subtle heat from the garlic.

Want a smokier kick? Try adding chipotle powder to the base to transform it into a chipotle garlic mayo combo.

Tips for Making it Creamy and Flavorful

Getting the perfect consistency and taste in your garlic mayo comes down to a few small but important tricks:

  • Use fresh garlic, not garlic powder, for a fuller, more authentic flavor. Roasting the garlic can also mellow the sharpness for a smoother taste.
  • Chill the sauce before serving. Cold sauces contrast beautifully with hot fried calamari, enhancing texture and mouthfeel.
  • Balance is key: too much garlic can overpower the delicate calamari, while too little may make the sauce bland.

For flavor experimentation, consider adding fresh herbs like dill or basil, or a small splash of white wine vinegar for acidity.

Discover great ideas like this Purple Peel Recipe—it’s a unique creation that proves flavor innovation is always welcome in the kitchen.

What Sauce Is Good with Calamari: Calamari Dipping Sauce?

Popular Sauce Choices in Restaurants

When you order calamari at a restaurant, chances are it comes with at least one of the following tried-and-true dipping sauces. These aren’t just tradition—they’ve stood the test of taste.

Sauce NameFlavor ProfileWhy It Works with Calamari
Garlic AioliCreamy, garlickyEnhances crispy texture, adds richness
Marinara SauceTomato-based, savoryCuts through fried coating with acidity
Tartar SauceTangy, slightly sweetCreamy texture balances fried calamari
Chipotle MayoSmoky, spicyAdds bold flavor and spice
Lemon Butter SauceButtery, citrusyLight and fresh—great for grilled squid
Sweet Chili SauceSweet and tangy with heatGreat for fusion dishes or Asian flair

Most popular pick: Garlic aioli still tops the list. But chipotle mayo is quickly rising in popularity for its bold kick.

Restaurants often combine sauces to offer diners options—sweet, spicy, creamy, or tangy. Creating that variety at home is a fantastic way to elevate your calamari platter.

Check out this Red Pepper Coulis Recipe for a vibrant dipping option—it’s smooth, zesty, and pairs beautifully with lightly fried seafood.

Pairing Sauces Based on Cooking Style (Fried vs Grilled)

The way you cook calamari directly impacts which sauces will taste best. Here’s how to pair like a pro:

Fried Calamari:

  • Needs bold and creamy sauces.
  • Pairs well with aioli, tartar, chipotle mayo, or remoulade.
  • Spicy or tangy flavors cut through the fried texture and bring balance.

Grilled Calamari:

  • Lighter sauces work best.
  • Think lemon-herb vinaigrette, garlic olive oil, or yogurt-based dips.
  • You want the char and natural squid flavor to shine—not be masked.

Sautéed or Marinated Calamari:

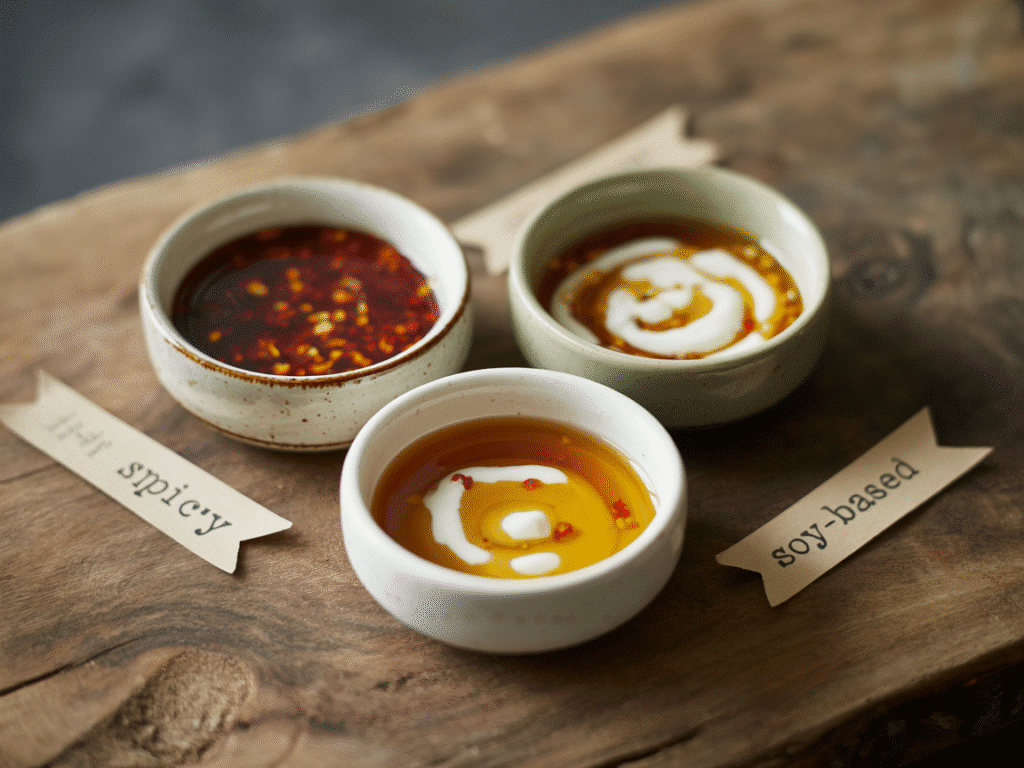
  • Works with pesto, citrus dips, or even soy-ginger blends.
  • A little sweetness or acidity helps elevate the natural brine of the squid.

Here’s a helpful visual pairing chart:

Cooking StyleBest Sauce TypeRecommended Sauce
FriedCreamy, tangy, spicyGarlic mayo, Chipotle aioli
GrilledZesty, herbaceousLemon vinaigrette, Tzatziki
SautéedUmami or citrus-basedSoy-ginger, Basil pesto

These pairings aren’t just delicious—they’re smart. The sauce should complement, not overpower, your calamari dish.

Print
clock clock iconcutlery cutlery iconflag flag iconfolder folder iconinstagram instagram iconpinterest pinterest iconfacebook facebook iconprint print iconsquares squares iconheart heart iconheart solid heart solid icon
Crispy calamari dipping sauce – garlic aioli, marinara, and chipotle mayo

Calamari Dipping Sauce

5 Stars 4 Stars 3 Stars 2 Stars 1 Star

No reviews

Print Recipe
Pin Recipe

Discover the best calamari dipping sauces, from garlic aioli to chipotle mayo, and learn how to make them at home with easy recipes and pairing tips.

  • Total Time: 20 minutes
  • Yield: 4 servings 1x

Ingredients

Scale

1 cup mayonnaise

1 teaspoon chipotle powder or 2 tablespoons chipotle pepper in adobo sauce

1 clove garlic coarsely chopped

1 teaspoon lemon juice

Pinch of salt

Instructions

Add the mayonnaise, chipotle powder OR chipotle pepper in adobo sauce, garlic, lemon juice and pinch of salt to a bowl and blend until combined. If using chipotle pepper, blend it in a food processor or with a stick blender to incorporate.

Cover and refrigerate for 15 minutes before serving.

Notes

You can use either chipotle powder or chipotle peppers in adobo sauce.

  • Author: Sarah
  • Prep Time: 5 minutes
  • Cook Time: 15 minutes

Did you make this recipe?

Share a photo and tag us — we can’t wait to see what you’ve made!

What Is Calamari Traditionally Served With?

Traditional Side Dishes and Sauces

In coastal regions around the world, calamari isn’t just an appetizer—it’s a tradition. And like every time-honored dish, it comes with its own beloved set of sides and sauces.

Here are the most common traditional accompaniments you’ll find served with calamari:

RegionTraditional Pairings
ItalyMarinara sauce, lemon wedges, crusty bread
SpainAioli, Romesco, fried potatoes (patatas bravas style)
GreeceTzatziki, lemon-herb oil, Greek salad
PortugalGarlic butter, piri-piri sauce, rice or salad
United StatesMarinara, tartar sauce, French fries

Lemon wedges are almost always served alongside calamari because their bright acidity lifts the crispy fried exterior and enhances the squid’s natural flavor without overpowering it. While not a dipping sauce per se, the fresh squeeze of lemon complements any calamari dipping sauce beautifully. Pair your calamari with crusty bread or a light salad to balance the richness of this indulgent fried dish.

Pro Tip: Serving calamari with both a creamy dip and a zesty citrus option (like a vinaigrette or lemon-infused oil) offers variety and satisfies more palates at your table.

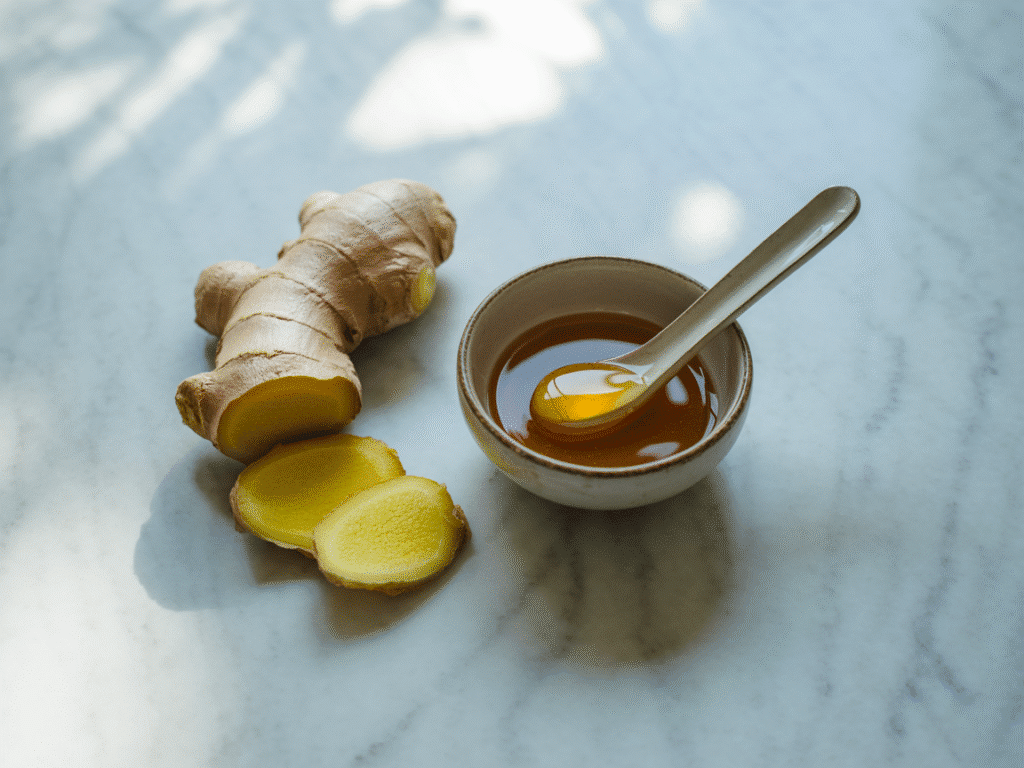
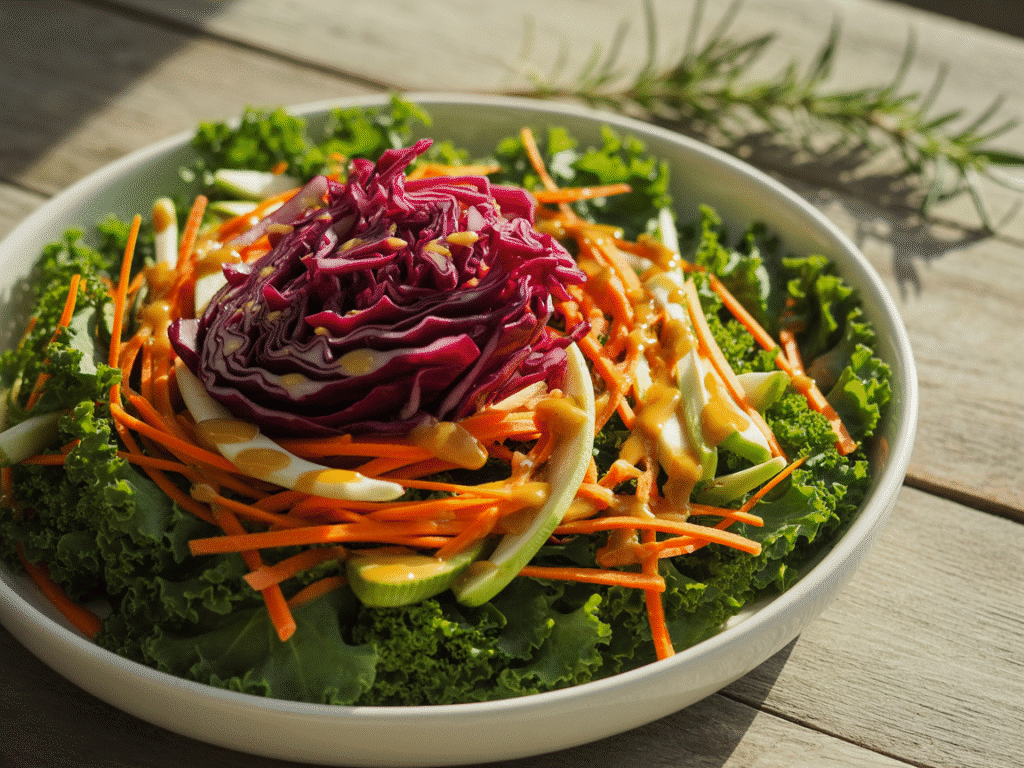
Don’t miss our Zesty Honey Ginger Dressing—it doubles as a dipping sauce and a salad topper, making it a versatile companion to grilled calamari.

Regional Variations in Calamari Serving Styles

While fried calamari is the most common preparation in the U.S., different cultures treat squid in their own special ways—and that impacts the dipping sauces.

  • Mediterranean regions tend to grill calamari and serve it with olive oil, herbs, and fresh lemon.
  • In Japan, squid is often part of sushi or served as tempura, paired with soy-based dips or wasabi mayo.
  • Southeast Asian cuisine brings bold flavors like lime, cilantro, and chili-infused sauces into the mix.

Let’s look at how serving style affects sauce choice:

Calamari TypeCommon inServed With
Fried RingsUSA, ItalyGarlic aioli, tartar, marinara
Grilled Whole SquidGreece, SpainLemon-herb oil, tzatziki, chimichurri
Tempura-Style StripsJapanPonzu, soy sauce, wasabi mayo
Stuffed CalamariPortugal, ItalyTomato-based sauces, garlic butter

Understanding these regional influences can inspire your next calamari dish—and give you a few fun ideas for sauce experiments too.

Recreating Olive Garden Calamari Dipping Sauce

The Olive Garden Calamari Experience

If you’ve ever ordered calamari at Olive Garden, you know the calamari dipping sauce is what takes the dish to the next level. That tangy-sweet marinara, with its hint of spice and herbs, is a big part of what makes the experience so satisfying. For many, it’s not just a sauce—it’s a memorable flavor that keeps them coming back.

Olive Garden traditionally serves their crispy calamari with a warm marinara sauce and occasionally a creamy parmesan peppercorn sauce on the side. Both are balanced and mild, appealing to a wide range of taste buds.

Here’s what makes Olive Garden’s marinara stand out:

  • Smooth texture – Not too chunky, perfect for dipping.
  • Balanced acidity – The tomato flavor is bright, but not overpowering.
  • Herb-forward – Basil and oregano add a comforting Italian aroma.
  • Hint of sweetness – Likely from sugar or sweet tomato varieties.

How to Mimic Their Dipping Sauce at Home

You don’t have to head to a restaurant to enjoy this kind of flavor. With a few pantry staples, you can recreate a similar sauce in your own kitchen.

Copycat Olive Garden Marinara for Calamari

IngredientAmount
Olive oil2 tbsp
Garlic (minced)2 cloves
Crushed tomatoes1 can (15 oz)
Tomato paste1 tbsp
Sugar1 tsp
Dried basil1 tsp
Dried oregano1 tsp
Red pepper flakes¼ tsp (optional)
Salt and pepperTo taste

Directions:

  1. Heat olive oil in a saucepan and sauté garlic until fragrant.
  2. Add crushed tomatoes and tomato paste. Stir well.
  3. Mix in sugar, herbs, red pepper flakes, salt, and pepper.
  4. Simmer on low for 15–20 minutes until slightly thickened.
  5. Taste and adjust seasonings if needed.

Bonus Tip: For a creamy twist like their peppercorn sauce, stir in 2 tablespoons of heavy cream and a dash of ground black pepper near the end of cooking.

This sauce pairs beautifully with both fried and baked calamari, and can even be used with pasta or bruschetta. Make extra and refrigerate—it gets even better the next day.

Check out this Brazilian Mounjaro Recipe if you love recreating restaurant-style meals at home with your own cozy touch.

Sauce Pairing Tips for Hosting and Serving

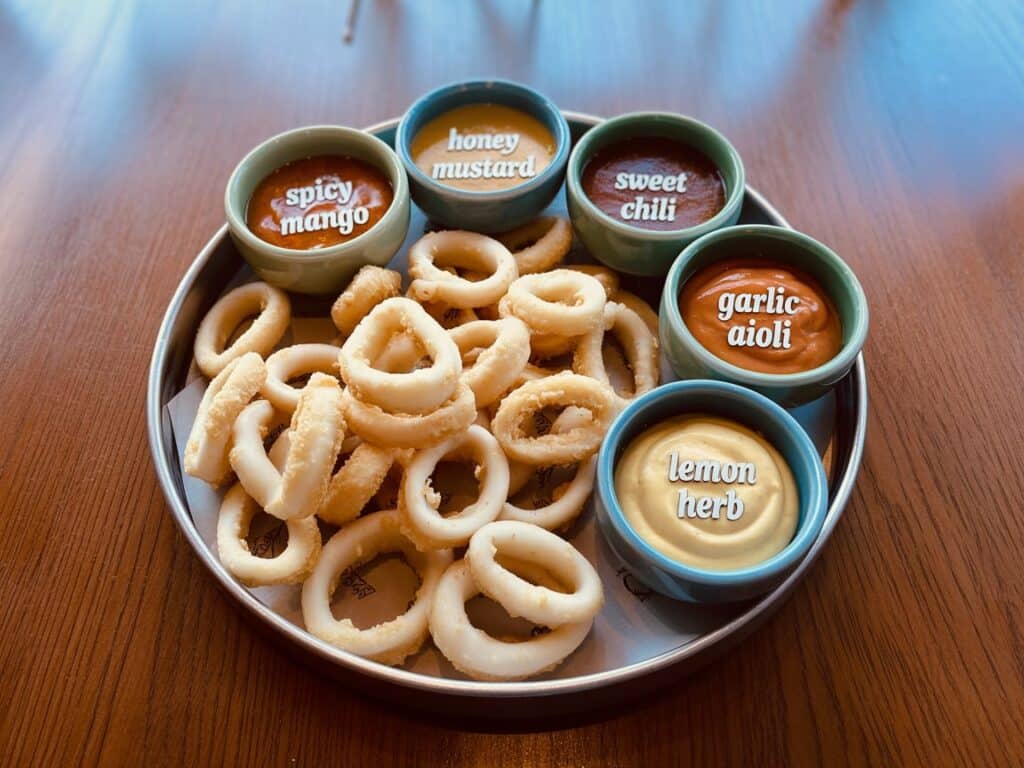
Calamari dipping station setup with assorted sauces
A perfect dipping station for hosting

How to Set Up a Calamari Dipping Sauce Station

Hosting a dinner party or game night? A calamari dipping sauce station is an interactive and crowd-pleasing way to serve appetizers. Instead of just one dip, offer a spread of sauces so guests can mix, match, and enjoy.

Here’s how to set it up like a pro:

1. Serve Calamari Hot and Fresh

  • Fry in small batches and keep warm in a low oven (200°F).
  • For grilled calamari, serve on skewers or sliced strips.

2. Offer a Sauce Variety (3–5 Options is Ideal)

Balance your selection by including:

  • Creamy: Garlic aioli, chipotle mayo, tartar
  • Zesty: Lemon vinaigrette, chimichurri, basil pesto
  • Spicy: Sweet chili, wasabi mayo, piri-piri
  • Traditional: Marinara, parmesan peppercorn

3. Label Each Sauce Clearly

Use small chalkboard signs or printed cards—this helps guests identify their favorites and avoids allergy risks.

4. Add Garnishes and Textures

  • Lemon wedges
  • Fresh herbs (parsley, dill, basil)
  • Thinly sliced red onions or pickled veggies for contrast

5. Accompany with Sides

Offer crusty bread, a light salad, or roasted veggies to complete the dish.

Looking for inspiration? Try this Lemon Balm Recipe as a unique herbal drizzle for grilled calamari or a refreshing palate cleanser between bites.

Which Sauces Pair Best with Appetizers and Wine

Pairing the right drink with calamari—and its dipping sauces—can elevate your event from good to unforgettable.

Here’s a quick guide for pairing calamari sauces with wine or cocktails:

Dipping SauceBest Drink Pairing
Garlic AioliDry Sauvignon Blanc or Cava
Chipotle MayoLight lager or sparkling rosé
TzatzikiCrisp white wine (Pinot Grigio)
Sweet Chili SauceRiesling or citrusy cocktails
Lemon-Herb VinaigretteChardonnay or sparkling water + mint
MarinaraChianti or red sangria

Pro Hosting Tip: Serve sauces in small ramekins with mini spoons for easy dipping and a clean presentation.

Creative Calamari Dipping Sauce Variations and Flavor Experiments

Unique Ingredients to Elevate Your Sauce

Once you’ve mastered the basics—aioli, marinara, chipotle mayo—it’s time to get creative with your calamari dipping sauce. Small tweaks and flavorful additions can transform a classic dip into a signature calamari dipping sauce that keeps guests coming back and asking, “What’s in this?”

Here are some unique additions that instantly upgrade your calamari dipping sauces:

IngredientFlavor ImpactWorks Best In
Sriracha or Hot HoneySweet heat, mild spiceChipotle mayo, creamy aioli
Anchovy PasteUmami depthGarlic or Caesar-style dips
CapersTangy, briny popTartar and Mediterranean sauces
Roasted Red PeppersSweet smokinessCreamy dips, romesco-style sauces
Yuzu Juice or Lime ZestCitrus brightnessAsian-inspired sauces
Fresh Dill or MintClean, herbal liftTzatziki or lemon yogurt sauces

These additions are easy to mix in and adjust based on taste—perfect for when you want something a little different without starting from scratch.

Mixing and Matching Flavors: Citrus, Herbs, and Spice

Combining flavors is where the real fun begins. A well-balanced sauce doesn’t rely on one note—it layers acidity, sweetness, saltiness, and heat in just the right way.

Flavor Fusion Combos to Try:

  • Lemon + Garlic + Paprika → A zesty aioli with a smoky finish
  • Cilantro + Lime + Greek Yogurt → Bright and tangy dip for grilled calamari
  • Dijon + Honey + Cayenne → Sweet-spicy mustard mayo with a kick
  • Basil + Sun-dried Tomato + Olive Oil → Mediterranean pesto remix

Pro Technique: Use a base like mayo or Greek yogurt, then mix in spices, herbs, acids (like vinegar or lemon), and heat to suit your palate.

Flavor Balance Cheat Sheet:

TasteAdd This
AcidicLemon juice, vinegar, yuzu
CreamyMayo, yogurt, sour cream
SweetHoney, sugar, roasted red peppers
SpicyChili flakes, sriracha, wasabi, cayenne
HerbalParsley, dill, mint, cilantro
UmamiAnchovy paste, soy sauce, miso

Experimenting not only makes your sauces better, but it makes your cooking feel like play—not work.

Check out this ABC Fruit Juice Recipe—it’s proof that flavor combinations don’t have to be traditional to be delicious.

FAQs About Calamari Dipping Sauce

What sauce is good with calamari?

Some of the best sauces for calamari include garlic aioli, chipotle mayo, tartar sauce, and marinara. Each offers a unique flavor—garlicky, spicy, creamy, or tangy—that enhances the mild, slightly sweet taste of calamari. Lighter sauces like lemon vinaigrette or tzatziki also pair beautifully with grilled or sautéed calamari.

What is calamari traditionally served with?

Traditionally, calamari is served with marinara sauce, lemon wedges, or garlic butter, often alongside crusty bread, salad, or fried potatoes. Mediterranean regions may also pair it with herb oil or tzatziki. The exact accompaniments vary by region and preparation style—fried or grilled.

What sauce does Olive Garden serve with calamari?

Olive Garden serves calamari with their signature warm marinara sauce and sometimes a parmesan peppercorn dipping sauce. The marinara is smooth, mildly sweet, and seasoned with herbs like basil and oregano, perfectly complementing the crispy calamari.

How to make garlic mayo for calamari?

To make garlic mayo:
Combine 1 cup mayonnaise, 1 clove chopped garlic, 1 tsp lemon juice, and a pinch of salt.
Blend well, chill for 15 minutes, and serve.
You can enhance it with roasted garlic or chipotle powder for a smoky twist.

Conclusion: Calamari Dipping Sauce —The Secret to Irresistible Calamari

Perfectly crisp calamari is delicious on its own—but pair it with the right calamari dipping sauce, and it becomes truly unforgettable. Whether you’re craving the bold kick of chipotle mayo, the comfort of creamy garlic aioli, or the citrusy zest of a Mediterranean lemon vinaigrette, the right calamari dipping sauce transforms simple seafood into something show-stopping.

So go ahead—experiment with textures, herbs, and spices. Whether you’re hosting guests or enjoying a quiet meal at home, a well-crafted calamari dipping sauce will always leave a lasting impression.

Looking for more cozy kitchen creations? Don’t miss our High Protein Dense Bean Salad—it’s hearty, flavorful, and pairs beautifully with seafood dishes.

June 23, 2025 0 comments
0 FacebookTwitterPinterestThreadsBlueskyEmail
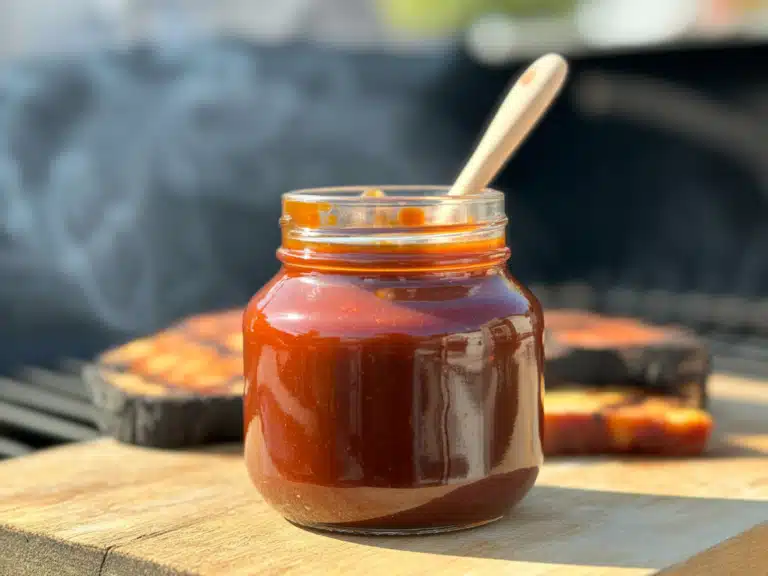
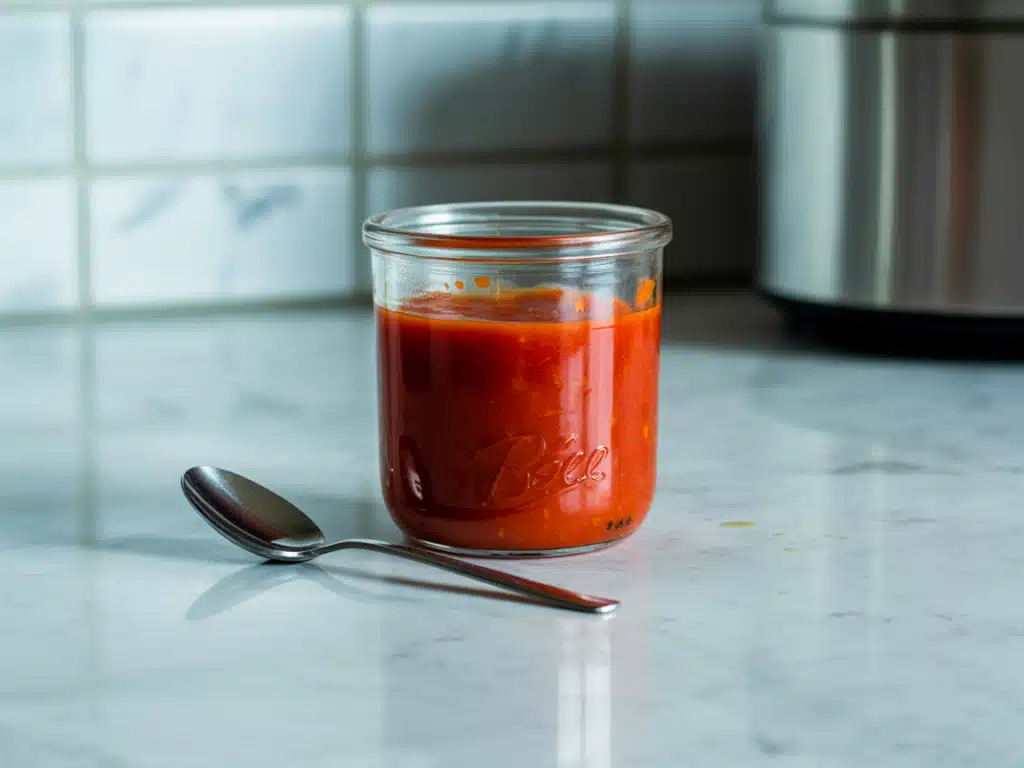
Homemade hickory smoked BBQ sauce in a glass jar
Lunch

Hickory Smoked BBQ Sauce – The Best Bold Flavor for BBQ Lovers

by Sarah June 21, 2025
written by Sarah

Hickory smoked BBQ sauce has always had a way of pulling me back to my roots—back to the sizzle of summer grills, the smell of charred wood in the air, and the simple joy of making food from scratch. When I started Cozy Bites Recipes, it wasn’t just about sharing recipes—it was about recreating moments that mattered. My kitchen became a haven of memory and flavor, where smoky undertones told stories just as much as spices did.

Years ago, I found myself craving the kind of BBQ sauce that didn’t just coat the meat—but clung to it, kissed by smoke, sweetened just right, and rounded out with that bold kick. That craving sparked countless test batches in my small but mighty kitchen—some too sweet, some too tangy, and finally, one that hit all the right notes. That’s the version I’m sharing with you today.

In this article, I’ll take you deep into the world of hickory smoked BBQ sauce—from its unique flavor profile and origins to how you can make it at home with ingredients already in your pantry. Whether you’re new to smoking, a weekend griller, or just someone looking for a standout marinade, this guide has everything you need to bring bold, hickory-smoked flavor to your table.

Check out one of our most popular recipes to pair with hickory BBQ sauce: Discover great ideas like this tangy plant-based BBQ wrap

Table of Contents
  • Definition and Ingredients of Hickory Smoked BBQ Sauce
  • Origins and Popularity in American Barbecue Culture
  • Smokiness and Sweetness Explained
  • Comparing Hickory Smoke to Other Wood Flavors
  • Flavor, Texture, and Color Comparison
  • Use Cases: When to Choose Hickory Over Classic
  • Step-by-Step Hickory Smoked BBQ Sauce Recipe with Common Ingredients
  • Customizing Heat, Sweetness, and Smokiness
  • Grilling, Smoking, and Baking Applications
  • Top 5 Dishes That Pair Perfectly with Hickory Sauce
  • Calories, Sugars, and Vegan-Friendly Variants
  • Using Natural Sweeteners and Low-Sodium Alternatives
  • Marinating vs. Basting: Timing and Techniques
  • How to Layer Flavors Without Overpowering
  • Top-Rated Brands You Can Buy
  • Pros and Cons of Homemade Sauce from Scratch
  • Refrigeration and Freezing Guidelines
  • Signs Your BBQ Sauce Has Gone Bad
  • What is hickory smoke barbecue sauce?
  • What is the difference between hickory and original BBQ sauce?
  • What does hickory smoked BBQ taste like?
  • What does hickory barbecue sauce taste like?

What Is Hickory Smoked BBQ Sauce?

Definition and Ingredients of Hickory Smoked BBQ Sauce

At its core, hickory smoked BBQ sauce is a bold, sweet, and smoky condiment that owes its unmistakable flavor to hickory wood smoke. Unlike your typical BBQ sauce that may lean heavily on either sweetness or tang, this version achieves a smoky-sweet harmony that adds depth to everything from grilled ribs to roasted vegetables.

Hickory itself is a hardwood native to North America and has been used in traditional Southern barbecue for decades. Its smoke imparts a rich, earthy character to meats and sauces. When infused into a barbecue sauce—either through liquid smoke or actual smoked ingredients—it delivers a flavor that’s warm, woody, and slightly bacon-like.

A simple homemade version includes:

IngredientRole in Flavor
Tomato sauce & pasteRich base and thickness
Worcestershire sauceUmami boost
Honey or maple/agaveNatural sweetness
Liquid smokeAdds that signature hickory flavor
Garlic & onion powderSavory depth
White vinegarTangy balance
Smoked paprika & chili powderComplex smoky spice
CayenneOptional heat

Learn more about building rich homemade sauces like this one: Check out this guide to scratch-made condiments

Origins and Popularity in American Barbecue Culture

Hickory smoked BBQ sauce finds its roots in Southern-style barbecue—especially in regions like Tennessee, Kentucky, and North Carolina where hickory wood is commonly used in smoking meats. Traditionally, barbecue isn’t just about taste—it’s about technique and storytelling. And the sauce, especially one made with hickory smoke, is a huge part of that narrative.

During the 20th century, as backyard barbecuing gained popularity across the U.S., the love for hickory flavor spread with it. Companies started bottling the flavor, adding liquid smoke to sauces to mimic the authentic pit-smoked experience. Today, hickory-smoked sauces are synonymous with hearty, robust barbecue that doesn’t shy away from flavor.

Whether used as a marinade, glaze, or dip, this sauce connects deeply with the traditions of slow cooking, family gatherings, and outdoor cookouts.

Flavor Profile – What Does Hickory Smoked BBQ Sauce Taste Like?

Smokiness and Sweetness Explained

Hickory smoked BBQ sauce is beloved for its bold and well-balanced flavor. At the first bite, you’re hit with a deep, smoky richness—a nod to the hickory wood smoke infusion. That smokiness isn’t just an afterthought; it’s front and center, wrapping around every ingredient like a campfire hug.

Following that bold introduction is a layer of sweetness that softens the edges. This sweetness usually comes from ingredients like honey, maple syrup, or agave, depending on your dietary preferences. It helps mellow the smokiness without overwhelming it, giving the sauce a velvety, sticky-sweet texture perfect for grilling.

The base of tomato sauce and paste gives it a hearty umami undertone, while a dash of vinegar brightens up the profile. Spices like garlic, paprika, and cayenne bring complexity and a touch of heat, creating a sauce that’s as versatile as it is flavorful.

Looking for inspiration? Try this smoky glaze in our baked BBQ cauliflower bites: Don’t miss our smoky vegan BBQ appetizer ideas

Comparing Hickory Smoke to Other Wood Flavors

When it comes to smoke flavor, not all woods are created equal. Hickory smoke delivers a strong, almost bacon-like flavor—robust enough to stand up to red meats like brisket and ribs, but still gentle enough for plant-based dishes when balanced correctly.

Here’s a quick comparison of common wood smoke flavors:

Wood TypeFlavor ProfileBest For
HickoryBold, earthy, smoky, bacon-likeRibs, brisket, sauces
ApplewoodSweet, mildChicken, pork, fruits
MesquiteIntense, earthy, slightly bitterBeef, game meats
CherrySlightly sweet, tartPoultry, veggies, sauces
OakMedium smoky, neutralAll-purpose

Hickory sits comfortably in the middle—it’s bolder than applewood but more balanced than mesquite. That’s why hickory smoked BBQ sauce feels so satisfying: it brings a sense of authenticity and richness to whatever it touches.

If you’re wondering what makes a store-bought BBQ sauce taste like it came from a pitmaster’s grill, it’s likely hickory smoke doing the heavy lifting.

Hickory Smoked BBQ Sauce vs. Original BBQ Sauce – What’s the Difference?

Flavor, Texture, and Color Comparison

While all BBQ sauces aim to deliver bold flavor, hickory smoked BBQ sauce brings something uniquely smoky and savory to the table. Let’s break down how it differs from the traditional or “original” BBQ sauces found on most grocery shelves:

FeatureHickory Smoked BBQ SauceOriginal BBQ Sauce
FlavorSmoky, slightly sweet, rich, with deep earthy notesBalanced sweet-tangy, mild spice, little to no smoke
ColorDarker reddish-brown, often deeper due to smoked paprika or chiliLighter red to brown, depending on brand
TextureThick and sticky, perfect for glazing and clinging to grilled foodsMedium-thin to thick, smoother in texture
AromaWood-smoke forward, evokes grilled or fire-cooked foodsSweet and tangy, more like ketchup-based marinades

The biggest flavor factor is smokiness. While original BBQ sauces rely heavily on sweetness and vinegar for their zing, hickory smoked BBQ sauce layers in that campfire-like warmth that comes from real or liquid smoke.

Plus, the extra spices like smoked paprika, cayenne, and chili powder give it a kick that original sauces often lack. It’s like the difference between roasted and raw vegetables—one is deeper, more complex, and undeniably more “cooked.”

Discover great ideas like this flavorful twist on smoky BBQ pasta: Check out our bold BBQ-inspired comfort dishes

Use Cases: When to Choose Hickory Over Classic

If you’re wondering when to use Hickory Smoked BBQ Sauce over a traditional BBQ sauce, the answer lies in what you’re cooking and the flavor intensity you want.

Choose hickory smoked BBQ sauce when:

  • You’re grilling or smoking meats and want bold, smoky depth.
  • You’re making jackfruit, tofu, or mushrooms and want to mimic grilled meat flavor.
  • You want a sauce that can stand up to high heat without burning or separating.
  • You need a marinade or glaze that clings well and caramelizes beautifully.

Opt for original BBQ sauce when:

  • You want something lighter and sweeter, like for chicken nuggets or fries.
  • You’re cooking for kids or spice-averse guests.
  • You’re making a barbecue dip or dressing for cold dishes.

The bottom line? Hickory smoked BBQ sauce is your go-to when you want drama, depth, and that unmistakable grilled essence—even if you’re not near a fire.

How to Make Homemade Hickory Smoked BBQ Sauce

Ingredients for hickory smoked BBQ sauce on kitchen counter
Key ingredients used in making homemade Hickory Smoked BBQ Sauce

Step-by-Step Hickory Smoked BBQ Sauce Recipe with Common Ingredients

Making your own hickory smoked BBQ sauce at home is easier than you think—and it tastes far superior to most bottled versions. With just a few pantry staples, you can whip up a sauce that’s sweet, smoky, tangy, and customizable to your exact flavor preference.

Here’s the simple recipe I perfected in my kitchen:

Ingredients:

  • ¾ cup tomato sauce
  • 2 tbsp tomato paste
  • 4 tsp honey or maple/agave syrup
  • 2 tbsp Worcestershire sauce (or vegan substitute)
  • 4 tsp white vinegar
  • 2 tsp liquid smoke (hickory flavor)
  • 1 tsp garlic powder
  • 1 tsp onion powder
  • 2 tsp smoked paprika
  • 1 tsp chili powder
  • ⅛ tsp cayenne pepper (optional for heat)
  • ⅛ tsp salt (or to taste)

Instructions:

  1. In a medium bowl, combine all ingredients. Stir thoroughly until fully blended.
  2. For a deeper flavor, simmer the sauce on low heat for 10–15 minutes, stirring occasionally. This helps meld the flavors together beautifully.
  3. Let the sauce cool slightly, then transfer to a glass jar or airtight container.
  4. Store in the refrigerator for up to 2 weeks, or freeze for long-term storage.

This sauce works great as a marinade, grilling glaze, or a dipping sauce for everything from plant-based proteins to chicken wings.

Don’t miss our easy marinade hacks for smoky flavor: Check out this grilling and sauce prep guide

Customizing Heat, Sweetness, and Smokiness

Everyone’s BBQ preferences are different. That’s the beauty of homemade sauce—you get to tweak it your way.

Here are a few adjustment tips:

PreferenceWhat to Add
More heatAdd extra cayenne, hot sauce, or minced chipotle
Less sweetReduce honey/maple or increase vinegar
Extra tangAdd more vinegar or a splash of lemon juice
Deeper smokinessUse an additional ½ tsp of liquid smoke
Richer thicknessAdd more tomato paste or simmer longer

Want it vegan? Just substitute Worcestershire sauce with a vegan version or soy sauce and a splash of balsamic for depth.

This flexible formula lets you tailor the sauce to your dish—whether you’re slathering it on pulled jackfruit sliders or brushing it over ribs.

Print
clock clock iconcutlery cutlery iconflag flag iconfolder folder iconinstagram instagram iconpinterest pinterest iconfacebook facebook iconprint print iconsquares squares iconheart heart iconheart solid heart solid icon
Homemade hickory smoked BBQ sauce in a glass jar

Hickory smoked BBQ sauce

5 Stars 4 Stars 3 Stars 2 Stars 1 Star

No reviews

Print Recipe
Pin Recipe

Hickory smoked BBQ sauce delivers rich, smoky flavor—learn how to make, store, and use it for bold BBQ dishes.

  • Total Time: 15 minutes
  • Yield: 1.5 cups 1x

Ingredients

Scale

¾ cup tomato sauce

4 tsp honey or maple/agave syrup

2 tbsp Worcestershire sauce or vegan substitute

4 tsp white vinegar

2 tsp liquid smoke

1 tsp garlic powder

1 tsp onion powder

⅛ tsp Salt (or to taste)

2 tsp Smoked paprika

⅛ tsp Cayenne

2 tbsp tomato paste

1 tsp chili powder

Instructions

Mix all the ingredients in a bowl, making sure everything is well combined

Enjoy the sauce as a marinade or a dip for your BBQ nights!

  • Author: Sarah
  • Prep Time: 5 minutes
  • Cook Time: 10 minutes

Nutrition

  • Serving Size: 1.5 cups
  • Calories: 50
  • Sugar: 11g
  • Sodium: 300mg
  • Carbohydrates: 13g

Did you make this recipe?

Share a photo and tag us — we can’t wait to see what you’ve made!

Best Uses for Hickory BBQ Sauce in Recipes

Grilling, Smoking, and Baking Applications

Hickory smoked BBQ sauce isn’t just a condiment—it’s a flavor powerhouse that transforms everyday dishes into smoky sensations. Whether you’re grilling over open flames or roasting in the oven, this sauce clings, caramelizes, and deepens flavor like no other.

Here are the top ways to use it:

1. Grilling

Slather it onto ribs, burgers, tofu slabs, or portobello mushrooms during the last 5–10 minutes of cooking. The sugars in the sauce caramelize beautifully, creating a sticky, flavorful crust.

2. Smoking

If you’re working with a smoker, use this sauce as a basting liquid. Apply it in layers throughout the smoking process, especially during the last hour, to build up a thick, smoky glaze.

3. Baking

Toss cauliflower, chickpeas, or meatballs in hickory BBQ sauce before roasting. You’ll get a crispy, smoky coating that feels like it came straight off the grill.

4. Stovetop Simmering

Mix the sauce into pulled jackfruit, seitan, or shredded chicken on the stovetop for a quick BBQ filling. Perfect for sliders, wraps, or bowls.

Looking for inspiration? Try this crowd-pleasing BBQ sandwich filling: Discover great ideas like our smoky jackfruit BBQ wraps

Top 5 Dishes That Pair Perfectly with Hickory Sauce

 Jackfruit sliders with hickory BBQ sauce
BBQ jackfruit sliders glazed with Hickory Smoked BBQ Sauce

Hickory BBQ sauce shines when paired with hearty, bold-flavored ingredients. Here are my top five pairings:

DishWhy It Works
BBQ Jackfruit SlidersThe smoky sauce mimics real pulled pork texture and flavor
Grilled Tempeh SteaksTempeh soaks up the bold hickory notes and caramelizes well
Roasted Cauliflower WingsCoated in sauce and crisped in the oven for a vegan delight
BBQ Chicken ThighsSmoky, sticky, and satisfying—classic American BBQ
Baked BBQ MeatballsSauce binds and glazes them for a flavorful main or appetizer

You can even drizzle it on flatbreads, tacos, or nachos to bring a bold BBQ twist to everyday meals. And don’t forget—it makes a phenomenal dip for sweet potato fries or roasted veggies.

Nutritional Facts and Dietary Substitutes

Calories, Sugars, and Vegan-Friendly Variants

Homemade hickory smoked BBQ sauce gives you full control over what goes into your body—no preservatives, no high-fructose corn syrup, and absolutely customizable for any diet. Here’s what you can expect nutritionally, based on the base recipe provided earlier:

Approximate Nutritional Breakdown (per 2 tbsp serving):

NutrientAmount
Calories45–60 kcal
Sugar6–8g (depending on sweetener)
Sodium140–200mg (adjustable with salt/Worcestershire)
Fat0g
Carbs10–12g
Protein0.5g

The majority of calories come from natural sugars in honey or maple syrup, and from the tomato base. If you’re using agave syrup, the glycemic index is a bit lower, which may help with blood sugar control.

Vegan tip: Replace Worcestershire sauce with a vegan alternative, or make your own with soy sauce, vinegar, molasses, and tamarind paste for that deep umami hit.

Using Natural Sweeteners and Low-Sodium Alternatives

If you’re aiming for a healthier version of hickory smoked BBQ sauce, small tweaks can make a big impact without compromising flavor.

To Reduce Sugar:

  • Use unsweetened applesauce in place of half the sweetener.
  • Add a pinch of stevia or monk fruit sweetener.
  • Balance with extra vinegar or lemon juice to maintain tang.

To Lower Sodium:

  • Use low-sodium tomato sauce.
  • Make your own salt-free Worcestershire substitute.
  • Add more herbs and spices like smoked paprika or cumin to intensify flavor without salt.

For Paleo or Whole30:

  • Sweeten with dates or date syrup.
  • Use coconut aminos in place of Worcestershire.
  • Skip liquid smoke and opt for real wood-smoked ingredients (like smoked paprika).

The key takeaway? You don’t have to sacrifice flavor to eat clean. Hickory smoked BBQ sauce can be made to fit nearly any diet with the right substitutions.

Expert Tips for Cooking with Hickory Sauce

Marinating vs. Basting: Timing and Techniques

Cooking with hickory smoked BBQ sauce isn’t just about slathering it on—it’s about timing and technique. When used strategically, this bold, smoky sauce can elevate your dish from good to unforgettable.

Marinating: Let the Flavor Soak In

Use hickory smoked BBQ sauce as a marinade for both meats and plant-based proteins (like tempeh, tofu, or mushrooms). For best results:

  • Marinate for at least 30 minutes, but up to 24 hours for maximum flavor.
  • Cover and refrigerate the marinating item in a sealed container or zip-top bag.
  • Avoid marinating too long if your sauce contains a lot of vinegar—it can affect texture.

Best for: Chicken thighs, tofu slabs, portobello mushrooms, jackfruit.

Basting: Build Flavor Layers

Basting involves brushing the sauce onto food while it cooks, usually on a grill or in the oven.

  • Start basting during the last 5–10 minutes of cooking to prevent burning (sugar in the sauce can char quickly).
  • Apply multiple thin coats instead of one thick layer for a sticky, glossy finish.
  • Flip and reapply every few minutes to build up that beautiful glaze.

Best for: Ribs, burgers, baked cauliflower wings, seared seitan.

How to Layer Flavors Without Overpowering

Hickory smoked BBQ sauce is bold—but with boldness comes the responsibility to balance. Here’s how to let the sauce shine without overwhelming your dish:

1. Use Sauce Sparingly at First

Start with a light coating and build from there. Especially with grilled foods, a little goes a long way.

2. Pair with Neutral Bases

Let your sauce pop by pairing it with ingredients that don’t compete in flavor. Roasted sweet potatoes, grains, and white beans all make excellent companions.

3. Add Contrast

Balance the smokiness by including something tangy (like pickled onions), creamy (like coleslaw), or fresh (like herbs or citrus) in your meal.

4. Mix into Other Sauces

For something more subtle, blend your BBQ sauce into aioli, yogurt, or vinaigrettes to spread the flavor across different parts of the dish.

Remember, layering flavors is like building music—let the smoke be your bass note, and add brightness or texture to create a full, satisfying “chord.”

Store-Bought vs. Homemade Hickory BBQ Sauces

Top-Rated Brands You Can Buy

While nothing beats the depth and freshness of homemade hickory smoked BBQ sauce, there are some solid store-bought options if you’re in a pinch. The key is finding sauces that don’t load up on high-fructose corn syrup or artificial smoke.

Here are a few top-rated hickory BBQ sauces available in most U.S. grocery stores or online:

BrandWhy It’s PopularNotes
Stubb’s Hickory Bourbon BBQAll-natural, no HFCS, bold smoke flavorGreat for grilling and basting
Sweet Baby Ray’s Hickory & Brown SugarSweet and thick, kid-friendlyMore sugary, less spicy
Annie’s Organic Smoky Maple BBQOrganic and vegan-friendlyLighter, great for dipping
Bone Suckin’ Sauce HickoryGluten-free, clean ingredientsBalanced and not overly smoky

When choosing a store-bought version, read the label closely. Look for real ingredients like tomato paste, natural sweeteners, and natural hickory smoke. Avoid ones with long chemical-sounding additives—they can dull the real flavor you’re after.

Pros and Cons of Homemade Sauce from Scratch

Still wondering if making your own is worth it? Let’s compare the two options side-by-side:

AspectHomemade Hickory SauceStore-Bought Sauce
FlavorCustomizable, fresh, intense smokeConsistent, but sometimes artificial
Control Over IngredientsTotal control—sweetness, sodium, spiceLimited—often high sugar/sodium
Shelf Life1–2 weeks refrigerated (longer if frozen)Up to a year unopened
Time & Effort10–15 minutes to prepareInstant, no prep needed
CostUsually cheaper per batchMore expensive per ounce

If you’re someone who loves full-bodied flavor and cooking with purpose, homemade sauce is the way to go. But when you’re low on time, having a go-to bottled version with clean ingredients is a smart backup.

Storage Tips and Shelf Life

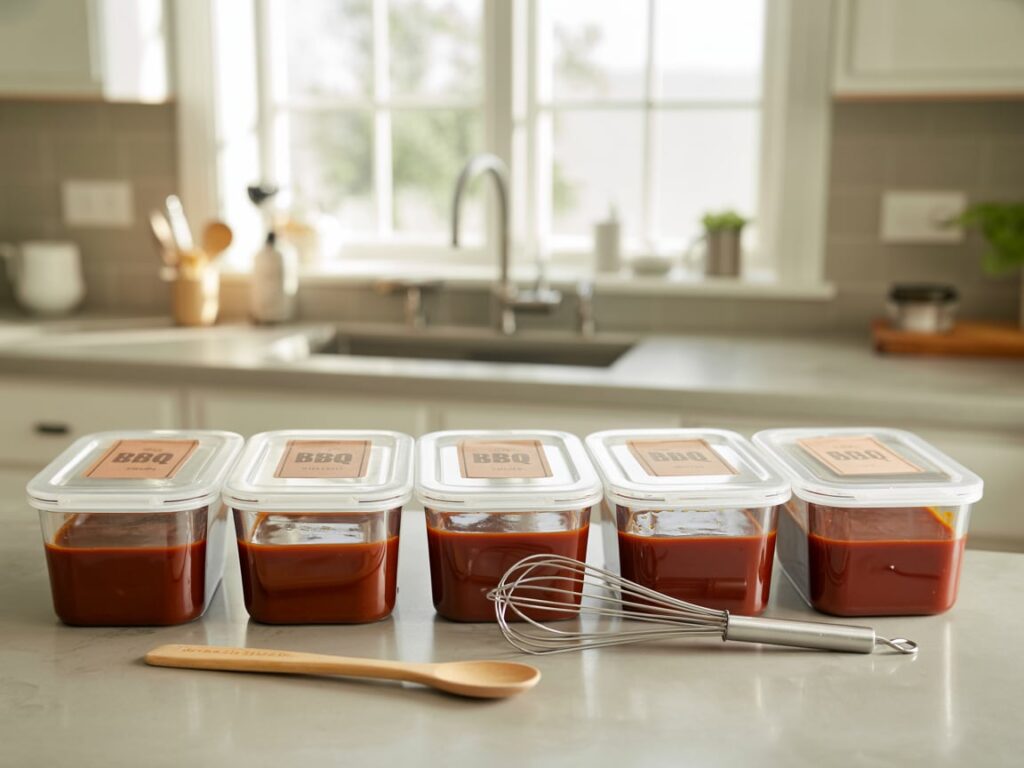
 BBQ sauce frozen in trays for storage
Homemade Hickory Smoked BBQ Sauce ready to freeze

Refrigeration and Freezing Guidelines

One of the best things about homemade hickory smoked BBQ sauce is how well it stores—meaning you can make a batch ahead and enjoy smoky flavor anytime. That said, storing it properly is crucial to maintain freshness and food safety.

Refrigerator Storage:

  • Shelf Life: 10–14 days
  • Storage Method: Transfer the sauce to an airtight glass jar or a BPA-free plastic container. Label it with the date for easy tracking.
  • Tip: Let the sauce cool completely before sealing and storing. This prevents condensation and preserves flavor.

Freezer Storage:

  • Shelf Life: 3–4 months
  • Storage Method: Use freezer-safe jars or silicone ice cube trays to freeze in portions.
  • To Use: Thaw in the fridge overnight or microwave in 30-second intervals, stirring between each.

Pro Tip: If you made a big batch for summer BBQ season, freezing half is a smart move. Thawed sauce retains most of its flavor and texture if stored correctly.

Signs Your BBQ Sauce Has Gone Bad

Even well-stored BBQ sauce doesn’t last forever. Watch for these signs that your sauce has gone off:

SignWhat It Means
Off smellA sour or fermented smell indicates spoilage
Mold or separationEspecially near the lid—discard immediately
Color changeDarkening or odd hues could suggest oxidation
Fizzing or bubblingNatural sauces shouldn’t ferment—throw it out

To extend shelf life even further:

  • Always use a clean spoon when scooping sauce.
  • Keep it sealed tightly and stored in the coldest part of your fridge.
  • Avoid cross-contamination by not dipping brushes or utensils directly into the storage jar during cooking.

Remember, fresh flavor starts with safe storage. When stored right, your hickory smoked BBQ sauce will be ready to elevate everything from weeknight dinners to backyard grill-outs.

Frequently Asked Questions (FAQs) About Hickory Smoked BBQ Sauce

What is hickory smoke barbecue sauce?

Hickory smoke barbecue sauce is a bold, sweet, and smoky condiment made using hickory wood smoke or liquid smoke extract. It’s crafted with a tomato-based foundation, enriched with sweeteners like honey or maple syrup, and spiced with ingredients such as smoked paprika, chili powder, and garlic. The defining characteristic is its robust smoky flavor, which mimics slow-cooked, pit-style barbecue even when used indoors or on non-smoked foods.

What is the difference between hickory and original BBQ sauce?

The key difference lies in the smokiness and intensity. Hickory BBQ sauce features a deeper, earthier flavor profile thanks to the addition of hickory smoke, giving it a wood-fired essence. Original BBQ sauce is usually milder, often sweeter and tangier, and lacks that strong, smoked character. Hickory sauce is ideal for hearty dishes like ribs or roasted jackfruit, while original BBQ suits lighter fare and broader palates.

What does hickory smoked BBQ taste like?

Hickory smoked BBQ delivers a rich, savory flavor with hints of wood-fired smoke, caramelized sugars, and umami from ingredients like Worcestershire or tamari. The smoke adds complexity and depth, with subtle notes of bacon or campfire char. The sweetness balances the bitterness of the smoke, resulting in a satisfying, well-rounded taste that lingers on the palate.

What does hickory barbecue sauce taste like?

Hickory barbecue sauce tastes smoky, slightly sweet, tangy, and bold. The hickory smoke gives it a hearty, grilled essence, while sweeteners and vinegar offer a balanced flavor. You’ll notice layers—starting with a touch of tang, then sweetness, followed by a savory depth that finishes with a gentle smoky heat. It’s especially delicious when used as a glaze on grilled or roasted foods.

Conclusion: Hickory Smoked BBQ Sauce

Hickory smoked BBQ sauce is more than just a condiment—it’s a celebration of flavor. From its deep roots in Southern barbecue traditions to the flexibility of crafting your own homemade version, this sauce brings smoky, bold personality to every meal. Whether you’re marinating, basting, grilling, or just dipping, you now have all the tools to make this sauce your own.

June 21, 2025 0 comments
0 FacebookTwitterPinterestThreadsBlueskyEmail
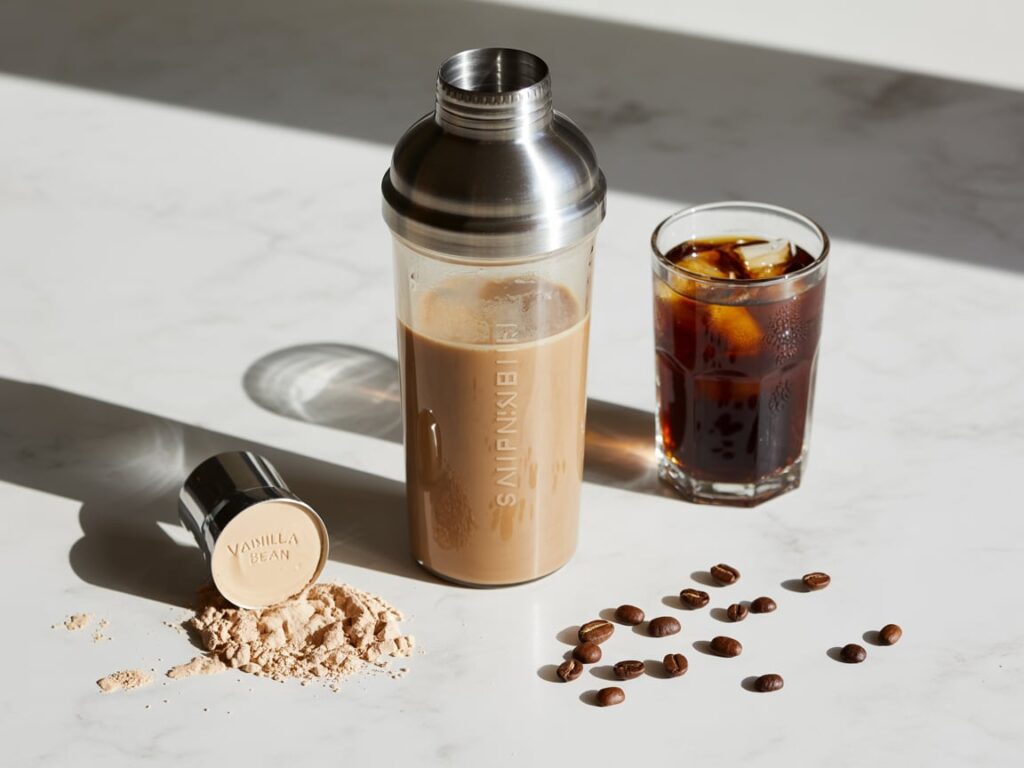
Protein coffee recipe with vanilla protein and cold brew
Drinks

Protein Coffee Recipe: The Best Energizing Blend to Boost Your Day

by Sarah June 19, 2025
written by Sarah

Protein coffee recipe—a buzzworthy trend that blends the bold flavor of coffee with the powerful punch of protein. But at Cozy Bites Recipes, it’s more than just a morning pick-me-up. It’s about comfort, connection, and creating something that feels like home in every sip.

I’m Sarah, the heart behind CozyBitesRecipes.com, and this protein coffee recipe is one of those magical combinations I first started exploring during busy mornings with my kids. Between getting breakfast ready and preparing lunchboxes, I needed something quick, energizing, and wholesome. And that’s where this recipe found its place in my kitchen. Rooted in the warmth of my grandmother’s cooking and my love for simple yet nourishing meals, I knew I had to share this gem with you.

Whether you’re a gym-goer needing a post-workout refuel or a parent needing to power through the morning hustle, this guide covers everything—from ingredients and health benefits to easy variations and expert tips.

👉 Looking for inspiration? Try our banana peach smoothie recipe if you’re craving something fruity and protein-packed later in the day.

Table of Contents
  • Understanding Protein Coffee Recipe: A Blend of Nutrition and Energy
  • How the Protein Coffee Recipe Trend Started: From TikTok to Fitness Gyms
  • Energy Boost with Lasting Satiety
  • Muscle Support and Weight Loss Companion
  • Choosing the Right Coffee Base: Cold Brew, Espresso, or French Press
  • Types of Protein to Use: Shakes vs Powders and Their Pros and Cons
  • Step-by-Step Instructions for the Perfect Proffee (Protein Coffee Recipe)
  • Alternative Recipes for Vegans, Keto, and Dairy-Free Diets
  • Flavor Add-Ins: Vanilla, Cinnamon, Cocoa & More
  • Sweeteners, Creamers, and Texture Enhancers
  • Macro Breakdown: Calories, Protein, Carbs & Fats
  • Is Protein Coffee Recipe Actually Healthy? Myths and Facts
  • Morning Kickstart vs Post-Workout Refuel
  • How Often Should You Drink It? Expert Recommendations
  • Mixing Protein Powder with Hot Coffee the Wrong Way
  • Flavor Imbalances and Texture Mistakes to Avoid
  • Can you mix protein with coffee?
  • What is the best protein to mix in coffee?
  • Is protein coffee actually healthy?
  • How much protein powder to put in a cup of coffee?

What is a Protein Coffee Recipe and Why It’s Trending

Understanding Protein Coffee Recipe: A Blend of Nutrition and Energy

At its core, a protein coffee recipe combines your favorite coffee with a dose of protein—usually from a shake or powder. It’s designed to give you the caffeine boost you crave while also keeping your muscles fueled and hunger at bay.

What sets this drink apart is how effortlessly it balances energy and nutrition. Unlike sugary coffee shop beverages, a well-made protein coffee can be low in carbs, high in protein, and tailored to your dietary needs. Whether you use whey, plant-based, or pre-made bottled shakes, the concept remains the same: energize smarter.

How the Protein Coffee Recipe Trend Started: From TikTok to Fitness Gyms

The rise of “Proffee” (protein + coffee) on TikTok catapulted this concept into mainstream popularity. Fitness influencers and everyday users alike began sharing their spins on the protein coffee trend, emphasizing how versatile and satisfying it is.

But this isn’t just a fleeting social media craze. Nutritionists and personal trainers now recommend protein coffee as a convenient breakfast or post-workout drink. And home cooks like me are turning it into a comforting ritual—just like any cozy latte or homemade treat.

👉 Discover great ideas like this high-protein sushi bake recipe for a satisfying post-coffee meal that fits your protein goals.

Benefits of Drinking Protein Coffee Daily

 Post-workout benefits of protein coffee recipe
Fuel your fitness with this protein coffee recipe

Energy Boost with Lasting Satiety

One of the biggest perks of following a protein coffee recipe is the dual power of caffeine and protein. While caffeine delivers an immediate mental alertness, the protein component ensures you stay full for hours. This combination helps reduce unnecessary snacking and keeps your energy stable, especially during busy mornings or long commutes.

The science backs it too—adding protein to your breakfast can reduce ghrelin (your hunger hormone) and improve focus throughout the day. Coffee alone might wake you up, but coffee with protein helps you stay productive and satisfied.

✔️ Pro Tip: If you’re always on the go, pre-mix your cold brew and protein shake in the fridge the night before. All you have to do in the morning is pour it over ice and stir.

👉 Learn more about how high-protein drinks impact your routine by checking out our chia seeds smoothie, another powerhouse blend you can rotate into your breakfast.

Muscle Support and Weight Loss Companion

For fitness enthusiasts, a solid protein coffee recipe can do more than wake you up—it can fuel your gains. After resistance training or cardio, your muscles are primed for recovery. A protein-packed beverage within 30 minutes post-workout helps repair muscle fibers and kickstart growth.

Not into lifting weights? No problem. Even on rest days, maintaining a consistent protein intake can support metabolism and fat loss by promoting lean muscle mass.

Plus, when paired with a calorie-controlled diet, replacing your usual sugary latte with a homemade protein coffee can help cut back on sugar and processed fats—supporting your weight goals without sacrificing taste.

💡 Looking for a flavorful twist? Don’t miss our 2-ingredient coffee loophole recipe that’s simple, satisfying, and just as trendy.

Best Ingredients for a Perfect Protein Coffee Recipe

Choosing the Right Coffee Base: Cold Brew, Espresso, or French Press

The base of your protein coffee recipe sets the tone for both flavor and texture. And the good news? You’ve got plenty of options. Let’s break them down:

Coffee TypeFlavor ProfileBest For
Cold BrewSmooth, low-acidIced protein coffee blends
Espresso ShotsBold, intenseStrong coffee lovers
French PressFull-bodied, richMellow, home-brewed versions
Drip CoffeeClassic and convenientQuick hot or iced versions

Using cold brew is the easiest when combining with pre-made protein shakes since it avoids clumping. But if you’re a fan of hot drinks, just let your espresso cool slightly before mixing to prevent curdling or damage to your shaker.

✔️ Don’t pour hot coffee directly onto ice in a glass. It can shatter from the temperature shock—use a heat-safe mug first.

👉 Discover more comforting drink ideas like our arizona watermelon fruit juice, perfect for midday hydration.

Types of Protein to Use: Shakes vs Powders and Their Pros and Cons

Your choice between protein shakes and powders depends on your goals, convenience, and dietary needs. Here’s a quick comparison to guide you:

Protein TypeProsCons
Bottled Protein ShakeReady to drink, quick to mixHigher cost, added sugars
Whey Protein PowderHigh bioavailability, creamy textureNeeds shaker or blender
Plant-Based PowderVegan-friendly, allergen-safeSometimes gritty or chalky
Collagen PeptidesSkin/joint support, dissolves easilyLower in complete proteins

If you’re in a hurry, bottled shakes like vanilla or chocolate blend seamlessly into cold coffee. But if you’re customizing your macros or flavors, powders give you more flexibility. Just be sure to shake or blend thoroughly.

💡 Sarah’s Tip: I like using vanilla plant-based protein with cold brew and a dash of cinnamon—it’s like a cinnamon latte but packed with 15g of protein!

👉 Check out our ABC fruit juice for another nutrient-rich option that complements your morning lineup.

Print
clock clock iconcutlery cutlery iconflag flag iconfolder folder iconinstagram instagram iconpinterest pinterest iconfacebook facebook iconprint print iconsquares squares iconheart heart iconheart solid heart solid icon
Protein coffee recipe with vanilla protein and cold brew

Protein Coffee Recipe

5 Stars 4 Stars 3 Stars 2 Stars 1 Star

No reviews

Print Recipe
Pin Recipe

Protein coffee recipe for energy and recovery. Learn how to make this creamy, high-protein drink at home in minutes.

  • Total Time: 3 minutes
  • Yield: 1 serving 1x

Ingredients

Scale

1 cup cold brew coffee

1 cup protein shake (vanilla, chocolate, or caramel)

½ cup ice

Instructions

Add ice to a glass.


Pour cold brew over ice.


Add protein shake and stir.

Notes

COFFEE VARIATIONS

It’s really up to you what type of coffee you use for your Proffee. I suggest using your favorite coffee you already have on hand. 


Any of these will work:


Drip Coffee – Be careful when pouring hot coffee into a glass with ice as it could cause the glass to shatter.

Espresso One or two shots depending on your preferred caffeine intake

Cold Brew Coffee – Prepared store bought cold brew or homemade.

French Press Coffee 


BOTTLED PROTEIN SHAKE OR PROTEIN POWDER?

The appeal to using a ready-to-drink  bottled protein shake over protein powder is that it can easily be poured over your coffee, where protein powders need to be mixed in a blender bottle, shocked together, or blended.


If you are using protein powder combine coffee, ice, whey protein, and a bit of unflavored almond milk into a big shaker cup. If you don’t like (or can’t have almond milk) regular dairy milk, soy milk, or oat milk are all good substitutes. 


The end result tastes almost the same no matter if you start with protein powder or a prepared liquid protein shake.  

  • Author: Sarah
  • Prep Time: 3 minutes
  • Cook Time: 0 minutes

Nutrition

  • Serving Size: 1 serving
  • Calories: 102
  • Fat: 2g
  • Carbohydrates: 2g
  • Protein: 15g

Did you make this recipe?

Share a photo and tag us — we can’t wait to see what you’ve made!

How to Make the Ultimate Protein Coffee Recipe at Home

 How to make a protein coffee recipe at home
Simple steps to create your protein coffee recipe

Step-by-Step Instructions for the Perfect Proffee (Protein Coffee Recipe)

Creating a satisfying protein coffee recipe at home is as easy as combining your favorite cold brew with a protein shake. Whether you’re using a store-bought protein drink or a scoop of powder, the steps are simple, fast, and foolproof.

Ingredients:

  • 1 cup cold brew coffee (or espresso/french press, cooled)
  • 1 cup protein shake (vanilla, caramel, or chocolate flavored)
  • ½ cup ice

Instructions:

  1. Add ice into a large glass.
  2. Pour cold brew over the ice.
  3. Add your protein shake (or powder + milk combo).
  4. Stir well until everything is fully combined. Enjoy!

✔️ Tip: If you’re using protein powder instead of a pre-made shake, mix it in a shaker bottle with a splash of almond or oat milk first. This avoids clumps and makes the texture smoother.

👉 Don’t miss our refreshing banana peach smoothie recipe if you want a fruity protein-packed option for later in the day.

Alternative Recipes for Vegans, Keto, and Dairy-Free Diets

No matter your lifestyle, there’s a protein coffee recipe variation for you. Here are a few swaps that cater to specific needs:

Vegan Protein Coffee:

  • Use plant-based protein (pea or soy) and oat milk.
  • Sweeten with agave or maple syrup if needed.

Keto-Friendly Proffee:

  • Stick with unsweetened cold brew.
  • Add low-carb protein powders (like whey isolate or collagen peptides).
  • Blend with unsweetened almond or coconut milk.

Dairy-Free Version:

  • Swap dairy protein shakes with almond, soy, or oat-based ones.
  • Choose cold brew coffee to maintain smoothness and avoid curdling.

💡 Flavor Tip: Add a splash of vanilla extract or cinnamon for a cozy upgrade without added calories.

👉 Check out our lesser-known but delicious high-protein dense bean salad as a savory complement to your morning proffee.

Tips to Customize Your Protein Coffee Recipe Like a Barista

Flavor Add-Ins: Vanilla, Cinnamon, Cocoa & More

The beauty of any protein coffee recipe lies in its flexibility. Once you’ve mastered the basic version, get creative with flavors and textures. Here are some popular—and delicious—add-ins to upgrade your morning brew:

Add-InFlavor ProfileHow to Use
Vanilla ExtractSweet, smooth¼ tsp stirred in or blended
Ground CinnamonWarm, spicy aromaSprinkle on top or mix into shake
Cocoa PowderRich, chocolateyMix 1 tsp with protein powder
Nut Butter (almond)Creamy, nutty depthBlend 1 tbsp for extra creaminess
Pumpkin SpiceCozy and seasonalAdd a dash for a fall-inspired flavor

These add-ins pair especially well with vanilla or caramel protein shakes and cold brew. Just remember, less is more—start small and adjust to taste.

✔️ Tip: Stirring in a little sugar-free hazelnut syrup gives your proffee café-style flair—without the sugar crash.

👉 Discover more customizable drinks like our ice water hack recipe, perfect for hydration between meals.

Sweeteners, Creamers, and Texture Enhancers

Not all protein shakes are sweet enough on their own. Here are some ways to adjust sweetness and creaminess without sacrificing nutrition:

Healthier Sweetener Options:

  • Stevia or monk fruit drops
  • Sugar-free syrups (vanilla, mocha, hazelnut)
  • A dash of honey or agave (if not low-carb)

Dairy-Free Creamers:

  • Unsweetened almond milk
  • Coconut milk creamer
  • Oat milk for a creamy, nut-free option

Texture Boosters:

  • Ice for a thicker, colder blend
  • Collagen peptides for added smoothness
  • Frozen banana (for smoothies with coffee)

If your coffee feels too thin, blending it with frozen ingredients or adding a spoonful of nut butter makes it richer—perfect for sipping on busy mornings.

💡 Want an even smoother experience? Use a handheld milk frother to blend everything together right in your glass.

👉 Don’t miss our red pepper coulis recipe to complement your protein-packed breakfast with bold flavor.

Nutrition Facts and Health Considerations of Protein Coffee Recipe

Protein coffee recipe nutrition facts and macros
Macro-friendly and energizing protein coffee recipe

Macro Breakdown: Calories, Protein, Carbs & Fats

When made right, a protein coffee recipe delivers excellent nutrition without weighing you down. Here’s an example of the macros for a standard homemade version using cold brew and a vanilla protein shake:

NutrientAmount per Serving
Calories102 kcal
Protein15g
Carbohydrates2g
Fat2g
Sugar7g
Cholesterol180mg
Calcium361mg
Sodium173mg
Potassium440mg

As you can see, it’s a low-calorie, high-protein option ideal for weight management, muscle maintenance, and energy support. Plus, it’s much healthier than sugar-laden specialty coffees or energy drinks.

✔️ If you’re tracking macros for fitness, proffee fits beautifully into most meal plans—especially when consumed pre- or post-workout.

👉 Check out our honey ginger dressing to balance your high-protein meal plan with anti-inflammatory ingredients.

Is Protein Coffee Recipe Actually Healthy? Myths and Facts

Let’s bust some common myths and get to the facts about the healthiness of protein coffee:

❌ Myth 1: Mixing protein and caffeine is harmful

✅ Fact: There’s no scientific evidence that combining protein and coffee negatively impacts absorption or digestion. As long as you’re not sensitive to caffeine, it’s perfectly safe.

❌ Myth 2: Protein coffee is just a trend

✅ Fact: It’s functional nutrition. Fitness experts and dietitians recommend it for busy mornings, recovery, and calorie-smart snacking.

❌ Myth 3: All protein coffees are created equal

✅ Fact: Not true. The nutritional quality depends on the ingredients you use. Bottled shakes with added sugars can reduce the health value. Go for clean protein powders or low-sugar pre-made shakes.

💡 Pro Tip: Always check the label on your protein shake or powder. Look for clean ingredients and avoid artificial fillers if you want your coffee to be as healthy as possible.

👉 Don’t miss our smoothies with Medjool dates—a naturally sweet option for protein-rich energy without processed sugars.

Best Time to Drink Protein Coffee for Maximum Results

Morning Kickstart vs Post-Workout Refuel

Timing is everything when it comes to getting the most out of your protein coffee recipe. Depending on your routine and goals, here’s how you can tailor it:

Morning Kickstart

Drinking protein coffee first thing in the morning helps replace traditional breakfasts with a more balanced, high-protein option. It’s perfect if:

  • You’re in a rush and need a grab-and-go meal
  • You want to stay full until lunch
  • You’re trying to avoid sugary breakfast cereals or pastries

Caffeine in coffee will jump-start your brain, while the protein slows digestion and keeps blood sugar stable. It’s a win-win for both productivity and health.

Post-Workout Refuel

Had a tough session at the gym? A protein coffee recipe within 30 minutes post-exercise supports:

  • Muscle recovery and repair
  • Reduced post-exercise soreness
  • Improved protein synthesis for muscle building

Just ensure your coffee base isn’t too acidic or hot—this can reduce palatability after intense workouts. Cold brew is usually the go-to option here.

✔️ Pro Tip: Add a banana or a scoop of collagen powder to your post-workout proffee for added recovery benefits.

👉 Learn more about nutrient-dense refueling with our steak chimichurri dense bean salad recipe, a perfect high-protein companion meal.

How Often Should You Drink It? Expert Recommendations

So how often should you enjoy this powerful combo? The answer depends on your lifestyle and diet, but here’s a helpful guideline:

GoalFrequency Suggestion
Weight loss1 serving in the morning
Muscle gain1–2 servings (AM + post-workout)
Busy lifestyle energy boostAs needed, max 1/day
Intermittent fastingBreak fast with proffee

Too much caffeine can lead to jitters or dehydration, so moderation is key. Keep total daily caffeine intake under 400mg—especially if you’re combining coffee with pre-workout or energy drinks.

💡 Sarah’s Tip: I limit myself to one proffee per day, usually mid-morning after a light walk. It gives me a great mental reset and carries me through the day!

Common Mistakes When Making Protein Coffee Recipe

Mixing Protein Powder with Hot Coffee the Wrong Way

One of the biggest errors people make with a protein coffee recipe is trying to stir protein powder directly into piping hot coffee. This usually ends in:

  • Clumping
  • Chalky texture
  • Curled or separated protein

Here’s how to avoid it:

  1. Let your coffee cool for at least 5–10 minutes before adding protein powder.
  2. Use a blender bottle or frother to properly dissolve the powder.
  3. Add a splash of cold milk before mixing into coffee to stabilize the temperature.

✔️ Best Practice: If you’re in a rush, pre-blend your protein with almond milk or water, then pour it into your coffee for a silky smooth texture.

👉 Don’t miss our brussel sprouts and ham quiche for a protein-packed breakfast that pairs well with your proffee.

Flavor Imbalances and Texture Mistakes to Avoid

Another common issue? Overpowering or bland flavor profiles. Protein coffee should be smooth, rich, and enjoyable—not a gulp-and-go chore.

Here’s how to strike the right balance:

  • Avoid overly sweet protein powders that clash with coffee’s natural bitterness.
  • Skip flavored creamers if your shake is already flavored.
  • Use unsweetened coffee bases so you can better control sweetness.

For texture:

  • Don’t skip the ice or milk if you want it cold and frothy.
  • Don’t use a spoon to stir powders—shaker bottles or mini blenders work better.

💡 Pro Tip: Adding a pinch of salt can balance sweetness and bitterness, enhancing flavor without extra calories.

👉 Looking for flavor-rich beverage alternatives? Check out our zobo drink recipe for a refreshing, immune-boosting sipper.

Frequently Asked Questions About Protein Coffee Recipe

Can you mix protein with coffee?

Yes, you absolutely can mix protein with coffee—and it’s actually a growing trend known as “proffee.” Just be sure to avoid pouring hot coffee directly onto protein powder. For best results:
Let the coffee cool slightly
Use a shaker bottle, blender, or frother
Mix your protein first with a bit of milk or water to prevent clumping
Many people now use this mix as a healthier breakfast or post-workout shake with a caffeine boost.

What is the best protein to mix in coffee?

The best protein for a protein coffee recipe depends on your taste, dietary preferences, and goals. Here are a few top options:
Whey Protein Isolate: Easily dissolves, great post-workout
Collagen Peptides: Dissolves in hot or cold coffee, supports joints & skin
Plant-Based Protein (Pea, Soy): Perfect for vegans, especially with cold brew
Ready-to-Drink Shakes: Great for convenience; just pour and stir

Is protein coffee actually healthy?

Yes—when made properly, a protein coffee recipe can be an incredibly healthy addition to your day. It’s a:
High-protein, low-carb option
Great alternative to sugary coffeehouse drinks
Satisfying breakfast or snack that fuels your energy and reduces cravings
Avoid highly processed protein shakes or those with added sugars. Stick to clean ingredients and limit yourself to one proffee a day to stay within safe caffeine limits.

How much protein powder to put in a cup of coffee?

The ideal amount is 1 full scoop of protein powder (typically 20–25g of protein), depending on your dietary needs. If you’re using a bottled protein shake, aim for around 8–12 oz, which usually contains 15–20g of protein.
✔️ Tip: Always read the label—some powders are more concentrated than others. When in doubt, start with half a scoop and adjust based on taste and texture.
👉 Learn more about nutritious drinks with our natural Zepbound recipe, which complements a balanced diet.

Conclusion: Protein Coffee Recipe

A protein coffee recipe is more than a social media trend—it’s a practical, energizing, and nourishing drink that fits into just about any lifestyle. Whether you’re a busy parent trying to simplify breakfast, a fitness enthusiast looking for smart recovery options, or just someone who loves their morning coffee with a boost, proffee delivers flavor and fuel in one easy glass.

At Cozy Bites Recipes, we believe in making comfort food simple—and your coffee should be no exception. With the right coffee base, the perfect protein, and a few custom touches, you can turn your daily brew into a satisfying ritual that energizes your body and brings joy to your routine.

👉 Don’t miss our easy homemade sugar scrub—a relaxing addition to your morning routine alongside your protein coffee.

June 19, 2025 0 comments
0 FacebookTwitterPinterestThreadsBlueskyEmail
high protein sushi bake recipe fresh from oven
Lunch

High Protein Sushi Bake Recipe: The Best 30g+ Protein Comfort Dish

by Sarah June 18, 2025
written by Sarah

High protein sushi bake recipe—that’s where we’re starting today, right in the heart of the kitchen that’s filled with warmth, laughter, and a whole lot of flavor. At Cozy Bites Recipes, cooking has always meant more than just putting food on the table. It’s about creating comfort, sparking memories, and finding joy in simple, nourishing meals that bring people together. Inspired by childhood afternoons spent baking with my grandmother and now fueled by the energy of raising two little ones, my journey with food has always revolved around love, simplicity, and family.

So when I stumbled across the idea of a sushi bake—a comforting, oven-baked twist on traditional sushi—I knew it needed a Cozy Bites spin. But this isn’t just any bake. This High Protein Sushi Bake Recipe is a cozy, satisfying, and nutrient-dense version that fits right into a health-conscious lifestyle.

Whether you’re after a fitness-friendly dinner, meal prep solution, or a twist on your favorite Japanese flavors, this High Protein Sushi Bake Recipe delivers on both taste and nourishment. In this guide, we’ll explore protein-packed ingredient swaps, macro-balanced toppings, baking tips, and how to store it for easy meals all week long.

Looking for inspiration? Try this protein-rich bean salad that pairs beautifully with this sushi bake for a complete macro-friendly plate.

Table of Contents
  • What is a High Protein Sushi Bake?
  • Key Ingredients for a High Protein Sushi Bake Recipe
  • Step-by-Step High Protein Sushi Bake Recipe Guide
  • How to Make Your Sushi Bake Even Higher in Protein
  • Best Protein Combinations for High Protein Sushi Bake Recipe
  • Tips for Meal Prep and Storage: High Protein Sushi Bake Recipe
  • Nutritional Breakdown & Health Benefits: High Protein Sushi Bake Recipe
  • Serving Suggestions and Side Dish Ideas: High Protein Sushi Bake Recipe
  • Common Mistakes to Avoid in a High Protein Sushi Bake Recipe
  • How much protein is in a sushi bake?
  • How to add more protein to sushi?
  • What type of sushi has the most protein?
  • Is sushi good for a high protein diet?
  • Conclusion: High Protein Sushi Bake Recipe

What is a High Protein Sushi Bake?

Understanding the Concept of Sushi Bake

A High Protein Sushi Bake Recipe is a deconstructed sushi roll turned into a warm, layered casserole. Think creamy textures and bold umami flavors, all baked together in one dish and served by the spoonful. Originally created as a home-cook-friendly twist on traditional sushi, this recipe skips the rolling mats and delicate wrapping. Instead, it layers rice, high-quality protein, and savory toppings into a satisfying, oven-baked meal that’s both comforting and macro-friendly.

But here’s where it gets even better. A high protein sushi bake takes this comfort-food favorite and boosts its nutritional profile, turning it into a meal that supports muscle gain, keeps you full longer, and fits seamlessly into high-protein diets. By simply tweaking a few ingredients—swapping in lean proteins, using low-fat condiments, and adding superfoods—you create a sushi bake that’s both crave-worthy and macro-conscious.

How It Differs from Traditional Sushi Rolls

Let’s break it down. Traditional sushi rolls are wrapped in seaweed and usually served cold or at room temperature. They can be delicate, time-consuming to prepare, and often light on protein—especially when filled with ingredients like cucumber, avocado, or imitation crab. A High Protein Sushi Bake Recipe, on the other hand, skips the fuss and boosts the nutrition. By layering hearty proteins like salmon, tuna, or tofu with seasoned rice and savory toppings, this baked version offers a more satisfying, meal-worthy alternative that still delivers on flavor.

By contrast, a high protein sushi bake recipe simplifies everything:

FeatureSushi RollHigh Protein Sushi Bake
AssemblyRolled with seaweedLayered in a casserole dish
TemperatureServed cold or room tempServed warm and baked
Protein ContentOften low to moderateCustomizable to high protein
Time to PrepareCan be time-consumingQuicker, no rolling required
Meal SizeLight, snack-size portionsFull-meal, hearty servings

This modern twist makes it easier to serve a crowd, meal prep for the week, or whip up a family-friendly dinner with zero stress. It’s also a fantastic way to sneak in more protein without sacrificing flavor—something every busy parent or fitness-minded foodie can appreciate.

Why Go High-Protein? Health and Fitness Benefits

Protein is essential—plain and simple. It’s the building block of muscle, supports blood sugar stability, and helps you stay full longer. That’s why a High Protein Sushi Bake Recipe is more than just a trendy meal—it’s a smart choice for active lifestyles, fitness goals, or anyone looking to eat with intention. By packing in quality protein, this dish fuels your body while satisfying your cravings for something cozy and crave-worthy.

Here’s why a high protein sushi bake recipe is ideal:

  • Supports muscle recovery: Especially when loaded with salmon, tuna, or chicken.
  • Improves satiety: Keeps you full longer, reducing the urge to snack.
  • Balances macros: Makes it easier to hit your daily protein goals.
  • Flexible & customizable: From tofu to shrimp, it’s easy to personalize.

Discover great ideas like this Southwest dense bean salad to combine with your sushi bake for a double protein punch.

And if you’re following a macro-balanced eating plan, this High Protein Sushi Bake Recipe fits like a glove. The base of sticky rice delivers energizing carbs, while lean protein layers make it hearty and satisfying. Toppings like Greek yogurt, spicy sriracha, or seaweed flakes add extra flavor, fiber, and nutrients—without sacrificing convenience or comfort.

Ready to build your own high-protein creation? In Part 2, we’ll break down the best ingredients to craft a sushi bake that’s both delicious and nutrient-rich.

Key Ingredients for a High Protein Sushi Bake Recipe

high protein sushi bake ingredients flat lay
Salmon, quinoa, and tofu—key ingredients for a protein-rich bake

Protein-Rich Options: Salmon, Tuna, Crab, Tofu, and Egg

Protein is the heart of any High Protein Sushi Bake Recipe—it’s what gives the dish its staying power and satisfying bite. The good news? You’ve got plenty of flavorful, muscle-building options to choose from. Whether you’re going for classic or creative, these protein picks will help you meet your goals without compromising on taste or texture:

  • Salmon: Packed with omega-3s and 20+ grams of protein per 3-ounce serving, salmon is a classic sushi ingredient and the gold standard for flavor and nutrition. Try it air-fried or baked.
  • Tuna: Whether canned or fresh, tuna brings a lean protein punch with around 25g of protein per serving. It’s savory and budget-friendly.
  • Imitation Crab (Surimi): While lower in protein (around 6-10g per serving), it’s often used for flavor and texture. Pair with another high-protein option for balance.
  • Firm Tofu or Tempeh: Ideal for vegetarian versions, tofu delivers around 10g per ½ cup and absorbs flavor well.
  • Boiled Eggs: Chop them into your base or top your bake after cooking. One large egg = ~6g protein.
  • Shrimp or Chicken: Excellent add-ins for lean protein lovers. Grill, chop, and layer in with the rice and sauce.

💡 Pro Tip: Combine multiple proteins like shredded salmon + egg + tofu for a richer, more nutrient-dense result.

Carbs and Complementary Ingredients: Sushi Rice, Seaweed, Furikake

Your sushi bake starts with a solid base—and while rice brings the comfort, you can elevate nutrition by adding in healthy grains and flavor boosters:

  • Sushi Rice: Classic, sticky, and essential for the sushi vibe. Choose short-grain white or brown rice for structure.
  • Quinoa or Cauliflower Rice: For low-carb or fiber-rich versions, these are smart swaps that won’t sacrifice texture.
  • Seaweed (Nori Sheets): Crumble between layers or serve as a scoop wrap. Seaweed adds umami, iodine, and crisp.
  • Furikake: This Japanese seasoning blend (with sesame seeds, seaweed flakes, dried fish) enhances every bite with depth.
  • Pickled Ginger & Cucumbers: Optional but amazing for balance and freshness.

✨ Don’t miss our flavorful twist in this Japanese Mounjaro Recipe, which also includes seaweed-forward ingredients you can adapt for this bake.

Choosing High-Protein Toppings and Sauces: Greek Yogurt, Kewpie Mayo Alternatives

In any High Protein Sushi Bake Recipe, sauces are the finishing touch that tie everything together. But they don’t have to weigh you down. Instead of traditional mayo, elevate your bake with protein-packed sauce alternatives that still deliver on creaminess, flavor, and that crave-worthy finish.

Sauce OptionProtein ContentNotes
Greek YogurtHighTangy, thick, and mayo-like when mixed with sriracha
Low-Fat KewpieMediumStill creamy, with less fat and sugar
Cottage Cheese BlendsHighBlend until smooth for a protein dip alternative
Avocado-Yogurt MashModerateAdds healthy fat + creaminess
Protein Mayo (DIY with whey or egg white protein)HighCustom-made for muscle-focused diets

Top it all off with a zigzag of spicy yogurt sauce, sesame seeds, green onions, and a sprinkle of crunchy tempura flakes if desired.

Check out how we transformed creamy components in this banana peach smoothie recipe—another cozy combo of protein + flavor.

Print
clock clock iconcutlery cutlery iconflag flag iconfolder folder iconinstagram instagram iconpinterest pinterest iconfacebook facebook iconprint print iconsquares squares iconheart heart iconheart solid heart solid icon
high protein sushi bake recipe fresh from oven

High Protein Sushi Bake Recipe

5 Stars 4 Stars 3 Stars 2 Stars 1 Star

No reviews

Print Recipe
Pin Recipe

This high protein sushi bake recipe is easy to make, packed with over 30g protein per serving, and perfect for meal prep or post-workout recovery.

  • Total Time: 27 minutes
  • Yield: 6 1x

Ingredients

Scale

2 cups sushi rice or quinoa

16 oz cooked salmon

3/4 cup imitation crab

2 tbsp Greek yogurt

1 tbsp sriracha

2 eggs, boiled

1 tbsp low sodium soy sauce

2 nori sheets, crumbled

1 tbsp furikake

Instructions

Preheat oven to 375°F.

Cook and mix rice or quinoa with vinegar and seasoning.

Layer rice in a greased baking dish.

Top with crushed nori, protein mix, and creamy sauce.

Bake for 10–12 mins. Broil for 2–3 mins for crispy top.

Garnish with green onions, furikake, and optional sauce drizzle

Notes

Rice Options: Sushi rice is ideal, but short-grain white rice or even your favorite white or brown rice will work just fine. You can also use my Instant Pot sushi rice for a quicker option.

Storage Tips: Let the sushi bake cool completely, then store it in an airtight container or cover the baking dish tightly with foil. Keep it in the refrigerator for up to 2–3 days. Be sure to store the nori sheets separately to keep them crisp until serving.


How to Reheat: To reheat, place the sushi bake in an oven-safe dish, cover it, and warm at 177°C (350°F) for 10–12 minutes or until heated through. For a quicker method, microwave in 20-second intervals until warmed to your liking.

  • Author: Sarah
  • Prep Time: 15 minutes
  • Cook Time: 12 minutes

Nutrition

  • Serving Size: 6
  • Calories: 370 kca
  • Fat: 14 g
  • Carbohydrates: 26 g
  • Protein: 32 g

Did you make this recipe?

Share a photo and tag us — we can’t wait to see what you’ve made!

Step-by-Step High Protein Sushi Bake Recipe Guide

sushi bake with protein layers mid-prep
Layered High Protein Sushi Bake Recipe ready for the oven

Preparation of Ingredients: Cooking, Shredding, and Assembling: High Protein Sushi Bake Recipe

Getting ready is half the fun—and this high protein sushi bake recipe keeps it simple and rewarding. Here’s what you’ll need to prep:

Protein Layer:

  • Salmon or Tuna: Bake or air-fry 12–16 oz skinless filets at 375°F for 10–12 minutes. Let cool slightly, then shred.
  • Optional Add-ins: Dice 2 boiled eggs, ½ cup tofu, or ½ cup cooked shrimp for extra protein variety.
  • Crab Mix (if used): Shred ¾ cup imitation crab and mix it with a spoonful of light Greek yogurt or low-fat Kewpie.

Sauce Base:

  • In a bowl, mix:
    • ¼ cup Greek yogurt (or mayo alternative)
    • 1 tablespoon sriracha (adjust to taste)
    • 1 teaspoon low-sodium soy sauce or coconut aminos
    • Optional: Add ½ scoop unflavored protein powder for an extra boost

Sushi Rice Base:

  • Cook 2 cups of sushi rice (or 1½ cups quinoa or cauliflower rice for low-carb).
  • Mix rice with 1 tablespoon rice vinegar, a pinch of salt, and ½ teaspoon of erythritol or sugar.

Assembly Prep:

  • Preheat your oven to 375°F (190°C).
  • Lightly grease a baking dish (8×8 or similar).
  • Crumble 2–3 sheets of nori into fine pieces.

Layering Your Bake for the Best Texture and Flavor

Time to build your flavor-packed layers! Here’s how to stack it up like a pro:

Step 1: The Base

  • Press your rice layer evenly into the bottom of the dish.
  • Sprinkle with furikake and a pinch of sea salt.

Step 2: Nori & Mix

  • Scatter crushed seaweed (nori) over the rice.
  • Evenly layer your protein mix on top—salmon, tuna, crab, or all three.

Step 3: Creamy Sauce

  • Spread your spicy protein sauce mix across the top.
  • Add a few dots of extra Greek yogurt or Kewpie for richness.

Step 4: Bake It

  • Bake for 10–12 minutes uncovered until slightly bubbly.
  • Broil for 2–3 minutes if you want a crispy top.

Step 5: Garnish & Serve

  • Top with:
    • Extra furikake
    • Thin sliced green onions
    • Sriracha drizzle
    • Optional: sesame seeds or avocado slices

Want more protein-enhanced inspiration? Don’t miss our bariatric seed recipe that’s perfect for topping or pairing.

Optimal Baking Times and Temperatures for Juicy Results

Precision matters! Follow these pro baking tips to get the most out of your protein:

Protein TypeBake TimeInternal TempTexture Tip
Salmon10–12 min145°FAir fry for crisp edges
Tuna8–10 min140°FCanned tuna needs only warming
Crab + Egg8–10 minN/AJust heat through, don’t overbake
Tofu10–12 minN/APress before baking for firmness

Don’t miss our purple peel recipe if you’re craving a tangy side dish that balances the richness of this sushi bake.

How to Make Your Sushi Bake Even Higher in Protein

Smart Swaps: Cottage Cheese, Quinoa, Protein Powder-Infused Mayo

If you’re chasing macros or need a more filling meal, a few easy swaps can seriously pump up the protein in your sushi bake—without making it taste like gym food.

1. Cottage Cheese (Blended):
Replace mayo or yogurt with blended low-fat cottage cheese. It adds creaminess and over 13g of protein per ½ cup. Use it in your seafood mix or as a topping base.

2. Quinoa for Rice:
Swap sushi rice with cooked quinoa to double the protein content of your base layer. One cup of quinoa offers 8g of complete protein with a nutty bite and more fiber.

3. Protein-Infused Mayo:
Make your own by blending:

  • 2 tbsp light mayo or Greek yogurt
  • ½ scoop unflavored whey or egg white protein
  • 1 tsp sriracha or soy sauce
    This turns a basic topping into a high-protein sauce with flavor and muscle fuel.

4. Greek Yogurt Over Kewpie:
Greek yogurt delivers double the protein and half the fat compared to traditional Japanese mayo.

Add-ins That Work: Edamame, Boiled Eggs, Shrimp, Tofu

Looking to sneak in even more grams of protein without throwing off the flavor balance? These mix-ins do the job while keeping the texture on point:

Add-inProtein (Per ½ Cup)Tips
Edamame9gBoil, shell, chop, and fold into the mix
Boiled Egg6g eachDice or mash into the seafood layer
Shrimp12gChop small and layer in
Tofu10gUse firm or extra-firm for structure

Use 1 or 2 of these within the same bake to boost variety and flavor. Want an even more satisfying side dish? Pair it with this high-protein dense bean salad to really max out your macros.

Using Lean Meat for Non-Seafood Versions

Not a seafood fan? You can still enjoy the layered goodness of a sushi bake with non-fish options that are just as protein-packed. Here are a few ideas:

  • Grilled Chicken Breast: Shred or dice it and toss with a spicy yogurt sauce. It pairs beautifully with rice or quinoa.
  • Ground Turkey: Season with garlic, ginger, and coconut aminos before layering.
  • Ground Beef (Lean 93%): Use sparingly, but a small amount can add flavor and depth, especially in fusion bakes.

For flavor inspiration, check out the steak chimichurri bean salad—those Latin spices work wonders when fused into a sushi bake.

Best Protein Combinations for High Protein Sushi Bake Recipe

Crab and Salmon Duo: A Protein-Packed Favorite

Combining crab and salmon is hands-down one of the most balanced, flavorful options for a high protein sushi bake recipe. You get the rich omega-3 fatty acids from salmon and the slightly sweet, chewy texture of imitation crab—all while keeping things lean and satisfying.

Why It Works:

  • Salmon provides 20–25g of protein per serving
  • Crab adds flavor and texture, with 8–10g protein
  • Together, they create a savory and layered seafood experience

Flavor Tip:
For this High Protein Sushi Bake Recipe, mix the salmon and crab with a protein-rich base of Greek yogurt, a splash of soy sauce, and a hint of sriracha for that creamy, spicy kick. This high-protein blend not only adds flavor but also enhances the overall texture—especially when paired with crunchy toppings like panko breadcrumbs or toasted sesame seeds.

If you’re looking to balance the richness, serve it with a light, citrusy side dish like our zobo drink recipe, which also helps aid digestion.

Chicken Teriyaki Sushi Bake Variation

If seafood isn’t your thing, try a teriyaki chicken sushi bake. It’s packed with lean protein and familiar flavors, making it great for picky eaters or anyone wanting a comforting, high-protein meal.

Protein Boost Breakdown:

  • Grilled chicken breast: ~26g of protein per 3 oz
  • Teriyaki glaze (low-sugar version): Adds flavor without excess calories
  • Optional: Stir in scrambled eggs for extra protein

Build It Like This:

  1. Sushi rice or quinoa layer
  2. Light seaweed crumble
  3. Diced grilled chicken tossed in teriyaki sauce
  4. A swirl of spicy yogurt sauce and a sprinkle of sesame seeds
  5. Bake, broil, and garnish with green onions

Craving a drink to go with it? Try our ice water hack recipe for a metabolism-friendly refresher.

Vegan Protein Sushi Bake with Tempeh and Black Beans

Plant-based? No problem. You can still enjoy a satisfying High Protein Sushi Bake Recipe without fish or meat. With the right protein-rich ingredients—like tofu, edamame, or tempeh—this plant-based version is hearty, spicy, and every bit as filling as the original.

Best Vegan Protein Combos:

  • Tempeh: Fermented soy that delivers 15g protein per ½ cup
  • Black Beans or Chickpeas: Add 7–8g protein per ½ cup
  • Tofu: Extra-firm tofu holds texture and adds mild flavor

How to Layer It:

  • Quinoa or cauliflower rice as your base
  • Sautéed tempeh and beans in soy sauce, garlic, and smoked paprika
  • Spicy tahini sauce or blended silken tofu “mayo”
  • Toppings: Furikake (vegan variety), pickled radish, green onions

💡 Don’t miss our natural mounjaro recipe if you’re into plant-based, functional meals.

Tips for Meal Prep and Storage: High Protein Sushi Bake Recipe

How to Store Sushi Bake Without Losing Texture

One of the best things about this high protein sushi bake recipe is how well it holds up for leftovers and meal prep. That said, sushi bake has a creamy top layer and rice base—so storage needs a little finesse to keep it tasting fresh.

Here’s how to store it right:

  • Use airtight containers: Divide the sushi bake into single-serving glass or BPA-free plastic containers. This keeps moisture locked in and prevents the rice from drying out.
  • Cool before sealing: Let the bake cool to room temp before refrigerating. Sealing it hot can create condensation that ruins the texture.
  • Layer parchment between servings (if stacked): Prevents sauce or garnish from sticking.
  • Refrigeration time: Keeps well in the fridge for up to 4 days.
  • Freezing? Only if you skip creamy sauces. Freeze protein and rice separately for best results.

Bonus Tip: Keep extra sauces (like sriracha or yogurt mayo) in mini containers to add fresh after reheating.

Reheating Tips for Maintaining Taste and Nutrients

Reheating a sushi bake can either restore its delicious, fresh-from-the-oven texture or leave it rubbery and dry. Follow these simple steps to enjoy your sushi bake just like the first time—warm, tender, and full of flavor every time.

Reheat MethodInstructionsPros
Microwave60–90 seconds with a damp paper towel on topFast, retains moisture
Oven350°F for 10–12 min, covered with foilCrisps the top, preserves texture
Air Fryer320°F for 5–6 minGreat for small portions

Avoid: Overheating proteins like salmon or tofu—they dry out easily. Always reheat with a moisture barrier (damp towel or foil).

Want a fun side to reheat with it? Try our semolina pudding recipes for a sweet and balanced follow-up.

Batch Cooking Ideas for Fitness Meal Plans

Meal prepping this high protein sushi bake recipe is a total game changer for anyone committed to a balanced, protein-packed diet. Here’s how to prep and store it so you can enjoy a week’s worth of flavorful, satisfying meals with ease:

Batch Prep Guide:

  • Double the Recipe: Use a 9×13 baking dish and split into 6–8 servings
  • Customize Portions: Mix and match layers—one version with chicken, one with tofu
  • Use Reusable Dividers: Prep multiple meals with rice on one side, sushi bake in another, sauce separately

Pro Tip:
Alternate your sushi bake servings with other protein-forward recipes like this natural Zepbound recipe to stay on track without getting bored.

Nutritional Breakdown & Health Benefits: High Protein Sushi Bake Recipe

macro breakdown high protein sushi bake
Sushi bake macros: 30g protein, 20g carbs, 15g fat

Caloric and Protein Macros per Serving

If you’re tracking macros or simply trying to eat cleaner, you’ll be glad to know this high protein sushi bake recipe checks all the boxes: lean protein, complex carbs, and customizable fats. Here’s an average breakdown for one serving (based on a 6-serving batch with salmon and Greek yogurt sauce):

NutrientAmount per Serving
Calories~330–420 kcal
Protein28–35g
Carbohydrates22–30g
Fats12–18g
Fiber2–4g

Note: Using quinoa instead of white rice can bump fiber up to 6g and add 2–3g more protein per serving.

Benefits of Omega-3s, Lean Proteins, and Whole Grains

Let’s break down why this dish is more than just tasty—it’s a nutritional powerhouse.

1. Omega-3 Fatty Acids from Salmon
Salmon is rich in omega-3s, which support:

  • Brain function
  • Joint health
  • Lower inflammation

2. Lean Proteins for Muscle Support
Whether you’re using chicken, shrimp, tofu, or eggs, lean proteins:

  • Support muscle recovery
  • Boost metabolism
  • Keep you full longer

3. Whole Grains and Fiber (Quinoa, Brown Rice)
Using whole grain alternatives:

  • Improves digestion
  • Keeps blood sugar stable
  • Supports heart health

4. High Satiety Factor
With 30+ grams of protein per serving, this dish keeps you satisfied for hours—making it ideal for lunch or post-workout recovery.

Looking for another nutrient-rich recipe? Check out our liver flush juice recipe for a detox-friendly drink that pairs well with this meal.

Why It Supports Weight Loss and Muscle Building Diets

The high protein sushi bake supports both fat loss and lean mass goals. Here’s why:

  • Protein Priority: With 30g+ per serving, this dish helps preserve muscle mass during calorie deficits.
  • Balanced Macros: It’s easy to pair with a high-fiber side like greens, edamame, or veggie stir-fry.
  • Easy to Portion: You can divide and freeze servings to control intake.

Fitness Tip: Add a scoop of collagen or egg white protein to the sauce for an extra boost—without impacting flavor or texture.

Serving Suggestions and Side Dish Ideas: High Protein Sushi Bake Recipe

Pairing with Pickled Veggies, Miso Soup, or Wakame Salad

To elevate your high protein sushi bake recipe into a full, well-balanced meal, think beyond the bake. Pairing it with the right side dishes boosts nutrition and brings vibrant flavors and textures to the plate.

Top Side Pairings:

Side DishBenefitsNotes
Pickled Ginger/DaikonAids digestion and cuts richnessEasy to find or make at home
Miso SoupAdds gut-friendly probioticsUse low-sodium miso for a cleaner option
Wakame Seaweed SaladAdds fiber and iodineCan be store-bought or homemade
Cucumber Avocado SaladFresh, hydrating, and nutrient-denseTop with sesame seeds for extra crunch

These sides balance out the richness of your sushi bake and help you feel nourished without getting overly full.

Drizzle Ideas: Spicy Sriracha Greek Yogurt, Soy Wasabi Glaze

Don’t let your sushi bake go naked—drizzle it with one of these high-protein, flavor-forward sauces that complement your toppings and increase satisfaction.

High-Protein Sauce Ideas:

  1. Spicy Yogurt Drizzle
    • 2 tbsp Greek yogurt
    • 1 tsp sriracha
    • Pinch of garlic powder
      → Protein-packed and tangy
  2. Soy Wasabi Glaze
    • 1 tbsp low-sodium soy sauce
    • ½ tsp wasabi paste
    • ½ tsp honey or erythritol
      → Sweet, salty, and zesty
  3. Avocado Cream Sauce
    • ½ avocado + 1 tbsp lemon juice + pinch of salt
    • Blend until smooth
      → Adds healthy fats and smooth texture

Each can be drizzled before or after baking. Add chopped scallions, sesame seeds, or crushed chili for extra style and crunch.

For a finishing drink pairing, discover our refreshing arizona watermelon fruit juice—a low-sugar, hydrating option that balances the bold sushi flavors.

Making It a Complete Macro-Balanced Meal

To build a macro-balanced plate (great for meal prep or post-workout recovery), you’ll want:

ComponentExample
ProteinSushi bake (salmon, tofu, egg)
Complex CarbBrown rice, quinoa, edamame salad
Healthy FatsAvocado, sesame, tahini drizzle
VeggiesSeaweed salad, cucumbers, radish
HydrationMiso soup or light detox juice

💡 Add a squeeze of lemon over your sushi bake before serving—it brightens flavor and enhances digestion.

Common Mistakes to Avoid in a High Protein Sushi Bake Recipe

Overbaking the Seafood or Rice Layer

One of the biggest issues in any sushi bake—especially a high protein sushi bake recipe—is overcooking the protein. This doesn’t just affect flavor, it ruins texture and can reduce nutritional value.

What to watch for:

  • Dry Salmon or Tuna: Overbaking makes it tough and chalky. Bake for only 10–12 minutes and broil at the end for crispness—not during the entire cooking time.
  • Hard, Dry Rice: Always let your rice cool slightly before layering and don’t press it too firmly into the dish. A light press allows steam to circulate and keeps it fluffy during baking.

✅ Pro Tip: Use foil loosely over your sushi bake during the first 8 minutes of baking, then remove it for the final 2–3 minutes to prevent the top from drying out.

Under-seasoning Protein Layers: High Protein Sushi Bake Recipe

Even with a rich topping, your protein layer needs flavor at its core. A bland center is a common mistake when relying too much on sauces.

How to avoid it:

  • Mix salmon, tuna, or tofu with soy sauce, garlic powder, sesame oil, and a touch of spicy mustard or sriracha before adding any cream-based binder.
  • Let proteins marinate for 10–15 minutes if time allows.

Bonus Flavor Boosters:

  • Crushed garlic, diced scallions, and furikake seasoning
  • Pickled jalapeños or ginger for a tangy twist
  • A splash of coconut aminos for added umami

For more seasoning inspiration, don’t miss our natural pink salt recipe for mineral-rich, flavor-enhancing blends.

Choosing the Wrong Rice or Using Low-Protein Fillings

Let’s be real—your bake is only as good as the base it’s built on.

Mistakes to skip:

  • Using long-grain rice: It won’t hold together and will dry out during baking.
  • Skimping on the protein: 2–3 tablespoons of protein won’t cut it if you want it filling.

Fix it fast:

  • Always choose short-grain sushi rice or quinoa for structure and protein density.
  • Use at least 4 oz of protein per serving. That’s roughly a ½ cup of shredded chicken or 1 medium salmon filet.

Explore more high-quality, dense recipes like our mexican vegetarian cheese jiffy corn bread casserole for layered baking ideas done right.

Frequently Asked Questions (FAQs): High Protein Sushi Bake Recipe

How much protein is in a sushi bake?

The amount of protein in a sushi bake depends heavily on the ingredients used. A standard portion made with salmon and imitation crab typically contains 25–35 grams of protein per serving. By incorporating extras like eggs, tofu, edamame, or switching to quinoa instead of rice, you can easily boost this number to 40g or more per portion.

How to add more protein to sushi?

To level up the protein in sushi (or a sushi bake), use:
Lean meats: Chicken, shrimp, or canned tuna
Eggs or egg whites: Mix into the base or as a topping
Greek yogurt: As a creamy, high-protein mayo substitute
Tofu or tempeh: Especially for plant-based versions
Protein-enhanced sauces: Like protein powder-infused yogurt dressings
All these additions blend well without changing the flavor too much—and they help turn sushi into a macro-balanced meal.

What type of sushi has the most protein?

Sashimi-style sushi—which includes raw fish without rice—is generally the highest in protein. Salmon, tuna, and yellowtail are excellent choices. Also, sushi rolls filled with grilled chicken, shrimp, or egg tend to pack more protein than veggie or imitation crab rolls.
For baked styles, a high protein sushi bake recipe made with salmon or tuna provides the most per serving.

Is sushi good for a high protein diet?

Absolutely—especially when customized for it. Traditional sushi can be carb-heavy, but swapping white rice for quinoa, using high-protein fillings like fish, tofu, or egg, and adding a creamy Greek yogurt sauce can transform sushi into a perfect high-protein, muscle-friendly meal.
Looking for inspiration? Try our protein-packed 2-ingredient coffee loophole recipe to pair with your sushi bake for a quick, energized start to your day.

Conclusion: High Protein Sushi Bake Recipe

This high protein sushi bake recipe is more than just a trend—it’s the perfect balance between indulgent comfort and intentional nutrition. Born from a love of family meals and inspired by a mission to make everyday cooking joyful and nourishing, this dish transforms the traditional sushi experience into something warm, accessible, and fit for your health goals.

June 18, 2025 0 comments
0 FacebookTwitterPinterestThreadsBlueskyEmail
Red pepper coulis in a bowl on rustic table
Dinner

Red Pepper Coulis: The Ultimate Flavor Enhancer for Every Dish

by Sarah June 17, 2025
written by Sarah

Red pepper coulis is that silky-smooth, flavor-packed red sauce you’ve probably seen drizzled artfully on gourmet plates. But it’s not just a chef’s secret anymore. Whether you’re looking to jazz up weeknight chicken or impress guests at dinner parties, red pepper coulis is the kitchen staple you didn’t know you needed. In this article, you’ll learn exactly what red pepper coulis is, how it’s different from other sauces like compote or capsicum coulis, how to make it from scratch, and — most importantly — what to pair it with.

We’ll also explore how to store it, what spices pair best, and how this sauce fits into global cuisine. To top it off, we’ll answer some of the most common questions about red pepper coulis. Ready to sauce things up? Let’s get into it.

Learn more about Honey Ginger Dressing if you love bold, homemade flavors that elevate your meals naturally.

Table of Contents
  • What is Red Pepper Coulis?
  • Origins and Culinary Significance
  • Why It’s Gaining Popularity in Modern Kitchens
  • Coulis vs Compote: Key Differences Explained
  • Red Pepper Coulis vs Roasted Pepper Sauce
  • Capsicum Coulis: A Fancy Cousin or the Same Thing?
  • Classic Red Pepper Coulis Recipe
  • Optional Variations: Smoky, Spicy, or Creamy
  • Tips for Roasting and Blending Peppers Like a Pro
  • Core Ingredients: Peppers, Garlic, Olive Oil, and Vinegar
  • Nutritional Value of Red Bell Peppers
  • Is Red Pepper Coulis Healthy? Here’s What Experts Say
  • As a Base for Entrees and Pasta Dishes
  • As a Drizzle Over Grilled Meat, Fish, or Vegetables
  • Creative Uses: Sandwich Spread, Dip, or Pizza Sauce
  • Real-Life Tip
  • Short-Term Storage: Refrigeration Guidelines
  • Freezing Tips and Shelf Life
  • How to Preserve Flavor During Storage
  • Spice Pairings: Cumin, Smoked Paprika, Chili
  • Acid Balance: Lemon Juice vs Balsamic Vinegar
  • Texture Control: Smooth or Chunky for Best Results?
  • French Cuisine: Classic Culinary Applications
  • Mediterranean Dishes That Shine with Coulis
  • How Chefs Use Coulis in Fusion Recipes
  • What do you do with red pepper coulis?
  • How do you make red pepper compote?
  • Are coulis cooked?
  • What is capsicum coulis?

Introduction to Red Pepper Coulis

What is Red Pepper Coulis?

Red pepper coulis is a smooth, vibrant sauce made primarily from roasted red bell peppers. The term “coulis” comes from French cuisine and originally referred to a strained purée of fruits or vegetables. Unlike chunky salsa or thick tomato-based sauces, coulis is blended until velvety smooth, delivering deep flavor and an elegant texture.

This sauce typically includes roasted red peppers, olive oil, garlic, salt, and sometimes a splash of vinegar or citrus juice. It’s the perfect combination of sweet, smoky, and tangy — depending on how it’s prepared.

Origins and Culinary Significance

The concept of coulis originates from French haute cuisine, where sauces are more than just condiments; they’re critical to the identity of a dish. In fine dining, red pepper coulis is often used as a base or artistic garnish, adding color and complexity. But its use isn’t limited to upscale restaurants anymore — it’s finding its place in home kitchens, thanks to its versatility and ease of preparation.

The popularity of plant-based dishes and Mediterranean-style eating has helped red pepper coulis rise in relevance. With just a few whole-food ingredients, it meets the mark for clean eating while delivering chef-level flavor.

Why It’s Gaining Popularity in Modern Kitchens

Home cooks and food bloggers are turning to red pepper coulis for several reasons:

  • It’s a low-calorie flavor booster, perfect for health-conscious recipes.
  • It’s plant-based and dairy-free, making it ideal for vegan diets.
  • It pairs with nearly everything: meats, veggies, grains, even breakfast eggs.
  • It stores well and can be made in large batches.

Thanks to social media food trends and the growing popularity of meal prepping, sauces like red pepper coulis are becoming a go-to hack for quick, delicious meals.

Looking for inspiration? Try Brussel Sprouts and Ham Quiche — it pairs beautifully with a spoonful of red pepper coulis for a gourmet finish.

Red Pepper Coulis vs Other Pepper-Based Sauces

Understanding how red pepper coulis stacks up against other pepper-based sauces helps clarify when and how to use it. From pepper compotes to capsicum purées, there’s a lot of crossover — but also clear distinctions in texture, preparation, and usage.

Coulis vs Compote: Key Differences Explained

One of the most common questions is: How do you make red pepper compote, and how is it different from coulis?

A red pepper compote is typically chunky and slow-cooked with added sugar or vinegar for a sweet-and-savory effect. It’s thicker, sometimes resembling chutney or relish. Compote often includes other ingredients like onions, dried fruits, or even herbs to give it complexity.

In contrast, red pepper coulis is smooth and emulsified, often without sweeteners unless you’re going for a sweeter variation. It’s typically blended until silky and strained for a refined finish. While compotes are cooked longer and reduced, coulis gets its flavor mostly from roasting and blending.

FeatureRed Pepper CoulisRed Pepper Compote
TextureSilky & smoothChunky & textured
PreparationRoasted & blendedCooked & reduced
Taste ProfileSavory, smoky, freshSweet, tangy, rich
Typical UseSauce base, garnishSpread, condiment

Red Pepper Coulis vs Roasted Pepper Sauce

Both use roasted red peppers, but roasted pepper sauces often include ingredients like tomatoes, heavy cream, or broth, giving them a soupier, heavier feel. These sauces are more likely to be used in hearty dishes like pasta bakes or casseroles.

Red pepper coulis is simpler, focusing on the purity of the pepper itself. Its minimal ingredients make it a lighter, fresher option — perfect for topping grilled meats or dressing up a vegetarian dish without overpowering the main elements.

Capsicum Coulis: A Fancy Cousin or the Same Thing?

What is capsicum coulis, and is it just a fancier name?

Yes — “capsicum” is simply the botanical name for the pepper family. In countries like Australia or the UK, “capsicum coulis” is often used interchangeably with red pepper coulis. The only difference may lie in the regional pepper varieties used, which can slightly alter the taste or color.

So whether it’s called red pepper coulis, capsicum coulis, or roasted bell pepper purée, they all fall under the same family — a smooth, blended, flavor-forward sauce made with roasted peppers.

Check out Steak Chimichurri Dense Bean Salad Recipe to see how layered sauces like coulis can elevate protein-packed meals.

How to Make the Perfect Red Pepper Coulis

Roasted red bell peppers for red pepper coulis
Roast your peppers until the skins blister for rich flavor

Creating red pepper coulis at home is incredibly rewarding — and easier than you might think. With just a handful of ingredients and a blender, you can whip up a gourmet-worthy sauce that enhances almost any dish. In this section, we’ll walk you through the classic recipe, flavor variations, and pro tips to get restaurant-quality results every time.

Classic Red Pepper Coulis Recipe

Here’s a simple base recipe that delivers bold flavor and a velvety-smooth texture.

Ingredients

  • 3 large red bell peppers (roasted)
  • 1 garlic clove (roasted or sautéed)
  • 2 tablespoons olive oil
  • 1 teaspoon balsamic or red wine vinegar
  • Salt and pepper to taste
  • Optional: a pinch of smoked paprika or chili flakes

Instructions

  1. Roast the red peppers: Preheat your oven to 425°F (220°C). Slice peppers in half, remove seeds, and place them skin-side up on a baking sheet. Roast for 25–30 minutes until charred and soft.
  2. Steam and peel: Transfer hot peppers to a bowl, cover with plastic wrap or a lid, and let steam for 10 minutes. Peel off the skins once cooled.
  3. Blend: Add peeled peppers, garlic, olive oil, vinegar, salt, and any spices to a blender. Blend until completely smooth.
  4. Strain (optional): For a silky restaurant-style finish, strain through a fine mesh sieve.
  5. Adjust: Taste and adjust seasoning as needed.

This red pepper coulis recipe yields about 1 cup and can be stored in the fridge for up to 5 days.

Optional Variations: Smoky, Spicy, or Creamy

Want to customize your coulis? Here are a few tasty twists:

  • Smoky: Add ½ teaspoon of smoked paprika or use fire-roasted peppers from a jar.
  • Spicy: Toss in a roasted jalapeño or a pinch of cayenne pepper.
  • Creamy: Blend in 1–2 tablespoons of Greek yogurt or cashew cream for a mellow, rich version.

These tweaks let you tailor the sauce to different types of dishes — smoky for BBQ meats, spicy for tacos, and creamy for vegetarian bowls.

Tips for Roasting and Blending Peppers Like a Pro

  • Roast evenly: Cut peppers into flat sections for even roasting and less charring.
  • Don’t skip the steaming step: It loosens the skins and makes peeling effortless.
  • Use a high-speed blender: It ensures a smoother consistency, especially if you’re skipping the straining step.
  • Balance the acid: Don’t go overboard with vinegar — you want brightness, not sourness.
  • Taste test: Your peppers may vary in sweetness, so always adjust salt and acid before serving.

Don’t miss our Southwest Dense Bean Salad — it pairs beautifully with a spicy variation of red pepper coulis for a southwest flavor bomb.

Ingredients Deep Dive and Health Benefits

Red pepper coulis may be simple, but its ingredients are nutritional powerhouses. In this section, we’ll break down the core ingredients used in the sauce, explore their individual health benefits, and explain why this condiment isn’t just tasty — it’s also great for your body.

Core Ingredients: Peppers, Garlic, Olive Oil, and Vinegar

Red Bell Peppers

The heart of any red pepper coulis is, of course, roasted red bell peppers. These vibrant veggies are:

  • High in Vitamin C — more than twice the daily requirement per serving.
  • Packed with antioxidants like beta-carotene and lycopene.
  • Naturally sweet when roasted, adding flavor without added sugar.

Garlic

Garlic isn’t just for depth of flavor. It:

  • Supports heart health and can help lower cholesterol.
  • Contains allicin, a compound known for its antimicrobial properties.
  • Boosts immune response with regular use.

Olive Oil

A high-quality extra virgin olive oil is more than a fat — it’s a foundation of Mediterranean nutrition.

  • Rich in monounsaturated fats that support heart health.
  • Contains powerful polyphenols that reduce inflammation.
  • Helps the body absorb fat-soluble vitamins from the peppers.

Vinegar or Citrus

Acid is essential for brightness and balance. Depending on the type used:

  • Balsamic vinegar adds a touch of sweetness.
  • Red wine vinegar offers tanginess without overpowering.
  • Lemon juice brings a fresh, zesty flavor and a boost of Vitamin C.

Each of these ingredients plays a crucial role in building flavor while contributing to the sauce’s impressive health profile.

Nutritional Value of Red Bell Peppers

Let’s take a quick look at what makes red bell peppers the nutritional MVP in this sauce:

NutrientAmount per 1 medium pepper% Daily Value
Vitamin C152 mg169%
Vitamin A3726 IU75%
Fiber2.5 g10%
Calories31—

They’re low in calories, high in water, and naturally sweet — a win for any dietary lifestyle.

Is Red Pepper Coulis Healthy? Here’s What Experts Say

Yes, red pepper coulis is a nutrient-dense, low-calorie, and heart-friendly sauce. It’s perfect for:

  • Clean eating: No added sugars, thickeners, or preservatives.
  • Plant-based diets: 100% vegan and naturally gluten-free.
  • Weight management: Low in calories but big on flavor, helping you avoid high-fat dressings or cream sauces.

Nutritionists often recommend incorporating more peppers into your diet, and coulis is a delicious, creative way to do it.

Discover great ideas like Liver Flush Juice Recipe if you’re looking to pack more nutrients into your daily routine.

Print
clock clock iconcutlery cutlery iconflag flag iconfolder folder iconinstagram instagram iconpinterest pinterest iconfacebook facebook iconprint print iconsquares squares iconheart heart iconheart solid heart solid icon
Red pepper coulis in a bowl on rustic table

Red Pepper Coulis

5 Stars 4 Stars 3 Stars 2 Stars 1 Star

No reviews

Print Recipe
Pin Recipe

Red pepper coulis adds bold flavor to any meal. Discover how to make, store, and use this vibrant sauce in under 5 minutes.

  • Total Time: 40 minutes
  • Yield: 1 cup 1x

Ingredients

Scale

¼ cup extra virgin olive oil

1 cup chopped white onion

1 clove garlic chopped

16 oz roasted red bell pepper drained

1 pinch kosher salt

1 Tbsp heavy cream

2 tsp balsamic vinegar

Instructions

Heat 1 Tablespoon of the olive oil in a skillet over high heat. Add the onion and garlic and cook, tossing regularly, until softened and fragrant. Transfer to a food processor.

Add the roasted peppers, salt, cream, and remaining olive oil to the onion-garlic mixture in the food processor. Process until smooth. Transfer mixture to a saucepan.

Add the balsamic vinegar to the coulis and simmer (*see Notes) 10 minutes. Remove from the heat. Yields ~1-½ cups (12 ounces) sauce.

Notes

Drizzle over meat, veggies, pasta, or use as a dip.

Refrigerate up to 5 days or freeze up to 3 months

  • Author: Sarah
  • Prep Time: 10 minutes
  • Cook Time: 30 minutes

Nutrition

  • Serving Size: 1 cup
  • Calories: 58kcal

Did you make this recipe?

Share a photo and tag us — we can’t wait to see what you’ve made!

Culinary Uses of Red Pepper Coulis

Drizzling red pepper coulis over grilled chicken
Add coulis to grilled dishes for a gourmet twist

Red pepper coulis isn’t just a pretty drizzle—it’s a culinary chameleon. Whether you’re cooking meat, prepping vegetarian meals, or assembling a quick lunch, this vibrant sauce adds color, moisture, and bold flavor without overpowering your ingredients. Here’s how to get the most out of your batch.

As a Base for Entrees and Pasta Dishes

If you’re tired of heavy cream-based sauces or bland tomato pastes, red pepper coulis is the solution. It serves as a flavorful base for:

  • Grain bowls and pasta: Toss it with spaghetti, couscous, or farro for a light, peppery twist.
  • Baked dishes: Use it under lasagna layers, in casseroles, or even as the base for baked fish.
  • Stuffed vegetables: Spoon it into roasted eggplants, zucchini boats, or bell peppers to amp up flavor.

Because it’s smooth and blends well, red pepper coulis can also be used in creamy-style sauces by adding yogurt, tahini, or cashew cream.

As a Drizzle Over Grilled Meat, Fish, or Vegetables

Red pepper coulis really shines when it’s used as a finishing drizzle. Think of it as the final touch that makes your meal look and taste restaurant-ready.

Great Pairings Include:

  • Grilled chicken or steak – Adds a bright, smoky-sweet note without overpowering.
  • Roasted or grilled salmon – The acidity and sweetness contrast beautifully with fatty fish.
  • Charred vegetables – Cauliflower, asparagus, or roasted carrots soak up the sauce’s deep flavor.
  • Scrambled eggs or omelets – Skip the ketchup and elevate your breakfast game.

The best part? It makes basic dishes look gourmet with almost no extra effort.

Creative Uses: Sandwich Spread, Dip, or Pizza Sauce

Red pepper coulis is more versatile than you might expect:

  • As a sandwich spread – Slather it onto burgers, wraps, or grilled cheese for a kick of color and taste.
  • As a dip – Serve it chilled with pita, chips, or raw veggies as a light alternative to hummus or ranch.
  • As a pizza sauce – Use it instead of tomato sauce for white pizzas, veggie flatbreads, or Mediterranean pies.

Its sweet-savory profile makes it adaptable for both hot and cold dishes.

Check out Natural Zepbound Recipe if you’re exploring wholesome, low-guilt additions to your kitchen rotation.

Real-Life Tip

Hosting a dinner party? Use red pepper coulis as a plate garnish. Simply spoon a swirl onto the plate before placing your main dish on top — it makes even a weeknight dinner feel like fine dining.

Storing and Preserving Red Pepper Coulis

Red pepper coulis stored in a glass jar
Store your coulis for up to 5 days in the fridge

Red pepper coulis is not just flavorful—it’s also super convenient to make ahead. Whether you’re meal prepping for the week or saving leftovers from a dinner party, knowing how to store it properly is essential to preserving both flavor and texture.

Short-Term Storage: Refrigeration Guidelines

Once prepared, red pepper coulis should be cooled to room temperature before storing. Here’s how to keep it fresh for daily use:

  • Use an airtight container – Mason jars or glass containers with tight lids are ideal.
  • Refrigerate immediately – Keep at or below 40°F (4°C).
  • Shelf life – It will stay fresh for up to 5 days in the refrigerator.

Pro tip: Pour a thin layer of olive oil on top before sealing. It creates a barrier against air, helping extend freshness and preventing oxidation.

Freezing Tips and Shelf Life

Want to store red pepper coulis for longer? Freezing is a fantastic option, and it won’t sacrifice much in terms of flavor or texture.

  • Portion and freeze – Use silicone ice cube trays to freeze in 1–2 tablespoon servings. Once solid, transfer cubes to a freezer bag.
  • Label and date – Mark with the prep date and use within 3 months for best quality.
  • Thawing – Thaw in the fridge overnight or microwave a cube on low in a pinch. Stir well before using.

Freezing works especially well for meal preppers and busy families—just grab a cube when you need it!

How to Preserve Flavor During Storage

Even though red pepper coulis freezes well, keeping the taste vibrant takes a few precautions:

  • Don’t over-blend herbs or garlic if you’re planning to freeze. These can develop bitter notes over time.
  • Avoid cream-based variations when freezing. Dairy can separate and create a grainy texture upon thawing.
  • Add acid fresh — If you’re using lemon juice or vinegar, consider stirring it in just before serving rather than before freezing to keep the brightness intact.

Learn more about ABC Fruit Juice for another vibrant, health-boosting staple you can store and enjoy anytime.

Advanced Cooking Tips and Flavor Pairings

You’ve mastered the basics of red pepper coulis — now it’s time to level up. In this part, we’ll go over expert tricks to tweak the flavor, texture, and versatility of your coulis. Plus, you’ll learn which herbs, spices, and acids pair best to bring out the sauce’s full potential.

Spice Pairings: Cumin, Smoked Paprika, Chili

Red pepper coulis has a naturally sweet, earthy flavor, making it an ideal canvas for spice experimentation.

Best spices to complement red pepper coulis:

  • Cumin: Adds a warm, nutty depth perfect for Mediterranean and Middle Eastern dishes.
  • Smoked paprika: Enhances the natural smokiness of roasted peppers and intensifies color.
  • Chili flakes or cayenne: Bring the heat — ideal if you’re pairing coulis with grilled meats or Mexican flavors.
  • Black pepper or white pepper: Adds complexity without overwhelming the sauce.

Pro tip: Toast spices in the olive oil before blending for an infused flavor that elevates the entire sauce.

Acid Balance: Lemon Juice vs Balsamic Vinegar

Acid plays a crucial role in balancing the sweetness of roasted peppers. Choosing the right one depends on your dish:

AcidFlavor ProfileBest For
Lemon JuiceBright, freshSeafood, salads, dips
Red Wine VinegarTangy, sharpPasta, sandwiches
Balsamic VinegarSweet, complexGlazes, grilled meats
Apple Cider VinegarMild, fruityGrain bowls, veggie wraps

If your coulis tastes dull or overly sweet, add a small splash of acid and retaste. The goal is to strike a balance — not overwhelm.

Texture Control: Smooth or Chunky for Best Results?

The traditional coulis texture is silky-smooth, but that doesn’t mean you can’t break the rules for certain dishes.

Smooth coulis works best for:

  • Drizzles over plated dishes
  • Pasta sauces
  • Sandwich spreads

Chunkier blends (skip straining) are ideal for:

  • Rustic meals like grain bowls or grilled veggies
  • Dips or spreads where texture adds dimension
  • Hearty toppings for grilled meats or toast

Blending tips:

  • Use a high-speed blender for ultra-smooth results.
  • Add warm water or broth to thin if needed — but go slow.
  • For chunkier texture, pulse in short bursts and skip the strainer.

Looking for more real food enhancements? Try Himalayan Salt Mouth Rinse Recipe — a surprising DIY health support using everyday kitchen items.

Red Pepper Coulis in Global Cuisine

Red pepper coulis might have French roots, but its reach goes far beyond European kitchens. Thanks to its flexibility, this vibrant sauce has found a home in cuisines across the globe. In this part, we’ll explore how different cultures use red pepper coulis or similar variants, and how you can bring international flair into your own kitchen.

French Cuisine: Classic Culinary Applications

In France, coulis is all about refinement. Red pepper coulis often appears in:

  • Appetizers: As a base for terrines, mousse, or seafood starters.
  • Main courses: Paired with fish (like cod or salmon), duck breast, or ratatouille.
  • Elegant plating: Swirled under proteins or alongside stacked vegetables for visual appeal.

French chefs prioritize texture and balance. Expect coulis to be velvety, slightly acidic, and often strained for a flawless finish.


Mediterranean Dishes That Shine with Coulis

In Mediterranean cooking, red pepper coulis plays a more rustic, robust role:

  • Grilled meats & lamb kebabs – Often served with pepper-based sauces resembling coulis.
  • Flatbreads & pitas – Used as a spread or base, especially in Greek or Turkish cuisine.
  • Roasted vegetables & eggplant dishes – Adds depth and contrast.

Mediterranean versions may include ingredients like olive tapenade, feta, or fresh herbs like parsley or mint for brightness.

How Chefs Use Coulis in Fusion Recipes

Modern chefs love red pepper coulis for its adaptability in fusion cuisine. It blends seamlessly with flavors from Asia, the Americas, and beyond:

  • Asian Fusion: Combine red pepper coulis with soy sauce, ginger, or sesame oil to create sauces for grilled tofu or rice bowls.
  • Mexican Influence: Add chili peppers, cumin, or lime juice for a bold taco topping or enchilada base.
  • American Comfort Dishes: Drizzle over mac and cheese, burgers, or even scrambled eggs to add gourmet flair.

What’s exciting is how easily you can experiment at home. Red pepper coulis acts like a base paint—you choose the color with spices and herbs.

Want more global twists? Discover Japanese Mounjaro Recipe for a dose of international inspiration in your kitchen.

FAQs About Red Pepper Coulis

To wrap up your culinary journey into red pepper coulis, let’s address the most frequently asked questions. These cover everything from how it’s used to how it compares with similar sauces. Whether you’re a beginner or a foodie experimenting with flavors, these answers will help clarify any lingering doubts.

What do you do with red pepper coulis?

Red pepper coulis is incredibly versatile. You can:
Drizzle it over grilled chicken, steak, or fish.
Use it as a vibrant base for pasta and grain bowls.
Spread it on sandwiches, wraps, or burgers.
Serve it as a dipping sauce for roasted veggies or pita chips.
Plate it elegantly under appetizers or entrées for a restaurant-style presentation.
It’s your secret weapon for transforming everyday dishes into gourmet meals.

How do you make red pepper compote?

Unlike coulis, red pepper compote is a chunky, slow-cooked condiment. Here’s a simple method:
Ingredients:
2 red bell peppers (diced)
1 small onion (sliced)
1 tbsp olive oil
1 tbsp brown sugar
1 tbsp vinegar (balsamic or apple cider)
Instructions:
Sauté onions in olive oil until soft.
Add peppers, sugar, and vinegar.
Simmer over low heat for 30–40 minutes until thickened.
Cool and store.
Compote is sweeter and chunkier than coulis, making it ideal for cheese boards or as a savory-sweet burger topping.

Are coulis cooked?

Yes — but it depends on the ingredients. In red pepper coulis:
The peppers are roasted or cooked beforehand to enhance flavor and softness.
Other ingredients like garlic may also be roasted or sautéed.
After blending, the coulis is usually not cooked further, though it can be gently warmed before serving.
So yes, coulis is partially cooked to develop flavor, but it’s not simmered or boiled like other sauces.

What is capsicum coulis?

Capsicum coulis is the same as red pepper coulis, just using a different name for the pepper. In regions like Australia or the UK, “capsicum” refers to bell peppers. So a capsicum coulis is a smooth sauce made from roasted capsicums — typically red ones — blended with oil, vinegar, and spices.
The flavor, preparation, and use are identical. It’s just a regional variation in terminology.

Conclusion: Elevate Everyday Meals with Red Pepper Coulis

Red pepper coulis proves that a few simple ingredients — when prepared right — can transform how you cook. This sauce isn’t just vibrant in color; it’s bold in flavor, loaded with nutrients, and endlessly adaptable. Whether you’re looking to impress dinner guests, meal prep for the week, or just bring life to an otherwise plain dish, red pepper coulis is a must-have in your culinary arsenal.

From breakfast eggs to grilled seafood, pasta, and even pizza, it works across cuisines and dietary styles. Plus, it’s easy to store, batch cook, and customize to your taste — spicy, smoky, creamy, or tangy.

Want more vibrant flavors like this? Don’t miss our Zobo Drink Recipe — a naturally colorful and nutrient-packed beverage that complements plant-based meals perfectly.

June 17, 2025 0 comments
0 FacebookTwitterPinterestThreadsBlueskyEmail
Homemade honey ginger dressing in a glass jar on rustic table
Breakfast

Honey Ginger Dressing – The Best Homemade Recipe You’ll Ever Try

by Sarah June 17, 2025
written by Sarah

Honey ginger dressing has always held a special place in my heart—not just because of its bright, zesty flavor, but because it’s the kind of kitchen magic that reminds me of my roots. Growing up, I spent countless hours in my grandmother’s cozy kitchen. It was there, with a wooden spoon in hand and flour dusting the counters, that I first learned the joy of feeding the people you love. Now, as a mom of two and the voice behind Cozy Bites Recipes, I’m still inspired by those early memories—creating comforting, simple meals that bring smiles to everyday moments.

This dressing is no exception. Whether you’re topping a crisp salad, drizzling it over roasted veggies, or marinating chicken for dinner, honey ginger dressing is the go-to that transforms ordinary into unforgettable. It’s healthy, versatile, and surprisingly easy to make. In this article, we’ll walk through its health benefits, ingredients, recipe steps, creative uses, fun variations, and even explore what really happens when you combine ginger and honey. By the end, you’ll know exactly why this dressing deserves a permanent spot in your fridge.

Don’t miss our Liver Flush Juice Recipe if you love recipes packed with flavor and wellness benefits.

Table of Contents
  • What is Honey Ginger Dressing?
  • Why This Dressing Stands Out Among Others
  • Health Benefits of Ginger in Dressings
  • Is Honey Ginger Dressing Healthy?
  • Choosing the Right Type of Honey
  • The Role of Fresh vs Ground Ginger
  • Other Common Ingredients That Pair Well
  • Quick & Easy Basic Recipe (Step-by-Step)
  • Pro Tips for Better Flavor & Texture
  • Storage, Shelf Life, and Meal Prepping
  • Best Salads for Honey Ginger Dressing
  • Drizzle It Over These Surprising Dishes
  • Spicy Honey Ginger Dressing with Chili Flakes
  • Creamy Version Using Greek Yogurt or Tahini
  • Soy-Based Asian Fusion Style
  • The Science of the Combo: Taste and Health
  • Traditional Remedies Behind the Duo
  • Best Online Recipes Reviewed and Compared
  • Tips from Food Bloggers and Nutrition Experts
  • Is honey ginger dressing healthy?
  • What does mixing ginger and honey do for you?
  • What happens when you soak ginger in honey?
  • Does honey taste good with ginger?

The Allure of Honey Ginger Dressing

What is Honey Ginger Dressing?

Honey ginger dressing is a light, sweet, and tangy sauce often used in salads, marinades, or drizzle sauces. At its heart, it blends the soothing sweetness of natural honey with the spicy zing of fresh ginger, often enhanced by vinegar, garlic, sesame oil, or soy sauce. The result? A flavor bomb that’s both refreshing and rich—perfect for balancing greens or giving a kick to proteins.

It’s commonly found in Japanese and Asian-inspired dishes, but home cooks across the U.S. have adopted it for its versatility and bold flavor. Whether it’s store-bought or homemade, this dressing is a fan favorite for anyone craving flavor without the fuss.

Why This Dressing Stands Out Among Others

Most dressings fall into two camps: creamy and rich or light and tangy. Honey ginger dressing is the rare blend that brings warmth, bite, and brightness all in one spoonful. What really sets it apart is its ability to elevate even the most basic salad with just a drizzle.

Here’s why this dressing is a standout:

  • Flavor complexity: The sweet-spicy contrast excites the palate.
  • Health-friendly: Loaded with antioxidants and natural ingredients.
  • Multi-purpose: Use it as a dressing, glaze, or marinade.
  • Customizable: Easy to tweak for sweet, spicy, or savory preferences.

Looking for inspiration? Try our Chia Seeds Smoothie for another quick, nutrient-packed addition to your meals.

Nutritional Power Behind Ginger and Honey

Health Benefits of Ginger in Dressings

Ginger has long been celebrated not just for its spicy bite, but also for its impressive health profile. When used in dressings like honey ginger, it adds more than just flavor—it brings anti-inflammatory and digestive support to the table.

Here’s why it’s a superstar in your salad bowl:

  • Digestive Aid: Ginger stimulates saliva and bile production, helping your body break down food more efficiently.
  • Anti-inflammatory Power: Rich in gingerol, it helps reduce inflammation in joints and muscles.
  • Immunity Booster: With antimicrobial properties, ginger supports your immune system—perfect for seasonal transitions.
  • Blood Sugar Control: Some studies suggest ginger may help regulate insulin, especially when paired with a balanced meal.

What makes ginger even more powerful in a dressing is how easily your body absorbs its nutrients when it’s emulsified in oil or vinegar-based liquids—exactly like in honey ginger dressing.

Check out Lemon Balm Recipe for another way to naturally boost your health with simple, fresh ingredients.

Is Honey Ginger Dressing Healthy?

Absolutely—and here’s why.

A well-made honey ginger dressing avoids the additives, sugars, and preservatives found in store-bought dressings. When prepared at home using fresh ingredients, it becomes a clean-eating essential. Here’s what makes it a healthy choice:

NutrientSourceBenefit
AntioxidantsGinger & HoneyFight free radicals
Healthy FatsSesame or Olive OilSupports heart health
Natural SweetenerRaw HoneyLower glycemic index than sugar
Low SodiumHomemade VersionsBetter blood pressure control

For those watching their calorie intake, using moderate portions (about 1 to 2 tablespoons) can keep this dressing both flavorful and diet-friendly.

Plus, honey is packed with antibacterial properties, and when combined with ginger, the two create a synergistic effect that supports respiratory health and detoxification.

Don’t miss our Smoothies with Medjool Dates for another nutrient-dense, naturally sweet way to fuel your body.

Essential Ingredients Breakdown

Fresh ginger and honey for homemade dressing
Use raw honey and ginger for the best results

Choosing the Right Type of Honey

When it comes to honey ginger dressing, the type of honey you choose makes a noticeable difference in both flavor and nutrition. While it’s tempting to grab the nearest squeeze bottle, not all honeys are created equal.

Let’s break down your options:

Honey TypeFlavor ProfileBest For
Raw HoneyBold, earthy, slightly floralBest nutritional benefits
Manuka HoneyRich, medicinalImmune-boosting, but expensive
Clover HoneyMild, sweetGreat for neutral, everyday dressings
Orange BlossomCitrus undertonesPairs beautifully with Asian fusion dressings

For most home cooks, raw local honey is the ideal choice—it’s unfiltered, unheated, and retains enzymes and pollen that are lost in commercial versions. It adds natural sweetness and a smooth texture that helps balance out the kick of ginger.

Discover great ideas like our Natural Zepbound Recipe for more ways to include natural ingredients in your kitchen routine.

The Role of Fresh vs Ground Ginger

Fresh ginger root and ground ginger both bring heat and aroma, but they’re not interchangeable in every case. Here’s a quick comparison:

FormTasteUsage
Fresh GingerBright, zesty, pungentBest for bold, vibrant flavor
Ground GingerMilder, warm spiceIdeal for subtle heat in creamy dressings

Fresh ginger is the go-to in most honey ginger dressing recipes because it blends well and maintains that sharp, invigorating zing. To use it, peel the root and finely grate or mince—about 1 tablespoon per cup of dressing is standard.

Pro Tip: Steep grated ginger in vinegar or oil before mixing—it mellows the heat while enhancing aroma.

Other Common Ingredients That Pair Well

To elevate your honey ginger dressing, try adding these supportive flavor agents:

  • Rice vinegar – Light acidity that balances honey’s sweetness
  • Soy sauce or tamari – Adds umami and depth (great in Asian-inspired salads)
  • Sesame oil – A few drops go a long way in creating a nutty, toasty undertone
  • Garlic – Raw or roasted, it adds complexity
  • Lime or lemon juice – Brightens the whole blend
  • Chili flakes or sriracha – For a subtle kick if you like a spicier version

These additions help create endless variations without compromising the base profile of sweet heat.

Check out Himalayan Salt Mouth Rinse Recipe to explore the wellness benefits of another ancient ingredient in a modern recipe.

How to Make Honey Ginger Dressing at Home

Quick & Easy Basic Recipe (Step-by-Step)

Making your own honey ginger dressing at home couldn’t be simpler. You don’t need fancy equipment—just a bowl, a whisk, and fresh ingredients. Here’s a foolproof recipe that comes together in under 10 minutes.

Ingredients:

  • 3 tbsp raw honey
  • 2 tbsp freshly grated ginger
  • 1/4 cup rice vinegar
  • 1/4 cup olive oil (or sesame oil for nuttier taste)
  • 1 tbsp low-sodium soy sauce (or tamari for gluten-free)
  • 1 tsp garlic (minced or grated)
  • 1 tsp lime juice (optional for brightness)
  • Pinch of salt
  • Optional: chili flakes or sriracha for heat

Instructions:

  1. Prep the Ginger & Garlic
    Peel and finely grate the ginger and garlic. The finer, the better—it blends more smoothly.
  2. Whisk the Wet Ingredients
    In a medium bowl, combine honey, vinegar, soy sauce, lime juice (if using), and whisk until blended.
  3. Add the Aromatics
    Stir in the ginger and garlic.
  4. Emulsify with Oil
    Slowly drizzle in the oil while whisking continuously until the dressing thickens slightly.
  5. Taste and Adjust
    Add salt or chili flakes as needed.

Yield: About 3/4 cup

Prep Time: 10 minutes

Difficulty: Super easy

Serving Suggestion: 1–2 tablespoons per salad

This homemade version bursts with flavor and skips the preservatives and added sugars you find in store-bought bottles.

Pro Tips for Better Flavor & Texture

  • Let it rest: Letting the dressing sit for 10–15 minutes before serving allows the ginger and garlic to infuse.
  • Double it up: This dressing keeps well, so double the batch and store it in a mason jar.
  • Shake before serving: Natural separation is normal—just shake it up.

Storage, Shelf Life, and Meal Prepping

Honey ginger dressing can last up to 7–10 days in the refrigerator if stored properly in a sealed container. The acidity from vinegar and natural antibacterial properties of honey help preserve it.

Storage TipBenefit
Use a glass jarNo flavor transfer, easy to shake
Label with dateHelps track freshness
Avoid freezingOil and vinegar separate during thawing

Check out Southwest Dense Bean Salad—this bold dressing is an amazing match for hearty, protein-packed salads.

Flavor Pairings and Creative Uses

Salad bowl with homemade honey ginger dressing
Honey ginger dressing brightens up any salad

Best Salads for Honey Ginger Dressing

Honey ginger dressing doesn’t just work on salads—it transforms them. Whether you’re building a bowl from scratch or trying to revive leftovers, this bright and tangy blend brings new life to any mix of greens, grains, or proteins.

Here are top salad combos that pair beautifully with honey ginger dressing:

Salad TypeBest Pairings
Asian Chopped SaladNapa cabbage, edamame, shredded carrots, sesame seeds
Grilled Chicken SaladMixed greens, avocado, grilled chicken, red onion
Quinoa Power BowlQuinoa, kale, chickpeas, cucumber, bell pepper
Crispy Tofu BowlSpring mix, tofu, shredded cabbage, scallions
Spinach & Strawberry SaladBaby spinach, strawberries, pecans, goat cheese

The key is contrast—honey ginger dressing excels when paired with crunchy textures, spicy elements, or slightly bitter greens like arugula or kale.

Check out High Protein Dense Bean Salad for another hearty pairing that welcomes bold, tangy dressings like this one.

Drizzle It Over These Surprising Dishes

Why stop at salad? This dressing does double duty in the kitchen. It works wonderfully as a marinade, glaze, or dipping sauce, making it one of the most versatile staples in your fridge.

Try honey ginger dressing with:

  • Grilled Salmon or Shrimp – Adds a sweet-spicy glaze when brushed on during the final few minutes.
  • Roasted Vegetables – Especially sweet potatoes, Brussels sprouts, or carrots.
  • Rice or Noodle Bowls – Works as a finishing sauce over jasmine rice or soba noodles.
  • Stir-Fry Sauce – Add to your wok during the final toss.
  • Lettuce Wraps – Spoon it into wraps with grilled chicken or tofu for an instant flavor upgrade.
  • Slaw Dressing – Skip mayo and toss shredded cabbage with this vinaigrette.

This dressing also makes a delicious dipping sauce for spring rolls, dumplings, or tempura when thickened slightly by reducing or adding a spoonful of tahini.

Looking for inspiration? Try our Japanese Mounjaro Recipe as a base meal that benefits from bold dressings like this one.

Variations to Try with the Classic Recipe

 Spicy, creamy, and soy-based honey ginger dressings
Explore tasty twists of the classic recipe

Spicy Honey Ginger Dressing with Chili Flakes

Love a little heat? A spicy version of honey ginger dressing gives you that warm, tingling kick without overpowering the core flavors.

How to Make It Spicy:

  • Add ½ tsp of red chili flakes during mixing.
  • For deeper heat, use a dash of sriracha or gochujang.
  • Want a smoky edge? Add a touch of smoked paprika.

This version works great with grain bowls, grilled tofu, or anything needing a bold contrast. Spice amplifies the ginger’s natural zing while letting the honey round out the edges.

Creamy Version Using Greek Yogurt or Tahini

Prefer a thicker, velvety dressing? Add creaminess without sacrificing nutrition.

OptionQuantityFlavor Profile
Greek Yogurt2–3 tbspTangy, rich, and protein-packed
Tahini1 tbspNutty, earthy, smooth texture
Avocado¼ mashedFresh and creamy with healthy fats

How to Make It Creamy:

  1. Whisk in your creamy base after combining the honey, ginger, and vinegar.
  2. Add a splash of water or lemon juice to balance the thickness.

These variations make your dressing feel heartier and are ideal for kale salads, roasted veggie bowls, and cold soba noodles.

Don’t miss our Banana Peach Smoothie Recipe for another creamy, wholesome blend perfect for summer lunches or light dinners.

Soy-Based Asian Fusion Style

If you’re craving a restaurant-style Asian vinaigrette, this variation is the one to try. It’s bold, savory, and umami-rich—perfect for hearty salads or marinades.

How to Make It Asian Fusion:

  • Swap olive oil for toasted sesame oil
  • Use 2 tbsp soy sauce instead of salt
  • Add 1 tsp grated fresh garlic and 1 tsp rice wine vinegar
  • Optional: A dash of fish sauce or mirin for complexity

This style is particularly good for soba noodle salads, grilled chicken bowls, or spring rolls. It pairs beautifully with crunchy vegetables and proteins like tempeh, tofu, or shrimp.

Learn more about Mexican Vegetarian Cheese Jiffy Corn Bread Casserole—you’d be surprised how a drizzle of the soy-based variation plays off rich, cheesy dishes too.

What Happens When You Mix Ginger and Honey?

The Science of the Combo: Taste and Health

Combining ginger and honey isn’t just about taste—it’s a fusion celebrated in ancient remedies and modern kitchens alike. The unique synergy of these two natural ingredients amplifies their individual benefits, making them more powerful together than apart.

Here’s how they work in tandem:

BenefitGingerHoneyCombined Effect
Anti-inflammatoryGingerol reduces swellingHoney soothes tissuesRelief for sore throats and joints
Immune supportFights bacteria and virusesNatural antibacterialBuilds defense against colds and flu
Digestive aidStimulates bile and enzymesCoats the stomach liningReduces nausea, eases indigestion
Blood sugar balanceMay improve insulin responseSlower sugar releaseSupports stable energy levels

When mixed in a dressing, this combo becomes not just delicious but functional—helping your body stay energized, balanced, and strong, one spoonful at a time.

Check out our ABC Fruit Juice for another health-boosting blend of natural ingredients that complements meals like salads or wraps.

Traditional Remedies Behind the Duo

Long before it became a salad staple, ginger and honey were staples of Ayurvedic and traditional Chinese medicine. Whether brewed into teas or mixed into tonics, this combo was known to:

  • Soothe coughs and sore throats
  • Aid digestion and reduce bloating
  • Warm the body and promote circulation
  • Detox the liver and clear sinuses

Even today, many people swear by a morning shot of honey-ginger water to kickstart metabolism and fend off seasonal sniffles.

So while we may love honey ginger dressing for how it makes salads pop, it’s fascinating to know that this humble recipe brings with it centuries of wellness tradition—revamped for your modern table.

Don’t miss our Zobo Drink Recipe for another refreshing beverage rooted in traditional health wisdom.

User Reviews and Recipe Comparisons

Best Online Recipes Reviewed and Compared

With so many versions of honey ginger dressing floating around online, it can be tough to choose which one to try. To help, we reviewed several of the top-ranking recipes, comparing flavor, texture, ease, and healthiness.

SourceProsCons
Minimalist BakerSimple, vegan, uses maple optionLacks strong ginger kick
AllRecipesCrowd favorite, easy pantry ingredientsMay be too sweet for some
Bon AppétitRestaurant-quality flavor, balancedMore ingredients, slightly complex
Pinterest Trending VersionsCreative (adds sesame or tahini)Results vary without tested measurements

Cozy Bites Verdict: The best honey ginger dressing strikes a balance—strong ginger flavor, just enough honey for sweetness, and a splash of acid (like vinegar or citrus) to bring it all together. Our recipe hits all those notes while keeping things simple and customizable for home cooks.

If you’re short on time but want bold flavor, stick to 7-ingredient versions. If you love experimenting, try creamy or spicy twists from food bloggers who love a flavor punch.

Don’t miss our Crumbl Strawberry Crumb Cake Cookie if you’re in the mood for pairing sweet treats with tangy vinaigrettes—it’s a surprisingly delightful combo.

Tips from Food Bloggers and Nutrition Experts

Across the board, bloggers and nutritionists agree: homemade dressings like honey ginger beat store-bought versions every time.

Common expert tips include:

  • Use fresh ginger instead of powdered for the best flavor.
  • Balance sweet and acid (start with 3:1 ratio, adjust to taste).
  • Add citrus zest (like orange or lemon) to brighten the flavor naturally.
  • Shake, don’t stir — a mason jar makes emulsifying fast and fun.

Some registered dietitians even recommend this dressing for those seeking a natural immune boost, as both honey and ginger are known to support gut and respiratory health.

Looking for more immune-friendly ideas? Try our Liver Flush Juice Recipe for a refreshing detox that pairs beautifully with clean-eating meals.

FAQ

Is honey ginger dressing healthy?

Yes, honey ginger dressing is a nutrient-rich and wholesome alternative to many store-bought dressings that are often loaded with refined sugars, unhealthy oils, and preservatives. When made at home with raw honey, fresh ginger, vinegar, and quality oils, it supports digestion, boosts immunity, and even helps reduce inflammation. The natural antibacterial and anti-inflammatory properties of both honey and ginger make this a dressing that’s not just tasty, but genuinely good for you.

What does mixing ginger and honey do for you?

Mixing ginger and honey creates a powerful combination that can:
Soothe sore throats and coughs
Aid in digestion
Boost immunity
Improve circulation
This duo has long been used in holistic medicine for treating colds, promoting gut health, and detoxifying the body. When blended into a dressing, these benefits are infused right into your meal—making every bite part of your wellness routine.

What happens when you soak ginger in honey?

Soaking ginger in honey infuses the honey with ginger’s oils and bioactive compounds, creating a natural syrup that’s both medicinal and delicious. Over time, the honey pulls moisture and nutrients from the ginger, enhancing its flavor and properties. This mixture is often used in teas or tonics and can even be stirred into salad dressings for an extra depth of flavor and therapeutic boost.

Does honey taste good with ginger?

Absolutely. Honey and ginger are one of those timeless culinary pairings. The warm spice of ginger is perfectly balanced by the smooth sweetness of honey. Together, they create a rich, layered flavor profile that works beautifully in dressings, sauces, marinades, and drinks. Whether you’re using this combination in a vinaigrette or a warm tea, it’s bold, comforting, and incredibly satisfying.
Check out Semolina Pudding Recipes for a soothing dessert to follow your next honey-ginger-infused salad—it’s all about balance.

Conclusion: Final Thoughts on Why You Need Honey Ginger Dressing in Your Kitchen

From weeknight salads to dinner party dishes, honey ginger dressing is one of the most versatile, flavorful, and health-boosting condiments you can keep in your kitchen. It’s quick to make, customizable to your taste, and elevates everything it touches—from leafy greens to grilled salmon and noodle bowls.

More than just a dressing, it’s a beautiful fusion of two powerhouse ingredients: the zesty fire of ginger and the smooth sweetness of honey. Together, they create a flavor profile that’s comforting, energizing, and rooted in both culinary and wellness traditions.

Whether you’re chasing better flavor, cleaner ingredients, or a quick go-to that the whole family loves, honey ginger dressing delivers—and then some.

Learn more about Smoothies with Medjool Dates for another naturally sweet, nutrient-rich recipe your body and taste buds will thank you for.

June 17, 2025 0 comments
0 FacebookTwitterPinterestThreadsBlueskyEmail
brussel sprouts and ham quiche in ceramic dish
Dinner

Brussel Sprouts and Ham Quiche – The Ultimate Savory Delight for Any Meal

by Sarah June 16, 2025
written by Sarah

Brussel sprouts and ham quiche isn’t just another savory breakfast—it’s a warm slice of comfort that brings together family, flavor, and cherished traditions. Growing up, I spent countless hours in my grandmother’s kitchen, where the smell of baked crust and sizzling ham felt like a hug from the inside out. That’s where my love for cooking began, and today, as the heart behind CozyBitesRecipes.com, it continues with simple, soul-soothing meals like this one.

As a busy mom of two, I know how precious time and togetherness are. That’s why this Brussel sprouts and ham quiche is a favorite in our home. It combines tender roasted Brussels sprouts with smoky ham, all wrapped in a creamy, cheesy custard and golden crust. This Brussel sprouts and ham quiche is easy to prepare, nourishing, and perfect for those moments that call for a little bit of homemade love. Whether you’re prepping brunch for guests or slicing leftovers for lunchboxes, this dish delivers every time.

Looking for more delicious comfort recipes? Discover great ideas like this Mexican vegetarian cheese Jiffy corn bread casserole on Cozy Bites Recipes.

Table of Contents
  • The Complementary Flavors of Ham and Brussel Sprouts
  • Nutritional Benefits of Combining Vegetables and Protein in Quiche
  • Fresh vs. Frozen Brussel Sprouts: Which Is Best?
  • Selecting the Best Ham Cuts and Cheese Varieties
  • Why Soak Brussel Sprouts Before Cooking?
  • Alternatives to Soaking: Roasting, Steaming, or Blanching?
  • The Science of Pre-Cooking Veggies for Quiche Texture
  • How Long to Blanch Brussel Sprouts Before Baking
  • Homemade Crust vs. Store-Bought: Pros and Cons
  • Tips for a Flaky, Golden Quiche Crust with No Soggy Bottom
  • Ideal Egg-to-Cream Ratio for Custard
  • Layering Ingredients for Even Cooking and Flavor Distribution
  • Crustless Quiche Version for a Low-Carb Meal
  • Adding Cheddar, Gruyère, or Goat Cheese for Flavor Twists
  • Best Side Dishes to Pair with This Savory Quiche
  • Storing Leftovers Properly and How to Reheat Without Drying Out
  • Macronutrient Breakdown of a Slice of This Quiche
  • Make-Ahead Tips for Weekly Meal Planning and Freezer Storage: Brussel Sprouts and Ham Quiche
  • Are Brussels sprouts good in quiche?
  • Why do you soak Brussels sprouts before cooking?
  • Should vegetables be cooked before putting in quiche?
  • Should you blanch Brussels sprouts before baking them?

Why Brussel Sprouts and Ham Make the Perfect Quiche Combo

The Complementary Flavors of Ham and Brussel Sprouts

At first glance, Brussel sprouts and ham might seem like an unlikely pair. But when roasted to tender perfection, the earthy, nutty notes of Brussel sprouts balance beautifully with the salty, smoky depth of ham. The contrast creates a satisfying flavor harmony that stands out without overwhelming the palate. In a Brussel sprouts and ham quiche, this duo shines—combined with eggs and cheese, the mixture becomes a creamy, savory experience in every bite.

Ham offers a savory punch and hearty texture, while Brussel sprouts introduce a subtle sweetness and slight crispiness when prepped correctly. It’s this interplay of textures and flavors that makes a Brussel sprouts and ham quiche a surprisingly perfect and delicious choice for any meal.

Nutritional Benefits of Combining Vegetables and Protein in Quiche

This quiche doesn’t just taste amazing—it’s also packed with nutrients. Brussel sprouts are a great source of vitamin C, fiber, and antioxidants, supporting digestion and immune health. Ham adds high-quality protein, iron, and B vitamins, helping you stay full and energized.

Here’s a quick nutritional snapshot per serving (based on standard recipe):

NutrientAmount per slice
Calories~280
Protein~14g
Fiber~3g
Vitamin C30% DV
Calcium (with cheese)20% DV

By combining these two core ingredients, you get a meal that’s not only delicious but also balanced—great for breakfast, lunch, or dinner. And yes, it’s even freezer-friendly for batch cooking days!

Choosing the Right Ingredients for a Balanced Quiche

ingredients for brussel sprouts and ham quiche
Prepping fresh ingredients for a delicious Brussel Sprouts and Ham Quiche

Fresh vs. Frozen Brussel Sprouts: Which Is Best?

When it comes to making the ultimate Brussel sprouts and ham quiche, the choice between fresh and frozen sprouts can significantly impact both flavor and texture. Fresh Brussel sprouts typically offer a sweeter, nuttier taste and a crisp-tender bite after roasting or blanching—perfect for elevating the overall richness of your quiche.

That said, frozen Brussel sprouts can still work in a Brussel sprouts and ham quiche if convenience is key. Just be sure to fully thaw and pat them dry before cooking. Excess moisture from frozen vegetables can lead to a soggy crust and watery filling. For the best texture, caramelization, and depth of flavor, fresh sprouts are your best bet.

Quick Tip:

If you’re using fresh sprouts, slice them thinly or quarter them for even cooking. This also helps them blend smoothly into the custard mixture.

Selecting the Best Ham Cuts and Cheese Varieties

The ham you choose can make or break your quiche. While pre-diced or leftover ham works great for quick meals, opt for thick-cut smoked ham or spiral-glazed ham if you want deep, savory flavor in every bite. Avoid deli-thin slices—they can get lost in the filling.

Some of the best ham options for this quiche:

  • Honey-glazed spiral ham (adds sweet-savory contrast)
  • Smoked ham steak (bold, salty flavor)
  • Leftover holiday ham (economical and delicious)

When it comes to cheese, you have plenty of room to play. A classic sharp cheddar adds richness and tang, while gruyère offers a more gourmet nutty flavor. Goat cheese or feta can bring a tangy twist for those who love bold taste.

Here’s a quick guide to ideal cheeses for your quiche:

Cheese TypeFlavor ProfileBest Pairing Note
CheddarSharp, tangyEnhances ham’s saltiness
GruyèreNutty, richMatches roasted sprouts well
Goat CheeseTangy, creamyGreat with caramelized onions
MozzarellaMild, stretchy textureKid-friendly and neutral taste

For a beautifully melted and browned top, consider blending two types of cheese. For example, combine cheddar and mozzarella or gruyère and feta for layered complexity.

Check out this high-protein dense bean salad if you’re looking for a healthy side dish to serve with your quiche.

Print
clock clock iconcutlery cutlery iconflag flag iconfolder folder iconinstagram instagram iconpinterest pinterest iconfacebook facebook iconprint print iconsquares squares iconheart heart iconheart solid heart solid icon
brussel sprouts and ham quiche in ceramic dish

Brussel Sprouts and Ham Quiche

5 Stars 4 Stars 3 Stars 2 Stars 1 Star

No reviews

Print Recipe
Pin Recipe

A savory and comforting quiche made with brussel sprouts, ham, eggs, and cheese—perfect for breakfast, brunch, or light dinners.

  • Total Time: 1 hour
  • Yield: 8 servings 1x

Ingredients

Scale

1 9-inch pie crust

4 large eggs

1½ cups heavy cream or milk

1 cup diced ham”,

1 cup halved and blanched brussel sprouts

1½ cups shredded cheese (cheddar, gruyère, or combo)

Salt, pepper, nutmeg to taste

Instructions

Blind bake the pie crust at 375°F for 15 minutes.

Prepare and pre-cook the brussel sprouts (blanch or roast).

In a bowl, whisk eggs, cream, and seasoning.

Layer cheese, ham, sprouts in crust; pour custard over.

Bake at 375°F for 35–45 minutes until set and golden.

Let rest 10–15 minutes before slicing.

Notes

Can be made a day ahead of time. Be sure to let cool fully before covering and refrigerating. The quiche can be eaten cold or at room temperature or reheated, covered with aluminum foil, in a 350°F oven for about 20 minutes.


  • Author: Sarah
  • Prep Time: 20 minutes
  • Cook Time: 40 minutes

Nutrition

  • Serving Size: 8 servings
  • Calories: 298

Did you make this recipe?

Share a photo and tag us — we can’t wait to see what you’ve made!

Prepping Brussel Sprouts for Quiche – To Soak or Not? Brussel Sprouts and Ham Quiche

Why Soak Brussel Sprouts Before Cooking?

One of the most common questions home cooks ask when preparing brussel sprouts and ham quiche is: Should I soak my sprouts first? The short answer: it depends on your goal.

Soaking brussel sprouts in cold water for about 10–15 minutes before cooking can help:

  • Remove dirt and any hidden insects (especially if using fresh garden-picked sprouts)
  • Loosen outer leaves for easier trimming
  • Slightly mellow the bitterness, especially in older or larger sprouts

While soaking is not mandatory, it can improve overall texture and taste, especially when you’re blending sprouts into a soft egg-based quiche. Just make sure to pat them dry thoroughly afterward—excess water will make your filling too loose.

If you’re short on time or using bagged store-bought sprouts, a quick rinse may be enough.

Alternatives to Soaking: Roasting, Steaming, or Blanching?

If soaking isn’t your thing, there are other prep methods that work beautifully with brussel sprouts and ham quiche:

Prep MethodBenefitsBest Use Case
RoastingDeepens flavor, adds caramelizationUse for extra crunch and smokiness
SteamingRetains nutrients, softens textureGreat for mixing evenly into custard
BlanchingQuick-cooks and brightens colorIdeal for maintaining vibrant texture
  • Roasting: Halve the sprouts, drizzle with olive oil, salt, and pepper. Roast at 400°F for 20 minutes until browned. This is ideal for a quiche with bold, roasted notes.
  • Steaming: Lightly steam for 5–7 minutes to soften sprouts while keeping them vibrant.
  • Blanching: Briefly boil sprouts (2–3 minutes), then shock in ice water to lock in color and stop cooking.

In most cases, blanching is the go-to method when making quiche. It strikes the right balance between flavor, tenderness, and structure. And yes—you should blanch sprouts before baking them if you want to avoid raw, tough bites in your finished dish.

Looking for inspiration? Try this southwest dense bean salad as a perfect side option for a quiche dinner.

Cooking Techniques: Brussel Sprouts and Ham Quiche – Should You Pre-Cook Vegetables?

blanching brussel sprouts for quiche
Blanched Brussels sprouts cooling before use in Brussel Sprouts and Ham Quiche

The Science of Pre-Cooking Veggies for Quiche Texture

When crafting the perfect brussel sprouts and ham quiche, pre-cooking your vegetables isn’t just a suggestion—it’s a game changer. Why? Because vegetables like brussel sprouts release moisture as they cook. If they’re added raw to the quiche filling, they can make the custard watery and the crust soggy.

Pre-cooking the Brussels sprouts—whether by roasting, steaming, or blanching—is a key step when preparing a Brussel sprouts and ham quiche. It reduces excess moisture and brings out the natural sweetness and depth of flavor in the sprouts, which complements the savory ham and creamy custard base perfectly.

This technique is especially important when using larger or thicker sprouts. Softening them beforehand ensures they cook evenly inside the Brussel sprouts and ham quiche, preventing any raw or tough bites. The result is a cohesive, melt-in-your-mouth texture that makes each slice as satisfying as the last.

Bonus: Pre-cooked veggies also layer better and help your quiche hold its shape.

How Long to Blanch Brussel Sprouts Before Baking

If you’re going the blanching route (a smart choice for uniform tenderness), here’s a step-by-step to get it right:

  1. Trim and halve the brussel sprouts.
  2. Bring a pot of lightly salted water to a boil.
  3. Add sprouts and boil for 2 to 3 minutes until bright green and just slightly tender.
  4. Immediately transfer to an ice water bath to stop the cooking.
  5. Drain well and pat dry with paper towels before folding them into the quiche.

Important: Moisture is your quiche’s enemy. Always dry your sprouts well after blanching to avoid a soggy filling.

Once your ingredients are prepped, start assembling your Brussel sprouts and ham quiche by layering the roasted sprouts, diced ham, and shredded cheese directly into the crust. This step ensures even distribution and allows the flavors to meld as they bake. Pour the egg mixture over the top, letting it fill every nook and cranny. By layering this way, the Brussels sprouts absorb the savory richness of the ham and cheese instead of releasing moisture, giving your Brussel sprouts and ham quiche a firm texture and deep, satisfying flavor.

Don’t miss our semolina pudding recipes if you’re craving a sweet finish after your savory quiche!

Building the Perfect Quiche Base and Crust: Brussel Sprouts and Ham Quiche

Homemade Crust vs. Store-Bought: Pros and Cons

The crust is more than just a vessel—it’s a critical part of your brussel sprouts and ham quiche. Whether you go homemade or store-bought, the crust sets the tone for texture, flavor, and structure. But which option is right for you?

OptionProsCons
Homemade CrustButtery, flakey, customizable flavorsTakes more time and prep
Store-BoughtConvenient, consistent resultsCan be bland or overly processed

A homemade crust—crafted from scratch with butter or shortening—adds rich flavor and flaky texture that takes your Brussel sprouts and ham quiche to the next level. It’s the kind of extra step that shows care, whether you’re hosting brunch or treating yourself to a cozy weekend bake. That said, convenience matters too. On busy days, a quality pre-rolled pie crust from the store works just fine. Just make sure it’s unsweetened (some are made for desserts) and give it a quick blind bake to keep your Brussel sprouts and ham quiche crisp, not soggy.

Tips for a Flaky, Golden Quiche Crust with No Soggy Bottom

One of the most common mistakes in baking quiche? A soggy, undercooked crust. But with a few simple steps, you can ensure your quiche crust is buttery, crisp, and firm enough to hold the creamy filling.

1. Blind Bake First

Before adding any filling, bake the crust empty (aka blind baking). Line it with parchment and fill with pie weights or dried beans. Bake at 375°F for 12–15 minutes, then remove weights and bake 5 more minutes.

2. Brush with Egg Wash

After blind baking, brush the crust with a beaten egg and return to the oven for 3–4 minutes. This creates a seal and prevents the custard from soaking into the dough.

3. Avoid Overfilling

Only pour the egg mixture to about 90% of the crust’s depth. Overfilling causes leaks and uneven baking.

4. Cool Slightly Before Filling

Let the crust cool for 10 minutes before adding the brussel sprouts and ham mixture. This small pause helps maintain crust integrity.

Looking for something fresh and hydrating to pair with your quiche? Try this zobo drink recipe packed with flavor and antioxidants.

Mixing and Baking Your Brussel Sprouts and Ham Quiche

 sliced brussel sprouts and ham quiche
A perfect slice of savory Brussel Sprouts and Ham Quiche

Ideal Egg-to-Cream Ratio for Custard

The heart of any great quiche lies in its custard—the smooth, savory egg mixture that ties everything together. When crafting a Brussel sprouts and ham quiche, getting that custard just right is essential. It’s all about balancing your egg-to-dairy ratio to create a silky texture that complements the hearty bites of roasted sprouts and smoky ham.

A general rule of thumb is:

  • 1 large egg per ½ cup of cream or milk

For a standard 9-inch pie crust, you’ll need:

  • 4 large eggs
  • 1½ cups of heavy cream (or a blend of milk and cream)

This combination delivers a rich, creamy texture without being too dense or rubbery. If you want a lighter version, use half whole milk and half cream. But avoid fat-free milk—it can make your custard thin and bland.

Optional Add-ins:

  • A pinch of nutmeg for subtle warmth
  • A tablespoon of Dijon mustard for tang
  • Fresh thyme or chives for herbal brightness

Layering Ingredients for Even Cooking and Flavor Distribution

To avoid a soggy bottom and ensure every bite bursts with flavor, proper layering of your ingredients is key. Here’s the layering technique that works best for this quiche:

  1. Sprinkle shredded cheese on the bottom of the blind-baked crust—this creates a moisture barrier.
  2. Add your chopped ham next, distributing evenly.
  3. Top with blanched or roasted brussel sprouts, making sure they’re not clumped.
  4. Pour the custard slowly and gently over the filling to avoid displacing ingredients.
  5. Finish with more cheese on top if you like a golden, bubbly top layer.

Then, bake at 375°F (190°C) for 35–45 minutes, or until the center is set and the top is lightly browned. A slight jiggle is okay—it will firm up as it cools. Let the quiche rest for 10–15 minutes before slicing to help the custard finish setting.

Baking Tip:

Place the quiche on a baking sheet to catch any overflow and ensure even cooking, especially if your oven has hot spots.

Check out this natural Mounjaro recipe for a healthy drink to serve alongside your brunch spread.

Variations of Brussel Sprouts and Ham Quiche to Try

Crustless Quiche Version for a Low-Carb Meal

Trying to cut carbs or skip the crust? No problem. A crustless brussel sprouts and ham quiche is just as flavorful—and even easier to make. It’s also gluten-free, keto-friendly, and perfect for a make-ahead breakfast or light dinner.

Instead of building the quiche in a crust, grease your pie dish well (butter or nonstick spray), and:

  • Layer ham, brussel sprouts, and cheese directly in the pan.
  • Pour over your custard (4 eggs, 1½ cups milk/cream).
  • Bake at 375°F for 35–40 minutes.

This variation cuts about 120 calories per slice, making it an ideal option if you’re watching your intake but still want that cozy, savory bite.

Adding Cheddar, Gruyère, or Goat Cheese for Flavor Twists

One of the easiest ways to refresh your Brussel sprouts and ham quiche is by experimenting with different cheeses. Whether you prefer sharp cheddar, nutty Gruyère, creamy goat cheese, or even a smoky gouda, each variety adds a unique twist to your Brussel sprouts and ham quiche. It’s a simple way to customize the flavor based on your preferences—or whatever cheese you have on hand.

Here are a few fun combinations:

Cheese ComboFlavor NotePairing Tip
Sharp Cheddar + MozzarellaClassic, kid-friendlyGreat for lunchboxes or picky eaters
Gruyère + SwissNutty and meltyAdds depth and elegance
Goat Cheese + FetaTangy and boldIdeal for dinner parties or brunch
Pepper Jack + CheddarSpicy twistPerfect with a side of salsa or greens

You can also toss in extras like:

  • Caramelized onions for a sweet touch
  • Sun-dried tomatoes for a tangy contrast
  • Spinach or kale for more greens

These variations let you turn a classic into something new and exciting without much extra effort.

Looking for a creative brunch twist? Don’t miss our banana peach smoothie recipe—a refreshing drink to complement any savory dish.

Serving, Storing, and Reheating Tips: Brussel Sprouts and Ham Quiche

Best Side Dishes to Pair with This Savory Quiche

Brussel sprouts and ham quiche is hearty enough to stand alone, but pairing it with the right side dish can take your meal from great to unforgettable. Whether you’re serving brunch, lunch, or a light dinner, the goal is to balance the richness of the quiche with something refreshing or crunchy.

Here are some ideal pairings:

Side DishWhy It Works
Mixed green saladLight and crisp contrast
Roasted sweet potatoesNatural sweetness pairs beautifully
Fruit saladBright, acidic balance
Sourdough toastAdds a rustic, chewy texture
Chia smoothieNutrient-rich and refreshing

Serve your quiche warm with a fresh garden salad topped with vinaigrette, or keep it casual with toast and fruit for breakfast. If you’re hosting brunch, add coffee or mimosas to round out the experience.

Discover great ideas like chia seeds smoothie to pair with your quiche for a protein-packed side or light beverage.

Storing Leftovers Properly and How to Reheat Without Drying Out

One of the best things about this brussel sprouts and ham quiche? It stores beautifully. That means you can make it ahead, enjoy leftovers, or pack it into lunches during the week.

Storage Tips:

  • Refrigerator: Wrap tightly in foil or place in an airtight container. Keeps fresh for up to 4 days.
  • Freezer: Wrap individual slices or the whole quiche (once cooled) in plastic wrap + foil. Freeze for up to 2 months.

Reheating Tips:

  • Oven (best for crisp crust): 350°F for 10–15 minutes, covered with foil to prevent drying.
  • Microwave (for quick reheats): 60–90 seconds per slice. Add a small cup of water to the microwave to preserve moisture.

Avoid reheating in high heat too quickly, as it can make the eggs rubbery or overcook the sprouts. A low-and-slow reheat is the secret to keeping texture and flavor intact.

Looking for a drink that pairs well post-quiche? Check out this liver flush juice recipe for a detox-style boost to cleanse your palate and body.

Health Benefits and Meal Prep Ideas: Brussel Sprouts and Ham Quiche

Macronutrient Breakdown of a Slice of This Quiche

Brussel sprouts and ham quiche isn’t just delicious—it’s also surprisingly nutritious. Thanks to its mix of vegetables, protein, and healthy fats, a single slice provides a well-balanced meal ideal for breakfast, brunch, or even a light dinner.

Here’s a typical macronutrient breakdown per slice (based on a standard 9-inch quiche, cut into 8 servings):

NutrientApproximate Value
Calories270–320 kcal
Protein14–18g
Fat18–22g
Carbohydrates8–10g
Fiber2–3g
Net Carbs6–8g

This makes Brussel sprouts and ham quiche ideal for low-carb lifestyles, meal prep plans, or anyone who prefers whole, satisfying meals that don’t leave you hungry an hour later. Using high-quality ham, fresh Brussel sprouts, eggs, and a bit of aged cheese not only boosts protein but also enhances the rich, savory flavor that makes this Brussel sprouts and ham quiche a go-to comfort dish.

Bonus: Brussel sprouts are high in vitamin K, C, and folate, supporting bone health and immune function.

Make-Ahead Tips for Weekly Meal Planning and Freezer Storage: Brussel Sprouts and Ham Quiche

One of the greatest advantages of a quiche—especially one as hearty as this—is how meal-prep friendly it is. With a few strategic steps, you can prep it for the entire week or freeze extra portions for later.

Weekly Meal Prep Strategy:

  • Bake your quiche on Sunday.
  • Let it cool completely, then slice into 8 even pieces.
  • Store slices in individual containers for grab-and-go lunches or breakfasts.

Freezer-Friendly Instructions:

  • Wrap each slice in plastic wrap and then foil, or use a vacuum-sealer bag.
  • Label with the date. It will keep for up to 2 months.
  • Reheat in the oven or toaster oven for best results—just 10 minutes at 350°F and it’s ready to enjoy.

This flexibility makes brussel sprouts and ham quiche an ideal recipe for anyone juggling a busy schedule but still craving something homemade and satisfying.

Looking for something fun and fruity for breakfast later in the week? Try this ABC fruit juice—a great vitamin-packed sidekick to your savory morning.

Frequently Asked Questions About Brussel Sprouts and Ham Quiche

Are Brussels sprouts good in quiche?

Yes, Brussels sprouts are excellent in quiche. When roasted, blanched, or sautéed beforehand, they bring a slightly sweet, nutty flavor that balances well with savory ingredients like ham and cheese. Their texture softens during baking, blending beautifully into the creamy custard. If prepped correctly, Brussels sprouts add both nutrition and depth to your quiche—no bitterness, just delicious complexity.

Why do you soak Brussels sprouts before cooking?

Soaking Brussels sprouts before cooking helps remove any dirt, bugs, or residual bitterness, especially in larger or more mature sprouts. A quick 10–15 minute soak in cold water can also loosen the outer leaves and improve texture. While not always necessary, soaking is a helpful prep step when using fresh, untrimmed sprouts in dishes like quiche.

Should vegetables be cooked before putting in quiche?

Absolutely. Pre-cooking vegetables is key to a successful quiche. Raw vegetables tend to release moisture as they bake, which can make the quiche soggy and prevent even cooking. Sautéing, steaming, roasting, or blanching vegetables like Brussels sprouts ensures they’re tender and flavorful before being mixed into the custard. This step is essential for a well-textured, sliceable quiche.

Should you blanch Brussels sprouts before baking them?

Yes, blanching Brussels sprouts before baking is highly recommended, especially if they’re going into a quiche. Blanching softens the sprouts slightly, preserves their bright green color, and reduces cooking time in the oven. After blanching for 2–3 minutes, shock them in ice water, pat them dry, and then add them to your filling. This method prevents soggy spots and ensures even texture throughout.

Conclusion: Make Brussel Sprouts and Ham Quiche Your New Comfort Classic

Brussel sprouts and ham quiche isn’t just another dish—it’s a celebration of flavor, comfort, and kitchen creativity. Whether you’re gathering around the table for Sunday brunch or batch-prepping your meals for the week, this quiche offers everything: texture, taste, nutrition, and that home-cooked warmth Cozy Bites Recipes is all about.

With a flaky crust, creamy egg custard, savory ham, and tender Brussels sprouts, this recipe checks every box. Plus, it’s endlessly adaptable—low-carb, freezer-friendly, and perfect for make-ahead mornings.

If you’re looking to add a new staple to your breakfast, brunch, or light dinner rotation, let this be the one. You bring the love—we’ve got the recipe.

Don’t miss our pink salt recipe for another unique way to elevate your homemade meals with natural flavors and flair.

June 16, 2025 0 comments
0 FacebookTwitterPinterestThreadsBlueskyEmail
Smoothies with Medjool dates in a mason jar
Breakfast

Smoothies with Medjool Dates: The Ultimate Guide to Creamy, Naturally Sweet Sips

by Sarah June 15, 2025
written by Sarah

In my kitchen, where comfort meets creativity and memories are made one recipe at a time, smoothies with Medjool dates have become a beloved staple. My passion for cooking began in my grandmother’s cozy kitchen—where the scent of cinnamon and ripe fruit filled the air, and every meal was a moment of connection. Years later, now a mom of two, that same spirit fuels every recipe I create for Cozy Bites Recipes.

These smoothies with Medjool dates aren’t just about tossing ingredients into a blender—they’re a warm hug in a glass. Medjool dates, known for their caramel-like sweetness and rich texture, transform everyday blends into something deeply satisfying and naturally energizing. Whether I’m prepping a quick breakfast for my family or blending a post-school treat, smoothies with Medjool dates offer that extra dose of nourishment and love.

Check out this fruity refreshment in our Banana Peach Smoothie Recipe—it’s a great example of how simple, comforting ingredients can bring smiles to every sip.

In this guide, you’ll learn why smoothies with Medjool dates are ideal for clean, satisfying nutrition. We’ll explore easy pairings, creative recipes, and simple ways to make every blend more nutritious and delicious. Whether you’re new to smoothies with Medjool dates or already a fan, there’s something here to inspire your next cozy kitchen creation.

Table of Contents
  • What Makes Medjool Dates Unique?
  • Natural Sweetness and Texture Benefits for Blended Drinks
  • Nutritional Profile of Medjool Dates
  • Energy Boost, Digestion Support, and Heart Health
  • Bananas, Nut Butters, and Plant-Based Milk Options
  • Spices, Protein Add-Ins, and Fiber-Rich Boosters
  • Classic Banana Date Smoothie
  • Chocolate Almond Date Shake
  • Tropical Mango-Date Smoothie
  • Green Detox Smoothie with Medjool Dates
  • Peanut Butter Protein Smoothie with Dates
  • Vegan Oatmeal Date Breakfast Smoothie
  • Coffee-Date Morning Booster
  • When to Use Fresh vs. Dried Dates in Blends
  • Choosing the Right Blender
  • Tips for Layering Ingredients and Achieving Creamy Consistency
  • Vegan and Dairy-Free Options
  • High-Protein and Low-Sugar Variations
  • Smoothies for Weight Gain vs. Weight Loss
  • Freezing Smoothie with Medjool Dates
  • How Long Smoothies Last and Storage Best Practices
  • Can dates be used in smoothies?
  • What to pair with Medjool dates?
  • What date is best for smoothies?
  • What are the benefits of dates and banana smoothies?

Why Medjool Dates Are Perfect for Smoothies

What Makes Medjool Dates Unique?

Medjool dates stand out from other varieties because of their large size, soft texture, and natural richness. Grown in warm climates like California and the Middle East, they’re often called “nature’s candy” for good reason—they’re incredibly sweet without added sugar. When blended into smoothies with Medjool dates, they melt effortlessly, offering not just sweetness, but a creamy consistency that rivals milk or yogurt.

Unlike Deglet Noor dates (which are firmer and drier), Medjool dates don’t require heavy processing or added liquids to soften. That makes them the perfect whole-food sweetener for smoothies with Medjool dates—especially those aimed at clean eating and balanced nutrition.

Natural Sweetness and Texture Benefits for Blended Drinks

In smoothies with Medjool dates, texture matters just as much as taste. Medjool dates create a velvety smooth base that enhances the drink’s body, especially when paired with frozen fruit or creamy elements like bananas or nut butters. These smoothies with Medjool dates also bring balance to bold flavors—cutting through tart berries, bitter greens, or earthy protein powders with ease.

Even just one or two Medjool dates can replace honey, maple syrup, or processed sugars entirely in your smoothies with Medjool dates. This swap not only lowers the glycemic index of your drink but also adds essential nutrients—fiber, potassium, and antioxidants—that refined sugars lack.

Don’t miss our nutrient-packed Chia Seeds Smoothie recipe for more naturally sweet ideas.

Health Benefits of Smoothies with Medjool Dates

Medjool dates health benefits for smoothies
Medjool dates are packed with fiber, potassium, and natural sugars

Nutritional Profile of Medjool Dates

When you reach for Medjool dates to sweeten your smoothies with Medjool dates, you’re getting a lot more than just a rich, caramel flavor. These dates are packed with nutrients that support overall wellness. Each Medjool date contains:

NutrientPer Date (24g)
Calories66
Natural Sugars16g
Fiber1.6g
Potassium167mg
Magnesium13mg
Vitamin B60.1mg
Iron0.2mg

What makes smoothies with Medjool dates particularly unique is their blend of quick energy (from natural sugars) and slow-digesting fiber. This combo provides a steady fuel source—great for mornings, workouts, or mid-day slumps.

Also, they’re cholesterol-free, fat-free, and sodium-free, which makes them a heart-healthy addition to any drink.

Discover great ideas like the ABC Fruit Juice, another naturally sweet blend loaded with wellness perks.

Energy Boost, Digestion Support, and Heart Health

Let’s break it down a bit more.

  • Energy Boost: Medjool dates are a favorite among athletes for good reason. Their glucose, fructose, and sucrose content makes them a powerful natural energy source—no caffeine crash, no artificial spike.
  • Digestive Aid: With 6-7g of dietary fiber per 100g, dates help regulate digestion and support gut health. Adding just two dates to your smoothie helps you meet your daily fiber needs and can support smoother digestion.
  • Heart Health: Thanks to potassium and antioxidants like polyphenols, dates support blood pressure regulation and may reduce oxidative stress, which helps keep your heart in check.

Pairing dates with ingredients like bananas (which also offer potassium) or flaxseeds (rich in omega-3s) boosts these health benefits even more.

Looking for inspiration? Try the Liver Flush Juice—it’s loaded with detoxifying ingredients similar to smoothies with Medjool dates.

So next time you’re blending your breakfast or prepping a post-workout shake, don’t just reach for sweeteners—choose smoothies with Medjool dates that nourish your body from the inside out.

Best Ingredients to Pair with Medjool Dates in Smoothies

If smoothies with Medjool dates are the star of the show, then what you blend with them is the supporting cast that makes the performance unforgettable. From fruits and plant-based milk to spices and superfoods, choosing the right combinations can transform your smoothie from basic to crave-worthy.

Bananas, Nut Butters, and Plant-Based Milk Options

Bananas and Medjool dates are a match made in smoothie heaven. In smoothies with Medjool dates, both ingredients offer natural sweetness and creaminess that blend effortlessly. Bananas also bring potassium, fiber, and a comforting flavor that balances out the rich caramel notes of dates.

Nut butters like almond, cashew, or peanut butter add a satisfying depth to your smoothies with Medjool dates—along with healthy fats and plant-based protein. Just one tablespoon can make your blend more filling, especially for breakfast or post-workout refuels.

As for the liquid base, here are a few perfect options:

Plant-Based MilkWhy It Works
Almond MilkLight and nutty, enhances creaminess
Oat MilkNaturally sweet, pairs well with dates
Coconut MilkRich and tropical, great for texture
Cashew MilkUltra-creamy and subtly sweet

You can even try water with chia or flax gel for an extra fiber boost without the heaviness.

Spices, Protein Add-Ins, and Fiber-Rich Boosters

Want to add complexity and nutrition to your smoothie? Spices and superfoods are where it’s at.

  • Spices: A dash of cinnamon, nutmeg, or ginger enhances the warm, sweet tones of Medjool dates. These also bring anti-inflammatory benefits and digestive support.
  • Protein Boosters: Add-ins like protein powder, Greek yogurt (if not vegan), or hemp seeds can turn your smoothie into a complete meal. A scoop of vanilla plant protein works especially well in date smoothies for a dessert-like vibe.
  • Fiber & Texture: Rolled oats, chia seeds, or flaxseeds bulk up your smoothie while improving gut health. They pair beautifully with the chewy texture of soaked dates.

Check out this unique Brazilian Mounjaro twist for other creative ingredient combinations that energize and satisfy.

Pro Tip: Balance is key when making smoothies with Medjool dates. If you’re using several rich ingredients (like bananas and nut butter), consider a splash of lemon juice or a handful of greens to keep the flavor from feeling too heavy.

Print
clock clock iconcutlery cutlery iconflag flag iconfolder folder iconinstagram instagram iconpinterest pinterest iconfacebook facebook iconprint print iconsquares squares iconheart heart iconheart solid heart solid icon
Smoothies with Medjool dates in a mason jar

Smoothies with Medjool Dates

5 Stars 4 Stars 3 Stars 2 Stars 1 Star

No reviews

Print Recipe
Pin Recipe

Creamy, naturally sweet smoothie made with banana, Medjool dates, and almond milk.

  • Total Time: 5 mins
  • Yield: 1 serving 1x

Ingredients

Scale

2 ripe bananas

3 Medjool dates (pitted)

1 cup almond milk

½ tsp cinnamon

Ice to taste

Instructions

Pit and soak the dates (5 mins in warm water).


Add all ingredients to blender.


Blend until smooth and creamy.


Serve immediately.

Notes

To be enjoyed right away or frozen for a later date. Freezes well for 1-2 months. 

Tastes great as a protein shake too! Add 1 – 2 scoops of protein powder for best results.

  • Author: Sarah
  • Prep Time: 5 mins

Nutrition

  • Calories: 280

Did you make this recipe?

Share a photo and tag us — we can’t wait to see what you’ve made!

7 Easy Smoothie Recipes Using Medjool Dates

Smoothie jars made with Medjool dates
Variety of smoothies using Medjool dates

Adding Medjool dates to smoothies is not just about sweetness—it’s about bringing depth, texture, and nourishment to every sip. Here are 7 tried-and-true smoothie recipes that are simple to make and loaded with benefits.

Classic Banana Date Smoothie

Ingredients:

  • 2 ripe bananas
  • 3 Medjool dates (pitted and soaked for 5 mins)
  • 1 cup almond milk
  • ½ tsp cinnamon
  • Handful of ice

Why You’ll Love It:
Sweet, creamy, and perfect for breakfast. Bananas and dates create a silky base with hints of warm spice.


Chocolate Almond Date Shake

Ingredients:

  • 2 Medjool dates
  • 1 tbsp almond butter
  • 1 tbsp cocoa powder
  • 1 frozen banana
  • ¾ cup oat milk
  • Pinch of sea salt

Why You’ll Love It:
It’s a dessert-like smoothie that satisfies chocolate cravings without processed sugar.


Tropical Mango-Date Smoothie

Ingredients:

  • 1 cup frozen mango
  • 2 Medjool dates
  • ½ banana
  • ¾ cup coconut milk
  • 1 tsp lime juice

Why You’ll Love It:
Refreshing and summery, this one is perfect for hot days or post-yoga cool-downs.


Green Detox Smoothie with Medjool Dates

Ingredients:

  • 1 cup spinach or kale
  • 1 green apple
  • 2 Medjool dates
  • ½ cucumber
  • 1 tbsp lemon juice
  • 1 cup water

Why You’ll Love It:
A sweet and tangy detoxifier with fiber, antioxidants, and clean green fuel.


Peanut Butter Protein Smoothie with Dates

Ingredients:

  • 1 scoop vanilla protein powder
  • 2 Medjool dates
  • 1 tbsp peanut butter
  • 1 banana
  • 1 cup almond milk
  • Ice cubes

Why You’ll Love It:
High-protein and filling—great for after workouts or as a meal replacement.


Vegan Oatmeal Date Breakfast Smoothie

Ingredients:

  • ¼ cup rolled oats
  • 2 Medjool dates
  • 1 cup oat milk
  • 1 banana
  • ½ tsp vanilla extract
  • Dash of cinnamon

Why You’ll Love It:
Tastes like a cozy breakfast bowl—blended! Full of fiber and slow-burning energy.


Coffee-Date Morning Booster

Ingredients:

  • ½ cup brewed and chilled coffee
  • 2 Medjool dates
  • ½ frozen banana
  • ¾ cup cashew milk
  • 1 tbsp almond butter
  • Dash of cacao or cinnamon

Why You’ll Love It:
Gives you that caffeine buzz with extra flavor and sustained energy—no crash!

Discover great ideas like the Pink Salt Recipe to pair with your smoothies for even more mineral goodness in your morning routine.


Quick Tip:
To prep ahead, freeze bananas and soak dates overnight. You can also blend these smoothies and freeze in mason jars for up to 3 days.

How to Prepare Medjool Dates for Smoothies : Smoothies with Medjool dates

Knowing how to prep Medjool dates for smoothies with Medjool dates can make a huge difference in texture, flavor, and ease of blending. While they’re soft and sticky by nature, the right technique ensures a smooth, lump-free drink every time.

Pitting and Soaking Tips

Step 1: Pit the Dates
Always start by removing the pit. Medjool dates have a large seed in the center that must be taken out before blending. Simply slice the date lengthwise with your fingers or a paring knife and pop the pit out.

Step 2: Soak for Better Blendability
Though Medjool dates are softer than most, a short soak can make blending even smoother—especially if your blender isn’t high-powered.

Blending PowerSoak Time
High-speed blenderNo soak or 2–5 mins max
Standard blender10–15 mins in warm water
Hand blender20 mins or overnight

Soaking also helps release their natural sugars into the blend more evenly, especially when paired with creamy or dense ingredients like nut butters or oats.

When to Use Fresh vs. Dried Dates in Blends

Though Medjool dates are often labeled “fresh,” they’re actually just naturally moist. You might also find dried versions of Medjool or other date types like Deglet Noor.

TypeUse in Smoothies?Best Use Case
Fresh Medjool Dates✅ YesFor sweet, creamy smoothies
Dried Medjool Dates✅ Yes (must soak)When you’re out of fresh dates
Deglet Noor (dry)⚠️ Not idealLess sweet and firm, use only if soaked

Fresh Medjool dates offer the best result—smooth, rich, and deeply flavorful. Dried dates, while usable, will lack the same depth and may require extra liquid and longer soak time.

Want to try a smoothie with unusual but nutrient-dense ingredients? Check out the Liver Flush Juice for more clean-blend ideas.


Bonus Tip:
For a flavor twist in your smoothies with Medjool dates, soak dates in brewed tea (like chai or cinnamon) or plant milk instead of water before blending. This adds an aromatic depth to your smoothie that’s perfect for fall or cozy breakfast blends.

Tools and Techniques for Perfectly Blended Smoothies: Smoothies with Medjool dates

Making smoothies with Medjool dates doesn’t require a fancy kitchen setup—but using the right tools and techniques can dramatically improve your results. Whether you’re new to blending or looking to level up your skills, these tips will make every smoothie velvety, consistent, and delicious.

Choosing the Right Blender

Not all blenders are created equal—especially when making smoothies with Medjool dates. Since Medjool dates are thick and sticky, a quality blender can make a big difference in consistency and cleanup.

Blender TypeProsIdeal For
High-Speed BlenderBreaks down tough fibers and sticky datesDaily smoothie makers, nut butters
Standard CountertopAffordable and capable with soft ingredientsOccasional smoothie prep
Immersion BlenderCompact and easy to storeSmall batches or travel-friendly use
Bullet-Style BlenderQuick and easy to cleanOn-the-go smoothies, small servings

Recommended Brands: Vitamix, Ninja, NutriBullet, Blendtec

Want a healthy blend without excess cleanup? Don’t miss our Chia Seeds Smoothie—it’s quick, simple, and packed with fiber.

Tips for Layering Ingredients and Achieving Creamy Consistency

How you layer your smoothie ingredients inside the blender actually affects how smoothly it blends. Here’s the golden rule:

Start with Liquids First → Add Soft Ingredients → Then Add Harder/Frozen Ingredients → Dates Last (on top)

This order helps prevent dates from getting stuck at the base and ensures better circulation in the blender.

Pro Tips for Smooth Blends:

  • Soak Dates Properly: As covered earlier, a 5–15 minute soak helps soften the dates and blend them more smoothly.
  • Add Ice Last: Frozen items (ice or frozen fruit) should be added at the top so they blend last—protecting your blade and creating an even texture.
  • Scrape the Sides: Stop the blender once midway to scrape down sides and ensure every chunk of date or nut butter is incorporated.
  • Blend Twice: Use a short pulse cycle after your initial blend to smooth out leftover bits.

Need creative ideas for using fruit and creamy ingredients together? Check out the Banana Peach Smoothie Recipe—a perfect pairing with Medjool dates.


Bonus Hack:
Add a tiny pinch of sea salt or a drop of vanilla extract to deepen flavor. These ingredients amplify the natural caramel-like profile of Medjool dates without overpowering other flavors.

Smoothies with Medjool Dates for Specific Diets

One of the best things about smoothies with Medjool dates is how easily they can be tailored to match your dietary goals. Whether you’re eating plant-based, watching sugar intake, or aiming for more protein, there’s a date smoothie variation that works for you—without compromising flavor or texture.

Vegan and Dairy-Free Options

Good news: Medjool dates are naturally vegan. That means your smoothies with Medjool dates contain no animal products, no dairy, and no artificial sweeteners—making them the perfect go-to for plant-based smoothie lovers.

Swap Suggestions for Dairy-Free Blends:

  • Replace milk with almond, oat, or cashew milk
  • Use frozen bananas instead of yogurt for creaminess
  • Try coconut cream or soaked cashews for richness
  • Add chia, flax, or hemp seeds for extra fiber and omega-3s

Check out this creamy and unique Brazilian Mounjaro twist—a fun way to experiment with naturally sweet, dairy-free blends.

Pro Tip: For a decadent vegan treat, blend dates with cocoa powder, peanut butter, oat milk, and frozen banana—dessert vibes, no guilt.

High-Protein and Low-Sugar Variations

Boosting Protein Without Protein Powder:

  • Add 2 tablespoons of hemp seeds (10g protein)
  • Use peanut, almond, or sunflower seed butter
  • Blend with silken tofu or plant-based Greek-style yogurt

Want even more protein in your smoothies with Medjool dates? Choose unsweetened protein powders made from pea, rice, or soy. Vanilla flavors pair beautifully with Medjool dates and banana.

Managing Sugar Smartly:
Although Medjool dates are high in natural sugar, they have a low glycemic index thanks to their fiber content. To lower the sugar impact in your smoothies with Medjool dates:

  • Limit to 1–2 dates per smoothie
  • Balance with unsweetened greens (spinach, kale)
  • Use berries like blueberries or raspberries (low-sugar fruits)
  • Add cinnamon or nutmeg to enhance sweetness without sugar

This is a great way to enjoy a sweet-tasting smoothie without the blood sugar spikes.

Smoothies for Weight Gain vs. Weight Loss

Smoothies are versatile. With Medjool dates, you can scale up calories for weight gain—or slim them down for light, nutrient-packed meals.

GoalBuild Your Smoothie With
Weight GainDates + banana + nut butter + oats + full-fat plant milk
Weight Loss1–2 dates + berries + greens + unsweetened almond milk

Discover great ideas like the ABC Fruit Juice—perfect for lighter, fruit-forward blends.


Quick Tip: No matter your goal, keep your ingredient list balanced—dates + fiber + healthy fat + protein ensures you’re not just drinking calories, but real, satisfying nutrition.

Storing and Prepping Smoothies with Medjool dates Ahead of Time

Smoothie freezer prep with Medjool dates
Smoothie prep bags with dates and whole ingredients

One of the best parts about smoothies with Medjool dates is how well they hold up to prepping ahead. Whether you’re a meal prep pro or just trying to simplify busy mornings, planning your smoothies in advance can save time, reduce food waste, and keep you on track with your health goals.

Freezing Smoothie with Medjool Dates

A smoothie freezer pack is a grab-and-go bag filled with pre-measured ingredients. You simply dump it into the blender, add your liquid, and blend.

How to Build a Smoothie Pack:

  1. Use a quart-sized freezer-safe zip bag or reusable silicone pouch.
  2. Add frozen fruits (bananas, mangoes, berries).
  3. Include pitted Medjool dates (no need to soak—they’ll thaw soft).
  4. Add spices, oats, nut butters, or seeds.
  5. Label with a sticky note showing what liquid to add when blending.

Storage Time: Up to 3 months in the freezer.

Pro Tip: Don’t include liquids in freezer bags—these can lead to freezer burn or ice block issues.

Want ideas for anti-inflammatory smoothie blends? Check out the detoxifying Liver Flush Juice Recipe for inspiration.

How Long Smoothies Last and Storage Best Practices

Already blended your smoothie but have leftovers? Here’s how to keep it fresh:

Storage MethodHow Long It LastsTips
Refrigerator1–2 daysUse an airtight glass jar to limit air
FreezerUp to 3 monthsFreeze in mason jars, leave space to expand
Thermos (on-the-go)6–8 hoursKeep chilled with ice or cold pack

Bonus Tip: Add lemon juice to your blend to slow oxidation and preserve color and taste—especially helpful in green or banana-based smoothies.

To enjoy your smoothie later:

  • Shake well if separated
  • Re-blend for texture recovery
  • Top with fresh ingredients like seeds or a date drizzle for flair

Discover great ideas like the Pink Salt Recipe to complement your smoothie routine with trace mineral hydration options.


Quick Hack: Blend a large batch and portion it into single-serve jars. Freeze the extras and move one jar to the fridge each evening for a grab-and-go breakfast the next day.

Frequently Asked Questions (FAQs): Smoothies with Medjool dates

Can dates be used in smoothies?

Absolutely! Dates—especially Medjool dates—are one of the best natural sweeteners for smoothies. They’re soft, blend easily, and add a rich, caramel-like sweetness without refined sugars. In addition to flavor, dates bring fiber, potassium, and antioxidants, making your smoothie more nutritious and satisfying. For best results, remove the pit and soak them in warm water for a few minutes before blending if your blender isn’t high-speed.

What to pair with Medjool dates?

Medjool dates pair beautifully with a wide range of ingredients. Here are some of the best combinations:
Fruits: Bananas, mangoes, apples, and berries
Nut Butters: Almond, peanut, or cashew butter
Liquids: Oat milk, almond milk, or coconut milk
Spices: Cinnamon, vanilla, cardamom, or nutmeg
Extras: Rolled oats, flaxseeds, chia seeds, or cocoa powder
These pairings create smooth, balanced blends that can be tailored to any taste—whether you’re craving something tropical, chocolatey, or protein-packed.

What date is best for smoothies?

Medjool dates are hands-down the best choice for smoothies. They’re larger, softer, and sweeter than most other varieties like Deglet Noor. This means they blend easily and add a naturally creamy texture to your drink. Unlike dried dates, Medjools require little to no soaking (unless your blender is low-power), making them a convenient and healthier alternative to syrups or artificial sweeteners.

What are the benefits of dates and banana smoothies?

Dates and bananas are a powerhouse combo for energy, digestion, and flavor. Here’s what makes them so great together:
Natural Energy: Both contain natural sugars and carbohydrates for sustained energy
Digestive Health: Rich in dietary fiber to support gut regularity
Potassium: Helps regulate blood pressure and support heart health
Creamy Texture: Bananas add thickness, while dates create smooth sweetness
Mood Boosting: Both contain vitamin B6, linked to mood and brain function
This pairing is perfect for pre-workout smoothies, breakfast blends, or anytime you need a quick pick-me-up.

Conclusion: The Sweet Power of Smoothies with Medjool dates

From creamy banana blends to high-protein energizers, smoothies with Medjool dates offer an irresistible mix of flavor and function. These naturally sweet gems elevate your smoothie game—providing energy, fiber, and richness without refined sugar.

Whether you’re looking to fuel your morning, curb afternoon cravings, or simply treat yourself, smoothies with Medjool dates are a nourishing, delicious way to sip with intention. With endless variations to fit every diet and preference, smoothies with Medjool dates offer a versatile base—you’ll never run out of combinations to try in your cozy kitchen.

Discover great ideas like the Pink Salt Recipe to enhance your hydration routine alongside your favorite smoothie blends.

June 15, 2025 0 comments
0 FacebookTwitterPinterestThreadsBlueskyEmail
Himalayan salt mouth rinse recipe in a glass
Drinks

Himalayan Salt Mouth Rinse Recipe – Benefits, DIY Guide & Expert Tips

by Sarah June 15, 2025
written by Sarah

Himalayan salt mouth rinse recipe — it might sound like a wellness trend, but in my cozy kitchen, it’s a cherished natural remedy passed down with love and intention. I’m Sarah, the heart behind CozyBitesRecipes.com, where I share comforting, everyday recipes inspired by family traditions and simple ingredients. My journey with cooking began in my grandmother’s kitchen, where healing didn’t just come from food—it came from the memories we made around the stove. Today, as a mom of two lively little ones, I continue that tradition by blending old wisdom with easy, practical recipes that nurture the body and soul.

Recently, while looking for gentle, natural ways to soothe my family’s occasional sore throats and promote better oral health, I revisited a remedy my grandmother swore by—a warm salt rinse. But not just any salt. I wanted something purer, richer in minerals, and more soothing on sensitive gums. That’s when I crafted my own Himalayan salt mouth rinse recipe, and let me tell you—it’s become a daily go-to in our home.

In this detailed guide, I’ll walk you through everything from the science behind salt rinses to step-by-step instructions for making your own Himalayan salt mouth rinse recipe, add-on ingredients for enhanced results, and FAQs that clear up common concerns. Whether you’re exploring this rinse for gum care, breath freshness, or natural remineralization, the Himalayan salt mouth rinse recipe is a simple, effective solution—and you’re in the right place.

Check out this salt-powered solution that’s as natural as it is nurturing: Pink Salt Recipe on CozyBitesRecipes

Let’s dive into the benefits and brilliance of using Himalayan salt for your oral health, starting with the basics.

Table of Contents
  • What is Himalayan pink salt?
  • Why Himalayan salt is different from regular table salt
  • Proven benefits for oral hygiene
  • Comparison: Himalayan salt rinse vs. commercial mouthwash
  • How salt water affects bacteria and oral pH
  • Salt rinse for wound healing, inflammation, and gum care
  • Simple DIY Himalayan salt mouth rinse recipe
  • How to make a concentrated salt rinse safely at home
  • Simple DIY Himalayan salt mouth rinse recipe
  • How to make a concentrated salt rinse safely at home
  • Add-ons like baking soda, essential oils, and herbs
  • Optional ingredient combinations for extra benefits
  • Risks of overuse or wrong salt concentrations
  • Common mistakes people make when using salt rinses
  • Testimonials and natural oral care routines
  • Other homemade mouthwash options using kitchen ingredients
  • Is Himalayan pink salt good for mouth rinse?
  • How do you make Himalayan salt mouthwash?
  • Should you brush your teeth before or after a salt water rinse?
  • Can Himalayan salt remineralize teeth?

Understanding the Power of Himalayan Salt for Oral Health

What is Himalayan pink salt?

Himalayan pink salt is a mineral-rich salt harvested from the ancient sea beds of the Himalayan mountains, primarily in Pakistan. Unlike regular table salt, which is stripped of most of its nutrients and often bleached, Himalayan salt is unprocessed and naturally pink due to its high content of iron, calcium, magnesium, and potassium. These minerals aren’t just good for your body—they play a crucial role in oral health, too.

When it comes to natural remedies, pink salt is a game-changer. Its mineral content helps balance the mouth’s pH, reduce inflammation, and support gum tissue. That’s one reason so many people are turning to the Himalayan salt mouth rinse recipe for daily oral care. Its purity and therapeutic properties make it a gentle yet powerful addition to your hygiene routine.

Why Himalayan salt is different from regular table salt

You might wonder, “Can’t I just use regular salt?” The answer lies in the source and processing.

ComparisonHimalayan Pink SaltTable Salt
ProcessingUnrefined, sun-driedHeavily processed
AdditivesNoneOften contains anti-caking agents
MineralsOver 80 trace mineralsMostly sodium chloride only
ColorNatural pink huePure white (bleached)

Regular salt is effective for rinses in a pinch, but it lacks the soothing and remineralizing benefits found in a Himalayan salt mouth rinse recipe. For a holistic and nourishing oral rinse, Himalayan salt brings far more to the table—or, more appropriately, the sink.

Not only does the Himalayan salt mouth rinse recipe offer anti-bacterial and anti-inflammatory effects, but it also adds a sense of ritual and calm to your routine. There’s something truly grounding about using a substance so ancient and pure in your self-care.

Discover great ideas like this skin-friendly detox treatment: Easy Homemade Sugar Scrub

When choosing ingredients for any DIY recipe—especially for something as important as oral care—quality matters. And Himalayan pink salt? It doesn’t just cleanse. It heals.

Why Use a Himalayan Salt Mouth Rinse?

Proven benefits for oral hygiene

There’s a reason the Himalayan salt mouth rinse recipe has gained popularity among natural health enthusiasts—it works. Rinsing your mouth with warm salt water isn’t just a folk remedy; science backs it up. And when you use Himalayan pink salt, those benefits multiply thanks to its mineral profile.

Here are some key advantages:

  • Reduces harmful bacteria: Salt draws moisture from bacteria cells through osmosis, effectively killing them or slowing their growth.
  • Helps heal wounds: Got a canker sore, gum irritation, or post-dental procedure tenderness? Salt water promotes faster healing by soothing tissues and reducing swelling.
  • Balances oral pH: A balanced pH helps create a less hospitable environment for plaque and cavity-causing bacteria.
  • Freshens breath: Regular use helps neutralize odor-causing bacteria without the harsh chemicals found in commercial rinses.

Many users who adopt a Himalayan salt rinse report reduced bleeding gums, fewer breakouts around the mouth, and a fresher breath that lasts throughout the day.

Don’t miss our natural liver-cleansing drink packed with detox power: Liver Flush Juice Recipe

Comparison: Himalayan salt rinse vs. commercial mouthwash

FeatureHimalayan Salt RinseCommercial Mouthwash
Main ingredientsPink salt + warm waterAlcohol, chlorhexidine, synthetic flavors
Safety for daily useSafe & naturalLong-term use may cause irritation
RemineralizationContains natural trace mineralsLacks natural minerals
CostInexpensiveCan be costly over time
Environmental impactMinimal wasteOften plastic packaging

Unlike store-bought mouthwashes that may contain dyes, alcohol, and artificial preservatives, a Himalayan salt mouth rinse recipe is as clean as it gets. Plus, you can make it in under two minutes with ingredients already in your pantry.

Looking for inspiration? Try this herbal healing recipe too: Lemon Balm Recipe

Not only does the Himalayan salt mouth rinse recipe support gum health, but it also aligns beautifully with a minimalist, toxin-free lifestyle. Whether you’re embracing clean living or simply want to cut back on unnecessary additives, this natural rinse is a smart, simple solution.

The Science Behind Salt Water Rinses

How salt water affects bacteria and oral pH

Salt has been used for centuries as a natural antimicrobial agent. When you use a Himalayan salt mouth rinse recipe, you’re tapping into this age-old healing wisdom—enhanced by the purity and mineral content of Himalayan salt.

Here’s how it works:

  • Osmosis: Salt water creates a hypertonic environment, meaning it draws moisture out of microbial cells. This dehydrates and kills many forms of harmful bacteria that cause bad breath, cavities, and gum infections.
  • pH balance: A rinse made with Himalayan salt helps balance your mouth’s pH levels. Why does this matter? A more neutral or slightly alkaline oral environment reduces acid erosion, plaque buildup, and enamel damage.
  • Reduces biofilm: Biofilm is a sticky layer of bacteria on your teeth and gums. Salt water disrupts its formation, keeping your mouth cleaner for longer.

In short, this rinse doesn’t just rinse away food—it fights bacteria, rebalances, and resets your oral health.

Salt rinse for wound healing, inflammation, and gum care

Whether you’re recovering from a dental procedure or dealing with inflamed gums, a Himalayan salt mouth rinse can bring powerful relief.

Let’s break down the benefits:

  • Reduces gum swelling: Thanks to its anti-inflammatory properties, a warm pink salt rinse can reduce swelling in gums caused by irritation, gingivitis, or accidental flossing injuries.
  • Soothes oral wounds: Have a cut, sore, or surgical site? A salt rinse gently cleanses the wound without stinging or disrupting healing tissue.
  • Improves circulation: Some studies suggest salt water rinsing may improve blood flow to oral tissues, promoting faster recovery and overall gum strength.
SymptomHow Salt Rinse Helps
Swollen gumsReduces inflammation & bacteria
Mouth soresCleanses and promotes healing
Tooth extractionKeeps wound clean without harsh chemicals
Sensitive areasSoothes with gentle mineral balance

Check out this naturally-inspired remedy that supports wellness inside and out: Natural Zepbound Recipe

Many dentists still recommend a warm salt water rinse post-surgery for one reason: it works. And when you follow a Himalayan salt mouth rinse recipe, you give your mouth an even more mineral-rich advantage with added soothing and healing properties.

Step-by-Step Himalayan Salt Mouth Rinse Recipe

Mixing Himalayan pink salt for mouth rinse
Preparing your daily rinse with Himalayan salt

Simple DIY Himalayan salt mouth rinse recipe

Creating your own Himalayan salt mouth rinse recipe takes less than two minutes, but it delivers long-lasting oral benefits. You don’t need fancy equipment—just a few clean ingredients and a glass.

Here’s a simple, tried-and-true recipe straight from my cozy kitchen.

Ingredients:

IngredientAmountPurpose
Himalayan pink salt (fine grain)½ tspAntibacterial & mineral support
Warm filtered water1 cup (8 oz)Soothing base for rinsing

Instructions:

  1. Warm the water: Heat 1 cup of filtered water until it’s warm—not boiling. Think baby bottle warm—just enough to dissolve the salt without harming sensitive mouth tissue.
  2. Add the salt: Stir in ½ teaspoon of Himalayan pink salt. Mix until fully dissolved.
  3. Rinse: Take a small sip (about 2 tablespoons), swish in your mouth for 30 seconds, and spit. Repeat until the cup is empty.
  4. Don’t swallow the solution—it’s not meant for ingestion.
  5. Optional: Use a clean jar to store the remaining rinse. It will keep for 1-2 days at room temperature, but it’s best fresh.

You’ve just made an effective, natural oral rinse using two simple ingredients. For freshness, you can prepare a new batch each morning or evening.

Don’t miss our recipe that shares a similar natural simplicity and care: Natural Mounjaro Recipe

How to make a concentrated salt rinse safely at home

If you want a more powerful mouth rinse—say, for post-dental care or more intense gum irritation—you can make a concentrated version of this recipe. But remember: more salt doesn’t always mean better results.

Here’s how to increase strength safely:

  • Use ¾ to 1 teaspoon of Himalayan salt per cup of warm water.
  • Stir thoroughly to dissolve completely.
  • Test a small rinse first—if it stings or feels too intense, dilute with more water.

Be cautious with high concentrations. Using too much salt too often may irritate the tissues instead of helping them heal. A mild to medium solution is ideal for most daily uses.

ConcentrationSaltWaterUse
Mild (daily use)½ tsp1 cupGeneral oral care
Medium¾ tsp1 cupOccasional gum soreness
Strong1 tsp1 cupShort-term use only for acute healing

With this Himalayan salt mouth rinse recipe, you’re not just cleaning your mouth—you’re honoring a tradition of natural wellness that’s gentle, affordable, and effective.

Step-by-Step Himalayan Salt Mouth Rinse Recipe

Simple DIY Himalayan salt mouth rinse recipe

Creating your own Himalayan salt mouth rinse recipe takes less than two minutes, but it delivers long-lasting oral benefits. You don’t need fancy equipment—just a few clean ingredients and a glass.

Here’s a simple, tried-and-true recipe straight from my cozy kitchen.

Ingredients:

IngredientAmountPurpose
Himalayan pink salt (fine grain)½ tspAntibacterial & mineral support
Warm filtered water1 cup (8 oz)Soothing base for rinsing

Instructions:

  1. Warm the water: Heat 1 cup of filtered water until it’s warm—not boiling. Think baby bottle warm—just enough to dissolve the salt without harming sensitive mouth tissue.
  2. Add the salt: Stir in ½ teaspoon of Himalayan pink salt. Mix until fully dissolved.
  3. Rinse: Take a small sip (about 2 tablespoons), swish in your mouth for 30 seconds, and spit. Repeat until the cup is empty.
  4. Don’t swallow the solution—it’s not meant for ingestion.
  5. Optional: Use a clean jar to store the remaining rinse. It will keep for 1-2 days at room temperature, but it’s best fresh.

You’ve just made an effective, natural oral rinse using two simple ingredients. For freshness, you can prepare a new batch each morning or evening.

Don’t miss our recipe that shares a similar natural simplicity and care: Natural Mounjaro Recipe

How to make a concentrated salt rinse safely at home

If you want a more powerful mouth rinse—say, for post-dental care or more intense gum irritation—you can make a concentrated version of this recipe. But remember: more salt doesn’t always mean better results.

Here’s how to increase strength safely:

  • Use ¾ to 1 teaspoon of Himalayan salt per cup of warm water.
  • Stir thoroughly to dissolve completely.
  • Test a small rinse first—if it stings or feels too intense, dilute with more water.

Be cautious with high concentrations. Using too much salt too often may irritate the tissues instead of helping them heal. A mild to medium solution is ideal for most daily uses.

ConcentrationSaltWaterUse
Mild (daily use)½ tsp1 cupGeneral oral care
Medium¾ tsp1 cupOccasional gum soreness
Strong1 tsp1 cupShort-term use only for acute healing

With this Himalayan salt mouth rinse recipe, you’re not just cleaning your mouth—you’re honoring a tradition of natural wellness that’s gentle, affordable, and effective.

Additional Ingredients to Boost Your Salt Rinse

Natural ingredients to enhance a salt mouth rinse
Boost your Himalayan rinse with herbal add-ons

Add-ons like baking soda, essential oils, and herbs

While the Himalayan salt mouth rinse recipe works beautifully on its own, you can tailor it to your specific oral needs by adding simple, natural ingredients that boost its power.

Here are some safe and effective add-ons you can mix in:

1. Baking Soda (½ tsp)

  • Why add it? It helps neutralize acids and whiten teeth.
  • Bonus: Baking soda also softens plaque and freshens breath.
  • How to use: Mix it with the salt before dissolving in warm water.

2. Tea Tree or Peppermint Essential Oil (1 drop)

  • Why add it? These oils are naturally antimicrobial and provide a refreshing aftertaste.
  • Caution: Use therapeutic-grade essential oils only, and never more than one drop per cup.
  • How to use: Add oil after the salt has fully dissolved.

3. Aloe Vera Juice (1 tsp)

  • Why add it? Aloe is soothing and supports gum healing.
  • Great for: Sensitive mouths, gingivitis, or after dental work.

4. Clove Powder (a pinch)

  • Why add it? Clove has natural numbing and antibacterial properties.
  • Use sparingly: It has a strong taste but works wonders for sore gums.

5. Chamomile or Mint Tea (as base water)

  • Why add it? Replace warm water with a mild herbal tea for added anti-inflammatory benefits.
  • How to use: Brew tea, let it cool to warm, and add salt as usual.

Optional ingredient combinations for extra benefits

You can easily mix and match depending on your needs. Here are a few tested combos that have worked great for me and readers in the CozyBitesRecipes community:

PurposeRecipe Combo
Everyday Refresh½ tsp pink salt + warm water + 1 drop peppermint oil
Whitening Support½ tsp pink salt + ½ tsp baking soda + warm water
Post-Dental Care½ tsp salt + 1 tsp aloe vera juice + chamomile tea
Sore Gum Relief½ tsp salt + pinch of clove powder + warm mint tea

Keep your add-ons minimal and safe—especially with essential oils. Always test new ingredients in small amounts, and consult your dentist if you have ongoing oral health issues.

Discover great ideas like this homemade DIY care recipe for external detox too: Easy Homemade Sugar Scrub

With these natural boosters, your Himalayan salt mouth rinse recipe becomes even more versatile, letting you customize based on your daily oral care needs or concerns.

Print
clock clock iconcutlery cutlery iconflag flag iconfolder folder iconinstagram instagram iconpinterest pinterest iconfacebook facebook iconprint print iconsquares squares iconheart heart iconheart solid heart solid icon
Himalayan salt mouth rinse recipe in a glass

Himalayan Salt Mouth Rinse Recipe

5 Stars 4 Stars 3 Stars 2 Stars 1 Star

No reviews

Print Recipe
Pin Recipe

Himalayan salt mouth rinse recipe for gum healing, breath freshening, and oral detox.

  • Total Time: 2 minutes
  • Yield: 1 cup 1x

Ingredients

Scale

½ tsp Himalayan pink salt

1 cup warm filtered water

Instructions

Heat water until warm, not boiling.


Add salt and stir until fully dissolved.


Swish in mouth for 30 seconds, then spit.

Notes

Storage: Use fresh daily or store in a sealed jar for up to 48 hours.
Add-ons (optional): baking soda, peppermint oil, aloe juice

  • Author: Sarah
  • Prep Time: 2 minutes

Nutrition

  • Serving Size: 1 cup

Did you make this recipe?

Share a photo and tag us — we can’t wait to see what you’ve made!

Safety Tips and Things to Avoid

DIY natural mouth rinse jars including Himalayan salt
Natural alternatives for oral care beyond pink salt

Risks of overuse or wrong salt concentrations

While the Himalayan salt mouth rinse recipe is incredibly gentle and natural, it’s still important to use it correctly. Like any remedy, balance is key. Overuse or overly strong solutions can cause more harm than good—especially if you have sensitive gums or dental concerns.

Here are a few things to keep in mind:

  • Don’t use more than 1 teaspoon per cup unless advised by a professional. Too much salt can irritate your mouth and throw off your body’s fluid balance if used excessively.
  • Avoid swallowing the rinse, especially if you’ve added essential oils or baking soda. It’s meant for swishing, not sipping.
  • Stick to filtered or boiled water to avoid introducing harmful bacteria, especially if storing your rinse overnight.
  • Use fine grain pink salt, not coarse crystals. Coarse salt may not dissolve well and could cause abrasions on delicate tissue.

If you experience ongoing stinging, sensitivity, or dry mouth, reduce the concentration or consult your dentist before continuing use.

Common mistakes people make when using salt rinses

Making your own Himalayan salt mouth rinse recipe is empowering—but it’s easy to overlook some simple rules. Here are the most frequent mistakes I’ve seen from readers and even in my own early experimenting:

MistakeWhy It’s a ProblemQuick Fix
Using too hot waterCan burn mouth tissueUse warm, not hot, water (like bathwater temp)
Rinsing too quicklyWon’t reach all areasSwish for a full 30 seconds
Not dissolving salt fullySalt crystals can irritate gumsStir until completely clear
Skipping brushing/flossingRinse isn’t a replacementUse as part of a complete routine
Overusing essential oilsMay cause allergic reactions or burningStart with 1 drop only

Check out another gentle and healing recipe designed for sensitive bodies: Banana Peach Smoothie Recipe

By staying mindful of these simple safety practices, your Himalayan salt mouth rinse recipe will remain a beneficial and safe addition to your wellness routine.

Real Experiences & Natural Oral Care Alternatives

Testimonials and natural oral care routines

One of the best parts about sharing the Himalayan salt mouth rinse recipe is hearing how it’s helped others reclaim their oral health naturally. From readers who’ve ditched alcohol-based mouthwashes to those looking for gentle recovery post-dental procedures, the feedback has been inspiring.

Here are a few real-world experiences from the CozyBitesRecipes community:

Emma, 34 (California):

“I had recurring gum inflammation, and my dentist suggested salt rinses. I switched to pink Himalayan salt after reading your recipe and WOW. Within a week, the soreness eased, and my breath felt fresher all day.”

James, 47 (Texas):

“Commercial rinses left my mouth dry and irritated. Your DIY salt rinse—especially the version with aloe—was a total game changer. I now use it every night before bed.”

Lena, 29 (New York):

“I love that it’s budget-friendly and toxin-free. I use it every morning after brushing. Bonus: I feel more in control of my health without needing to buy specialty products.”

These testimonials echo what many natural wellness lovers already believe—less is more, and when you use the right ingredients, your body responds beautifully.

Other homemade mouthwash options using kitchen ingredients

If you enjoy the Himalayan salt mouth rinse recipe, you might also love exploring other homemade mouthwash recipes that use easy, natural pantry staples. They complement your routine and offer variety while avoiding harsh chemicals.

Here are a few safe, simple options:

1. Apple Cider Vinegar Rinse

  • 1 tsp raw ACV + 1 cup water
  • Kills bacteria and helps whiten teeth
  • Use sparingly to avoid enamel erosion

2. Green Tea Mouthwash

  • Brewed, cooled green tea (no sugar) + pinch of salt
  • Rich in antioxidants and reduces gum inflammation

3. Hydrogen Peroxide Rinse

  • ½ cup water + ½ cup 3% hydrogen peroxide (use occasionally)
  • Helps whiten teeth and disinfect

4. Coconut Oil Pulling

  • 1 tbsp organic coconut oil swished for 10–15 minutes
  • Removes bacteria, improves gum health, and freshens breath
Natural RinseBest For
Salt rinse (Himalayan)Daily oral hygiene
ACV rinsePeriodic detox, breath freshening
Green tea rinseInflammation and gum support
Oil pullingDeep cleansing and whitening
Peroxide rinseStain removal and microbial control

These natural solutions can work hand-in-hand with your Himalayan salt mouth rinse recipe, giving you a clean, safe, and empowered oral care routine—without synthetic additives.

Looking for inspiration? Try another natural remedy that supports internal wellness too: Chia Seeds Smoothie

FAQs – Himalayan Salt Mouth Rinse Recipe

Is Himalayan pink salt good for mouth rinse?

Yes, Himalayan pink salt is excellent for a mouth rinse. Unlike processed table salt, Himalayan salt contains over 80 trace minerals that help soothe gums, reduce inflammation, and promote healing. When used in a Himalayan salt mouth rinse recipe, it offers a natural antibacterial effect without the dryness or irritation caused by alcohol-based mouthwashes. Its mineral content also supports remineralization and pH balance in the mouth.

How do you make Himalayan salt mouthwash?

To make your own Himalayan salt mouth rinse recipe, dissolve ½ teaspoon of fine pink salt in 1 cup of warm filtered water. Swish about 1–2 tablespoons in your mouth for 30 seconds, then spit. You can use it once or twice a day as part of your oral care routine. For extra benefits, add ingredients like baking soda or peppermint oil (in very small amounts).

Should you brush your teeth before or after a salt water rinse?

It depends on your preference and goals. If you rinse before brushing, it helps loosen debris and reduce bacteria load before cleaning. If you rinse after brushing, it offers soothing benefits and can help heal gum tissue or neutralize leftover acidity. Many users alternate or rinse both before and after brushing when using the Himalayan salt mouth rinse recipe.

Can Himalayan salt remineralize teeth?

Himalayan salt contributes trace minerals like calcium, magnesium, and potassium that may help support enamel health and remineralization when used regularly. While it’s not a substitute for fluoride or professional treatments, a consistent Himalayan salt mouth rinse recipe can create a healthier environment in the mouth by balancing pH and reducing harmful bacteria—both essential for enamel preservation.

Conclusion: Embrace the Natural Power of a Himalayan Salt Mouth Rinse Recipe

Creating and using a Himalayan salt mouth rinse recipe is one of the simplest and most effective ways to support your oral health naturally. From reducing inflammation to fighting bacteria and promoting healing, pink salt delivers powerful benefits with none of the harsh chemicals found in commercial rinses.

Whether you’re seeking a gentle rinse after dental work, looking to improve your gum health, or just want a daily natural solution, the Himalayan salt mouth rinse recipe is a go-to in homes like mine. This Himalayan salt mouth rinse recipe is affordable, easy to make, and rooted in age-old wisdom—making it a trusted ally in your clean-living routine.

Looking for more holistic health recipes? Don’t miss our soothing wellness blend here: Pink Salt Recipe on CozyBitesRecipes

June 15, 2025 0 comments
0 FacebookTwitterPinterestThreadsBlueskyEmail
Newer Posts
Older Posts
  • Facebook
  • Twitter

@2021 - All Right Reserved. Designed and Developed by PenciDesign


Back To Top
Manage Consent
To provide the best experiences, we use technologies like cookies to store and/or access device information. Consenting to these technologies will allow us to process data such as browsing behavior or unique IDs on this site. Not consenting or withdrawing consent, may adversely affect certain features and functions.
Functional Always active
The technical storage or access is strictly necessary for the legitimate purpose of enabling the use of a specific service explicitly requested by the subscriber or user, or for the sole purpose of carrying out the transmission of a communication over an electronic communications network.
Preferences
The technical storage or access is necessary for the legitimate purpose of storing preferences that are not requested by the subscriber or user.
Statistics
The technical storage or access that is used exclusively for statistical purposes. The technical storage or access that is used exclusively for anonymous statistical purposes. Without a subpoena, voluntary compliance on the part of your Internet Service Provider, or additional records from a third party, information stored or retrieved for this purpose alone cannot usually be used to identify you.
Marketing
The technical storage or access is required to create user profiles to send advertising, or to track the user on a website or across several websites for similar marketing purposes.
Manage options Manage services Manage {vendor_count} vendors Read more about these purposes
View preferences
{title} {title} {title}
koya recipes
  • Home
  • Breakfast
  • Lunch
  • Dinner
  • Dessert
  • Drinks